 The front cover gets all the love!
I’ve seen a lot of information about designing the front cover for a book, but only a little about the back cover. There’s a reason for that, of course. The front cover sells the book. It catches the eye of a prospective reader and encourages him or her to look inside.
Ebooks don’t even have back covers. And, until recently, none of the online bookstores ever showed the back cover of a paper book. If you wanted to see the back cover, you had to walk into a brick and mortar store. (Or wait until your purchased paperback arrived on your doorstep.)
But any book that has a paper edition needs a back cover for it. That back cover must be attractive and harmonize with the front cover. It needs to have sizzle, as well as the “steak” of the back cover copy. And it needs to have certain information, such as the bar code, the publisher, maybe the price.
I thought it might be interesting if I shared some of my experiences with back covers.
The first thing I learned was that when I create the front cover for the ebook and wait until I start building the paperback to design the back cover, it’s much harder! I did the covers for Troll-magic and Sarvet’s Wanderyar in this piecemeal way. I got them to work, but…hoo boy!
All the books that came after, I created the paperback cover first and simply used the right half for the front cover of the ebook.
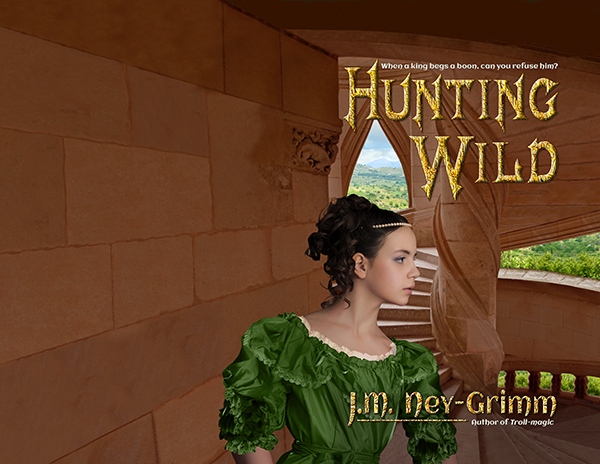
Let me show what the paperback cover of Hunting Wild looked like when I was ready to start finalizing the back cover.
One of the things that you’ll notice in the image above is that it’s a whole lot bigger than it needs to be. There are two reasons for that.
1) It has an extra half inch all the way around the edge. That’s because I’ve learned from experience that it is infinitely easier to chop off unneeded edges than it is to add more later if it turns out you miscalculated and need the art a little taller or a little wider. I give myself plenty of wiggle room.
You need only a one-eighth inch bleed when you upload the cover file to CreateSpace. But I have found that when I paste my TIFF file into my InDesign file – I do covers in InDesign – the margins sometime get funky and weird. There have been several times I’ve been very glad of my extra margin.
2) Because I am creating the paperback cover before I create the paperback interior, I don’t know exactly how many pages the book will be. Which means I cannot calculate the precise width of the spine. So I allow an extra inch on the far left of my image, in order to have enough image to go from the bleed on the far right all the way across the front, then around the spine, then across the back, and finish beyond the leftmost bleed.
For Hunting Wild, I had planned to purchase a photo of a stone wall to use as a continuation of the wall coming off the stair tower on the front. However, when I tried a mock-up using a watermarked comp image, I didn’t like the result.
So I decided to “paint” that wall extension by copying and pasting the stone blocks (and smoothing the joins) from the left edge of the stair tower photo. I was very pleased with how that worked. It looks natural to my eye, and it makes a good, even background for the back cover text.
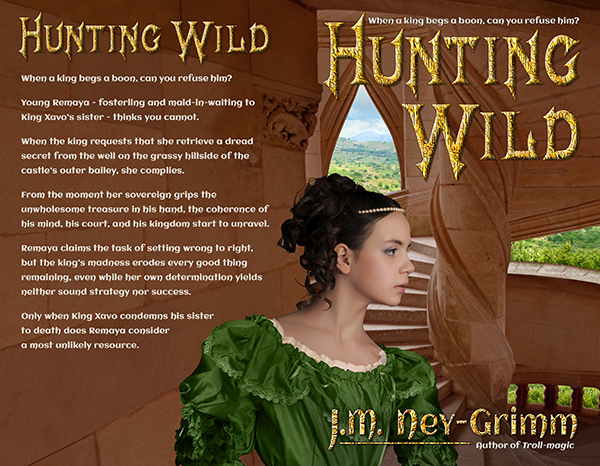
I’ve cropped the cover image above, to the approximate size it will be on the paperback, using an estimate of the spine width. It is easy to move the text and the title on the back cover from side to side. So I will place it more exactly when I know the precise spine width.
My second reader is still reading and generating feedback for Hunting Wild, so I have another round of revisions on the book before I can send it to my proofreader. When I get it back from my proofreader, I will start formatting it for both the ebook edition and the paperback edition.
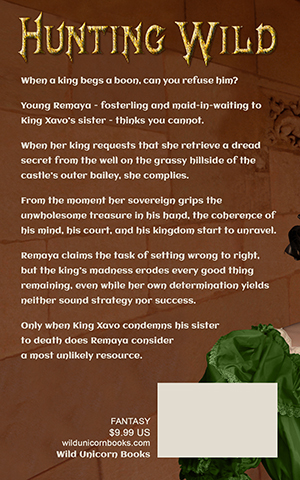
Only when I have the precise spine width will I place the white box needed for the bar code, as well as placing text indicating my publishing imprint (Wild Unicorn Books), the genre (fantasy), and the price (which is determined by the page count).
I’ll also wait to place the title and my byline on the spine.
There are a lot of elements that must go on the back cover, and it’s important to use some of the same design principles that go into designing the front cover: alignment, grouping, and type fonts that match those used on the front.
I’ll be posting more about back covers. Until then, here’s the link to my Cover Design Primer, so you can bone up on those design principles. 😉
And, if you missed it, here’s the post about designing the front cover for Hunting Wild.

Lovely. I don’t know if this makes any sense, but it looks real.
I’m also wondering if it’s worth putting a second image in ebook files, so you can show the back cover. I guess most of the information is already in other places on the Amazon, etc., page, so it isn’t strictly necessary, and images add a lot to a file size, which might cost extra money, but you COULD.
Very nice – and thanks for the tutorials.
Thank you! It looks like a real place to me also; which gives me a kick – that a place invented in my own mind and presented in my story comes to life further in a seeming photograph.
One cool thing about Amazon…the web page for the paperback shows the back cover, and the ebook page is linked to the paperback page. So readers who purchase the ebook, but are curious about the back cover, can see it with just two clicks.