
 With my goal of eating more foods with live cultures and active enzymes came the intention of drinking more kombucha.
But if I was going to drink kombucha, I was going to need to learn how to make it myself, because it was too expensive to keep Casa Ney-Grimm supplied from the grocery store. Especially since my kids like the stuff and will empty the refrigerator of it in no time flat. 😀
The key to making kombucha is the SCOBY.
Symbiotic
Colony
Of
Bacteria and
Yeast
The SCOBY is the living element that turns the other ingredients into kombucha.
 There are three ways to obtain a SCOBY.
1 • If you know anyone who makes kombucha, they are likely to have a spare which they will gift you.
2 • You can buy a dehydrated SCOBY through the mail as part of a kombucha starter kit, and then rehydrate the SCOBY.
3 • Or you can make your own SCOBY.
Until just a few weeks ago, I knew about only the first two ways. None of my friends or acquaintances makes kombucha, so I couldn’t get one that way. And Casa Ney-Grimm is currently in the midst of an employment drought, so I didn’t want to spend the money on a starter kit.
Luckily I stumbled across a website that gave instructions on how to make your own SCOBY! Yay!
The site is CulturesForHealth.com, and it’s got a lot of really excellent how-to stuff on it, if you are interested.
To make your own SCOBY, you do have to buy a bottle of kombucha with live cultures in it. That’s $3 at the grocery store. I could handle that.
So…how do you make your own SCOBY?
I’d going to chronicle my experience right here.
I almost said ‘adventure,’ except that I’ve been known to use that word when I encounter problems, and—so far—my SCOBY-making has been very smooth. Although I did find it exciting, in a good way. But I digress.
The first thing to do is collect all your ingredients, which includes some equipment, so I think I’ll set the process forth like a recipe.
 SCOBY
SCOBY
Ingredients
1 wide-mouth canning jar (1 quart size)
1 sturdy paper napkin (or coffee filter or paper towel)
rubber band
filtered water
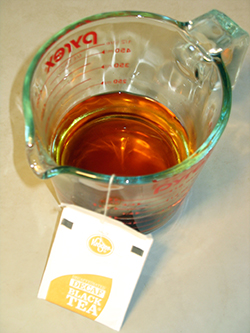
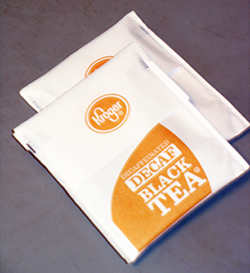
1 tea bag (black tea)
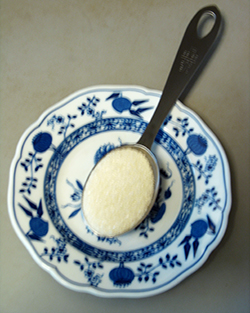
2 tablespoons evaporated cane juice
1 bottle live kombucha (16 oz)
1 spray bottle filled with white vinegar
Directions
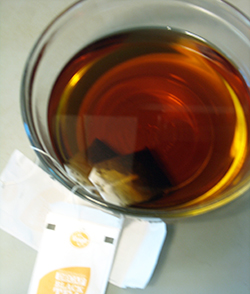
1 • Brew 1 cup of black tea using filtered water. Let the tea bag stay in the hot water for 10 minutes, instead of the usual 4 or 5 minutes.
 If the water has chlorine or chloramine in it, it will kill the SCOBY and hinder the fermentation process. If the water has other contaminates in it, they will harm the SCOBY, hinder the fermentation process, and possibly produce unpleasant sidenotes in the taste. Make sure your water is pure.
2 • Stir the evaporated cane juice into the hot tea until it is dissolved.
3 • Let the tea cool to room temperature.
 If the tea is too hot, it will kill the living organisms in the kombucha, and no SCOBY will grow.
4 • Pour the tea into the canning jar.
5 • Add the kombucha from the purchased bottle.
Wash that bottle (and lid), and save it! You’ll need it later.
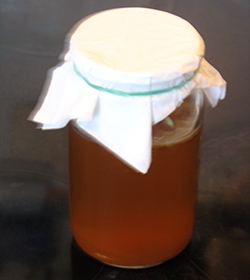
6 • Cover the canning jar with the paper napkin and secure it with the rubber band.
 This will keep dust and debris out, but will allow the mixture to breath.
7 • Spray the paper napkin with the white vinegar. It should be damp, but not soaking.
This will prevent any mold from growing.
8 • Put the jar in a sheltered corner, out of direct sunlight.
9 • Spray the paper napkin once per day.
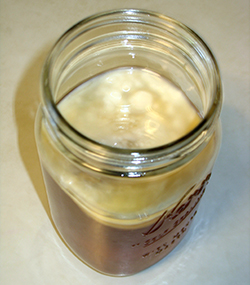
After 2 days, I saw a small fragment on the top of the liquid that I thought might be the beginnings of a new SCOBY. (It was!)
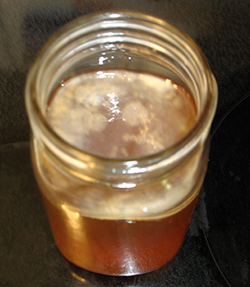 On day 4, that fragment had expanded to cover the entire surface of the liquid! (I found this super exciting.)
By day 7, the new SCOBY had thickened to become a pancake 1/8-inch thick.
10 • Once your new SCOBY is present, taste a spoonful of the kombucha.
Mine tasted too sweet on day 7, so I carried on letting it ferment and spraying the paper napkin every day until day 10, when it seemed about right. By that time, my SCOBY was a healthy 1/4-inch thick!
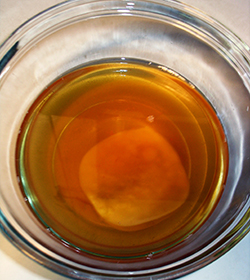 11 • Pour the liquid out into a generous glass bowl, letting the SCOBY flow out with it.
12 • Rinse and dry the canning jar.
Now you have your SCOBY!
Which means you need the recipe for a standard batch of kombucha, because you immediately make a new batch with that SCOBY.
But first, what do you do with the kombucha you made while making your SCOBY?
You bottle all but 1/2 cup of it.
Remember the bottle (and lid) I told you to wash and save? Get it now. Put 1/2 teaspoon of evaporated cane juice in it. Pour your newly made kombucha into the bottle. Leave about a 1/2 inch of head room. Screw the lid on tightly.
Set the bottle in a sheltered corner out of direct sunlight for 2-7 days. It will be getting fizzy.
I’m in the middle of this phase right now with the kombucha I made in the process of making my SCOBY.
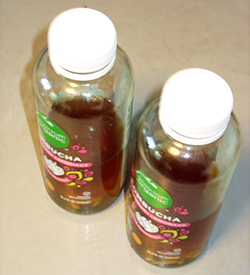 I saved several bottles from storebought kombucha, so I used two of them, because I had 24 oz of kombucha. Reserving 4 oz (1/2 cup) for my next batch left 20 oz to bottle, which would not fit in one 16-oz bottle. I added a teaspoon of minced ginger to each bottle, because I like ginger-flavored kombucha.
The instructions on CulturesForHealth.com say to ‘burp’ the bottle(s) every day, so that the fizz does not build up too much and shatter the bottle. The first day I did this, I heard a tiny pop from the escaping fizz. But there was nothing on day 2 or 3, so I think I will ‘burp’ mine less frequently. I want more fizz!
Edited to add: When I drank my first batch of kombucha, it was delicious, but not as fizzy as I like.
Since the SCOBY ‘eats’ the evaporated cane juice in order to ferment the tea and to produce the fizz, I decided to increase the amount in each bottle of my second batch from 1/2 teaspoon to 1 teaspoon. Also, I did not burp the bottles.
The result was perfect! More fizz, yet my bottles did not explode, despite the lack of burping. I suspect each kombucha brewer must fine-tune such things.
Okay. So you’ve bottled your kombucha and now need to start your next batch. Let’s do it!
Kombucha
Ingredients
3 cups filtered water
2 tea bags (black tea)
1/4 cup evaporated cane juice
1/2 cup live kombucha (from previous batch)
1 SCOBY
Directions
 1 • Brew 3 cups of black tea using filtered water. Let the tea bag stay in the hot water for 10 minutes, instead of the usual 4 or 5 minutes.
2 • Stir the evaporated cane juice into the hot tea until it is dissolved.
3 • Let the tea cool to room temperature.
4 • Pour the tea into a canning jar.
5 • Add the kombucha from the previous batch.
 6 • Add the SCOBY.
7 • Cover the canning jar with a paper napkin and secure it with the rubber band.
8 • Spray the paper napkin with the white vinegar. It should be damp, but not soaking.
9 • Put the jar in a sheltered corner, out of direct sunlight.
10 • Spray the paper napkin once per day.
11 • On day 7, start tasting the kombucha. It will be ready anywhere between day 7 and day 28.
 It will taste sweeter in the earlier days (too sweet for me), and more sour in the later days. I’m still experimenting to see what produces the result I like best. 😀
12 • When the kombucha tastes right, bottle all except 1/2 cup. Use that 1/2 cup to start a new batch!
My understanding is that often (but not always) each batch creates a new SCOBY. No wonder kombucha makers are happy to give one away!
 I gather that after 3 batches, it is possible to increase the size of your batch from 1 quart to 2 quarts. And after you’ve made 3 batches at the 2-quart size, your SCOBY will be strong, able to handle a gallon.
One other note…my first attempt at making a SCOBY succeeded beautifully, but apparently this is not always the case. Living organisms are unpredictable. If 3 weeks go by with nary a sign of any SCOBY, you’ll need to toss that attempt and try again with fresh ingredients.
For more about foods with live cultures, see:
Lacto-fermented Sauerkraut
Lacto-fermented Corn
Pickled Greens
Beet Kvass
