Facial “Soap” Eureka!

Two years ago I wrote about soap and shampoo and lip balm. I’d recently discovered that modern toiletries weren’t as safe as I’d always believed. I was dismayed and wanted to share my new-to-me knowledge with others.

Especially because I’d hunted up alternatives that were both safe and effective.

You can read that blog post here.

safe bath products

Now I’ve got an update!

I’m still using the same wonderful Terressentials hairwash, Bubble&Bee lip balm and “bodyButta” lotion, pure castile soap from the Blue Ridge Soap Shed, alata soap from SheAyurvedics, and Bubble&Bee deodorant. These products have worked for me over the long haul.

But, at last I’ve found a solution to my face soap dilemma!

Cetaphil and Equate Gentle Cleanser
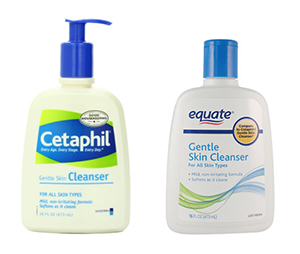
Before my toiletries revelation, I’d been using a generic version of Cetaphil® Gentle Cleanser. It worked well. The Gentle Cleanser kept my face clean without drying my skin. Perfect! Until I checked the EWG Skin Deep® Cosmetics Database.

Amongst Cetaphil’s ingredients:

Propylparaben – developmental/reproductive toxicity, endocrine disruption, allergies/immunotoxicity – EWG score of 10, the worst

Butylparaben – biochemical or cellular level changes, developmental/reproductive toxicity, endocrine disruption, allergies/immunotoxicity – EWG score of 7, not good on a scale of 1 – 10

Methylparaben – biochemical or cellular level changes, endocrine disruption, allergies/immunotoxicity – EWG score of 4, still not great (I like products with ingredients that score 0 or 1)

Propylene Glycol – enhanced skin absorption, allergies/immunotoxicity, irritation (skin, eyes, or lungs), organ system toxicity (non-reproductive) – EWG score of 3, better but not the range I prefer

I gave up my Gentle Cleanser, but my face suffered.

The pure castile soap was gentle, but not gentle enough for my face. The alata soap was gentler yet, but not gentle enough.

Rosa Mosqueta
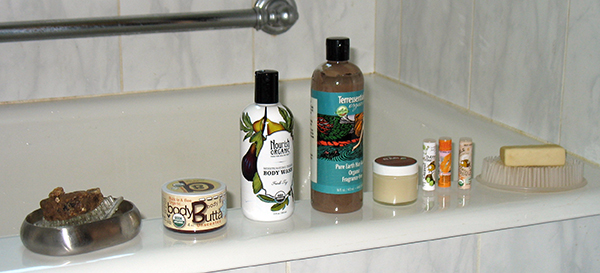
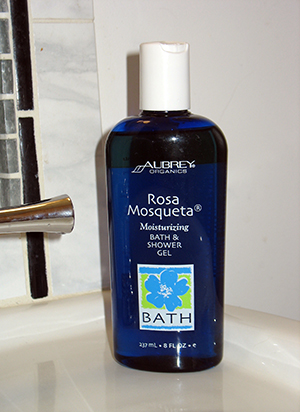
I tried using Aubrey® Organics Rosa Mosqueta® Bath & Shower Gel, but my cheeks developed a bit of red chapping in response. Plus I had concerns about the grapefruit seed preservative in it. Grapefruit seed extract may be contaminated by triclosan and methyl paraben or benzethonium chloride, unless it is processed properly.

I tried plain vegetable glycerin, the main ingredient in the Aubrey® Organics product, but it worsened the chapping on my skin.

I gave up for a while.


Nourish Organic Hand Wash
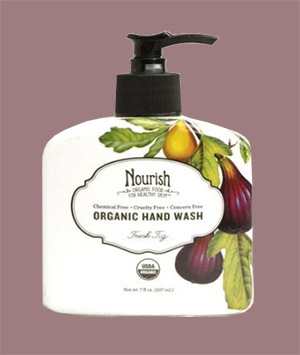
And then I found myself away from home during a family medical emergency. The hand soap in the house where I stayed ran out. I dashed to the local health food store and picked up a bottle of Nourish Organic Hand Wash. The ingredients looked good, but I didn’t think more about it until after my family member in the hospital was out of danger.

My hands felt great and – since I’d been using it on my face – my face felt great too! This was what I’d been wanting for the last 2 years: a gentle cleanser for delicate skin that wasn’t soap-based, that didn’t dry my skin, that didn’t irritate my skin, and that was made of safe ingredients.

Eureka!

I returned home exhausted and sick (in a minor, non-dangerous way) myself. Needless to say, I didn’t go shopping right away. When I did, I couldn’t find the Hand Wash, but the Body Wash seems to be the same stuff in a different dispenser. I’m happy!

Nourish Body Wash
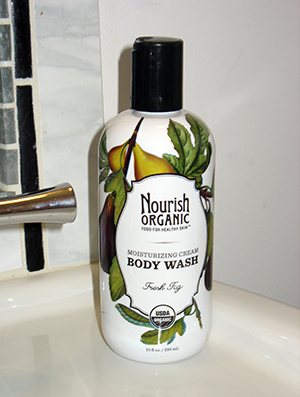
At this point, I’ve only been using Nourish for a few weeks. I’ll report back in a few months to share how it holds up over the long haul. I’m hopeful! 😀

For more about safe and effective toiletries, see:
Hair Wash with Rhassoul Clay
Why Add a Lemon Rinse
Great Soap & Etcetera Quest


For more on green clean, read:
Green Housekeeping


Share

Wrapping with Cloth

Last year I shared my adventures wrapping gifts with bandannas. Bandannas remain part of my repertoire, as do purchased cloth bags and larger swatches of cloth that I give neat edges with pinking shears.

But all of those options stem from the Japanese furoshiki or “bath spread.”

They first came into use in the Nara Era to bundle one’s clothes while bathing in the public baths. The technique was borrowed by merchants as a convenient way to transport their wares. And then the furoshiki became a decorative covering for a gift.

Modern-day Japan is reviving the furoshiki.

This video shows two ways to tie a furoshiki. The first is new to me! I’m tempted to re-wrap some of my already wrapped presents, because it looks so cool. 😀
 
http://youtu.be/6fhPumcPla0


Here’s a few more furoshiki techniques.


And one more video:


Have fun with it!

For more green living tips:
Great Soap & Etcetera Quest
Green Housekeeping
Bandanna Gift Wrap


Share

Bandanna Gift Wrap

four packages wrapped in bandannasBandanna gift wrapping came to my household through sheer desperation. It was the middle of November several years ago, and I’d just ripped the cartilage in my hip joint. I could not stand without pain. Walking was even more difficult. How was I to do all the holiday prep needed to make our winter celebration a celebration?

The gifts were largely already acquired. I’d started early. And my husband, with his background of restaurant cooking, took over both daily meal prep and holiday meal planning. But I’d always been the gift wrapper, and the regular wrapping deal was not going to work this time.

I decided to throw money at the problem: reuseit.com stocked some really festive cloth bags with ribbon closures. I’d seen them and coveted them, but refrained due to their pricey nature. Now, I would refrain no longer. (Although, since these would envelop family presents, they could be used again and again. So the short-term expense would likely be a long-term savings.)

I purchased a bundle of them, winced at my total at checkout, and clicked the finalizing button.

And my solution working excellently. I merely popped each gift into its bag, tied the ribbon, and safety pinned a tag on it. Done!

The ease and simplicity spoiled me for gift wrapping from then on. I didn’t want to go back to paper. The cloth bags were prettier, easier, and didn’t contribute to our overfull landfills. But . . . eight dollars or more per bag? Ouch!

I perused the reuseit site again. Was there anything less expensive? No. There were only more expensive options! But one of them gave me an idea. It was a beautiful wrapping cloth derived from Japanese heritage. The how-to video showed the simple method by which one secured the cloth around a gift. And I thought: why not use a bandanna? I can get those for a dollar each!

I never looked back. Birthdays, anniversaries, housewarmings, hospitality – all these occasions feature bandanna-wrapped gifts from me. Since we have winter holidays approaching as I write this, I want to show you how I do it. Maybe you’d like to try it yourself!

First, gather your supplies: bandannas, gift tags (I use small white paper circles that I cut myself), and safety pins.

bandannas, tags, safety pins

Next, place the gift on your chosen bandanna and wrap the the cloth around it.

photos of wrapping bandanna around gift

Then gather the two pointy ends in your hands, bring them together, and tie a knot. Arrange the folds of cloth to look good. They will stay put, especially if you make the knot snug.

Now pin your tag onto the bandanna. I usually put it to one side of the knot, to make it easy for the opener to untie the knot.

hands poised to pin tag on gift

And there you have it! No cutting – and cutting too small or too big. No taping and then taping it again when the paper starts to unfurl. Just fold the cloth around your gift and tie.

photo of gift wrapped in bandanna

Bonus tip: last year we had some really bulky gifts. I bought fabric at a sewing store, used pinking sheers to prevent the edges from unraveling, and ribbons to secure the ends (like a giant toffee). No need to abandon my cloth habit, just because bandannas weren’t big enough!

Update: Videos showing wrapping with cloth here!

For more on green living, see:
Waste-Free Lunch
Green Housekeeping
Great Soap & Etcetera Quest


Share

Going Up Like Smoke?

photo looking out the front doorThink of your house as a chimney.

Cold air seeps inside under the front door and the back. Cold air creeps through any breaks in the insulation on the outer walls. Cold air gathers atop the foundation wall where the floor joists rest.

Once within, the cold air warms and rises. Rises to the ceilings, rises up the stairwell, and then soars out the attic fan or the gable vents. Whoosh! There’s a draft, a current, to pull more chilly air in at the bottom. Which warms and rises and leaves.

That’s how a house without air sealing works! It’s not the way to stay warm in winter. Sealing the leaks in a building’s envelope is more critical than beefing up its insulation. A house with no leaks and little insulation will stay warmer than one with lots of leaks and lots of insulation.

(Yes, it’s late fall as I write this, and today was cold, so I’m focused on heat. But air sealed houses retain their cool air in summer better, too.)

My house was built in 1949 and featured lots of leaks when we bought it. Heating it in cold weather cost a fortune! My husband and I added insulation to the crawl spaces under the roof, and that helped the rooms immediately under the roof feel cooler in summer and warmer in winter. But our utility bills remained high.

We signed up for a mini energy audit offered by our electricity provider and learned both why and what to do. More than anything our home needed air sealing. And there were some simple ways to improve its leaky state.


photo of air sealed fanThe first step was closing off any upper escape hatches for warm air. Without that suction, less cold air would be drawn into the house. For us, this was the whole house fan at the top of the steps. All the insulating in the eaves had also air sealed them. We just hadn’t finished the upper level job when we left the fan as we found it. And that one opening was ample as a chimney top! Whoosh!

There are expensive covers you can buy to seal off whole house fans, but we opted for the cheap solution: insulation panels of rigid foam secured by painter’s tape. Not elegant, perhaps, but neat and functional.


photos of air sealed leaksThe next steps involved locating all the undesired air intakes. All our exterior doors featured gaping cracks between door and threshold. The water and gas supply pipes displayed daylight shining through their holes in the basement cinderblocks. The dryer vent, likewise. And all the electrical outlets on the outer wall acted as conduits of cold air from outside to inside.


We used sprayable foam to seal the pipes.


We used calk to seal the dryer vent.


The front, back, and basement doors received bottom sweeps. Plus the front door, cut extra high off the floor by the previous owners to clear what must have been a very plush carpet, is reinforced by a sort of “pillow” designed to block draughts.


photos of air sealing an electrical outletWe sealed the electrical outlet boxes like this:


1 • Flip the circuit breaker for the outlet to off (or remove its fuse, if you have a fuse box). If your screwdriver should slip, you don’t want it slipping into a live socket!


2 • Remove the old cover.


3 • Place a special insulation pad over the gaps around the outlet. These may be purchased in a hardware store. Don’t jury rig your own with styrofoam trays or something else which might be flammable. Live electricity is close to the pad – don’t risk a fire!


4 • Replace the standard cover with a child safety cover. The sliding protectors not only keep little fingers out, they stop airflow!


Our energy auditor also recommended we seal the gap that most older houses have above the foundation wall. The floor joists rest there, and only one thin 2×8 separates outside from inside. Sealing the joist area is more involved than all the other projects I’ve described, so it’s still on our to-do list. I sealed one of those cold-air pockets this afternoon, and took photos, so you can see how the project goes. It is something a home owner can do him- or herself.


photos of the process1 • Gather your tools: utility blade, old bread knife, goggles, gloves.

2 • Gather your materials: rigid insulation, paper for a pattern, spray foam.

3 • Use the paper to make a pattern. I merely folded and taped mine, fairly roughly. Then I traced it onto the rigid insulation.

4 • Cut 2 rectangles of rigid insulation and check the fit. Mine were initially too large, so I had to trim them. Twice! You definitely don’t want to be trimming after you’ve started spraying foam. The utility blade worked fine for my first cut. Zoop! Snap! Done! It kept catching after that and giving a very jagged edge. The old bread knife worked really well. (Really! Weird, huh?)

5 • Put on the goggles and your gloves. I wondered if I really needed all the protective gear. I did! All the photos I’d seen of the procedure in a DIY book made it look neat and tidy. And the spray can featured a lovely trigger. How messy could it be? For a non-pro: very messy! The foam emerged from the nozzle in unpredictable spurts. It dripped and occasionally went wild. The nozzle fell off once between spraying sessions, and I had to attach the oozy straw to the dispenser. I ended with spray foam all over my gloves, some on the wrist cuff of my new sweatshirt, and one far-flung gob on the drawer of the tool chest! Wear the gloves and the goggles. The foam is not benign on the skin or in an eye!

6 • Spray the corners of the “box” at the end of the joists with foam.

7 • Place the first rigid insulation rectangle; the foam will harden in a few minutes and hold it in place.

8 • Spray the edges of the rigid insulation where they meet wood.

9 • Place the second rectangle of rigid insulation and spray its edges.

10 • Keep going with the next joist over! The spray foam is best used all in one session of DIY. It clogs the dispenser, if it sits unused for more than 2 hours after the first spray. And once it clogs, it’s done.

This afternoon’s sealing session went pretty smoothly, despite the mess. My photos show that my work is definitely not neat. But it’s not a Jackson Pollock painting either! I’m thinking we should move the complete project higher among our priorities. It might take a weekend, but it won’t be hard.

In the meantime, how is our house performing? Are our energy bills still going up like smoke? Well . . . no. Or, at least, not right now. The cost per BTU may keep shooting for the moon, but the January bill after our air sealing was $100 less than the previous (un-air-sealed) January. And it wasn’t because the weather was warmer. That particular month delivered extra snowfall and extra chill. So even the simplest air sealing projects paid big dividends.

Have you tackled any energy-efficiency projects on your home? Were they challenging? Easy? Did your bills go down? I’d love to hear about your experiences.

For more on green living, see:
Green Housekeeping
Grass Green
Permaculture Gardening


Share

Waste-Free Lunch

photo of Lunchskin sandwich bagThe summer before my twins started school, I prepped for their bag lunches.

We’d been on a non-plastic food storage kick for several years, and I didn’t want to go back to caressing comestibles with bisphenol A or anything similar!

It took some creativity. The marketplace provided fabric bags for sandwiches and pretzels. Ditto steel canteens for water and thermoses for soup. But what would I put juicy quartered pears, moist sliced cucumbers, or drippy applesauce in?

photo of glass storage containers with lidsI rootled around online and discovered several possibilities. One eco-store carried small glass containers – both rectangular and round – with plastic lids. But my best solution turned out to be 4-ounce canning jars! They were small. I needed small, because 5-year-olds eat small servings. They were tough and unlikely to break (good, thick glass). And they were inexpensive! Also important, since we were on a tight budget.

I felt pretty pleased with myself: insulated lunch sacks, sandwich bags, Klean Kanteens, tiny canning jars, small cloth napkins, small stainless steel utensils, and cold packs. I was ready!

You know there’s more to my story than that, right?

Yep.

Turns out that many schools don’t allow glass containers in their cafeterias. Ours was one of them.

I didn’t learn this until 4 weeks into the school year, when my son dropped his canning jar full of mini carrots on the cafeteria floor. It didn’t break. (I’d thought it would not.) But his teacher contacted me and requested I make other lunch provisions.

Yikes! Now I had to scramble.

Luckily To-Go Ware came through with its “sidekick” containers intended to hold dressing for salads. My kids weren’t salad eaters, but the sidekicks would work just fine for other wet foods. I purchased half a dozen, and then we were all set.

In case you’re currently assembling your own plastic-free, waste-free lunch kit, I’ll share the details of ours.

photos of lunch sack, opened, unpackedI love the BUILT lunch sacks, because they provide some insulation, but they’re also stretchy. On days when a child asserts he or she is especially hungry and wants a big lunch, that stretch is key.

I like Klean Kanteens for beverages. The opening is big enough to easily slip ice cubes inside. (My daughter prefers her water super cooled.) There’s no inner lining. (Linings crack over time, so I want stainless steel straight up.) And the canteens come in a size small enough to fit inside a lunch sack.

I tried a cloth wrap for sandwiches, but discovered that it featured a plastic lining. I sewed my own version without plastic, but then the sandwich dried out by lunchtime. Not very tasty. Finally I settled on the nylon bags from reuseit.

The small sidekick from To-Go Ware is perfect for veggies, but my kids like a larger helping of fruit. I don’t remember what my solution was that first year of school. By the next year, a larger sidekick was released, and I purchased a half dozen of them.

I use small “cocktail”-sized cloth napkins: small, small, small is always important on the go. Camping utensils (also small) provide a fork for mac & cheese or spoons for yogurt. And then there’s the cold pack, probably unnecessary for PBJ, but reassuring if the sandwich features sliced ham. August in Virginia is hot!

I’ve included links in all of the above, so you can easily track down anything that fits your needs.

Do you pack lunches for work or school or hiking in the mountains? I’d love to learn about your solutions in the comments here.

For more on green living, see:
Bandanna Gift Wrap
Grass Green
Great Soap & Etcetera Quest


Share

Running Mushrooms

image depicting old growth forestFirst, a confession: I didn’t read every page of Mycelium Running. I didn’t even read most of them! So why am I telling you about this book? The half of it I did read was amazing. But let me explain.

Mycelium Running is a manual geared toward practicalities, toward getting out there and getting your hands dirty. If you need to know how to heal an ailing forest under your care, how to purify bacteria-laden water running off your land, or how to restore your compacted and abused back yard, then Paul Stamets’ book will tell you exactly what you need to know.

But I’m not quite ready for action. I do hope to tackle my clay-imbued and weed-strewn garden over the next few years, but I’ve got other projects ahead of that one on my to-do list. Mostly I’m gathering facts, seeking to understand the big picture. And Mycelium Running is good for that too – especially the earlier chapters. Thus I dare bring it to your attention.

The basic facts of mycelium are fascinating. And the scope of its influence and potential are far beyond anything I might have imagined. Frankly, before I read Mycelium Running, I hadn’t thought much about mushrooms. I loved eating them sautéed in butter. I enjoyed spotting them during August nature walks. And I took pleasure in whimsical paintings featuring fey dancers amidst mushroom circles. Essentially, I was ignorant!

Which meant I loved the experience of having my eyes opened. (Yes, nothing like tickling my curiosity!)

But what is mycelium anyway? The dictionary names it the vegetative part of a fungus. It consists of a mass of branching, thread-like filaments called hyphae. Healthy soils harbor colonies of mycelia, but tree bark or fallen leaves or your compost heap (if, cool) also feed mycelial or fungal mats.

Fungi eat by secreting acids and enzymes into their surroundings and then absorbing the created nutrients through the cells of their mycelia.

The mushrooms we notice springing from a forest floor or among the grass blades of a lawn are almost a side show of the drama hidden below ground. That’s where the real action transpires. Spores released from a mushroom (the fruiting body of the fungus) germinate like plant seeds when they encounter the right moisture, temperature, and nutrients. From microscopic grains, they grow and branch, and grow and branch, creating a mycelial mat. Mycelial mats vary in size. The one supporting the health of a birch tree in your front yard might be just a few feet across. But one mycelium in eastern Oregon – Armillaria or honey mushroom – once covered 2,400 acres!

But more than just odd trivia make mycelia cool. In fact, I can’t confine myself to just three cool things. Here are six!

Mycelia Partner Plants

Most plants – from grasses to Douglas firs – have mycorrhizal mycelia as partners. These mycelia form sheaths around the plant roots and bring nutrients and moisture to the host plant, spreading a net far wider than the roots alone could do. And actively creating nutrients with the action of its enzymes and acids.

Plants with mycorrhizal partners thrive, growing faster and stronger than those without, and resisting diseases better. Their root masses are larger and denser. Their stems or trunks are thicker and taller. Their branches are leafier. The difference is dramatic. And some plants won’t grow at all without their attendant mycelia.

Mycellium is Nature’s Internet

The physical structure of mycelia shares the branching architecture of neural pathways in the mammalian brain. It also mirrors diagrams of the internet’s information-sharing systems. Mycelia might very well be the feedback loop by which planet Earth regulates its ecosystems. They certainly respond in complex ways to complex environments.

In one experiment, researchers mapped the flow of nutrients via mycellium between a Douglas fir, a paper birch, and a western red cedar. The researchers covered the fir, simulating deep shade. The mycellium responded by channeling sugars from the root zone of the birch to the root zone of the fir (which was unable to photosynthesize the sugars it needed).

Outside the lab, mycelia build soil, remove contaminants such as spilled diesel fuel, and filter bacteria out of polluted water.

Could mycelia possess a form of intelligence never envisioned by humans? Impossible to say at this point in history, but the biochemical connections formed by mycelia surpass those of supercomputers. And the organisms display nuanced responses to the world around them. Perhaps our next generation of computers will use fungi instead of copper micro-wire for hardware.

Even Parasites Bring Benefit

The most famous parasitic mushroom, Armillaria or the honey mushroom, is stigmatized as a blight. It can destroy thousands of acres of forest and is banned in many areas. But look again, and look longer. Parasitic fungi may serve to select the strongest plants for survival and to repair damaged habitats. Each time Armillaria swept through that 2,400-acre spot in Oregon, it created nurse logs for more directly benign fungi, it increased soil depth, and it covered barren rock with rich humus. The stage was set for a vibrant revival of habitats and ecosystems.

Mushrooms Lead Eco-restoration

Consider forest fires. The first species to appear amidst the ash and cinders are mushrooms – typically morels and cup fungi. They’re fast-growing and quick to decompose. As they mature and release spores, they also emit fragrances that attract insects and mammals. The insects attract birds, and all these newcomers bring seeds with them. Soon the wasteland burgeons with life – all starting with fungi.

Timber Is Not a Renewable Resource

The old growth forests of the Pacific Northwest accessible to loggers are largely gone. The first two replantings of logged areas are gone as well. Logging companies are now harvesting the third. But no one is making plans for a fourth replanting. Why? With each clear cut, the mycelia of the forest is damaged and the soil grows both thinner and poorer. You can’t get good wood from trees growing in exhausted soils, so many logging companies are selling their land.

Mushrooms Are Renewable

Now consider another patch of forest, this one in south central Oregon. Imagine harvesting timber from it. You’d get a substantial financial return, but eventually you’d reach the end of what you could profitably extract. When you were done, the land would be effectively barren.

But what if you harvested matsutake mushrooms – tasty and desirable – instead? The economic benefit would equal that of the timber (actual calculations have been done), but each year you’d also get thicker soils, reduced erosion, increased stream health, greater biodiversity, improving air quality, and increased regional cooling. And it can go on forever.

I’ll take it!


And do I recommend this book?

I do.

Just don’t try to read it from cover to cover. Begin with part one, where the big picture info is dense. As technicalities creep in, start skipping a bit. Part two held my interest. Part three is where I touched down lightly. (I’m not ready for mushrooms species specifics yet!)

I’m normally a cover-to-cover reader, but this book was worth adjusting my reading style for. It changed my world view. Again! Give it a try. It might change yours!

Mycelium Running at Amazon

Mycelium Running at B&N

For more green living concepts, see:
Permaculture Gardening
Green Housekeeping
Grass Green

For more cool science trivia, see:
Water


Share

Green Housekeeping

There′s a lot of ″green″ advice in books, in magazines, and online. Too much of it describes what we should do, or what might be good to do, or what somebody plans to do. We all know what happens when theory gets practical: the bugs jump out.

house-shaped windows of green texturesGreen Housekeeping by Ellen Sandbeck is a different animal altogether. Too quirky to be anything but real, the book describes her actual experience and why her practice is effective.

I′ll follow my ″three cool things″ format of recommendation, starting with the method that won my own housekeeping-averse heart.

Cleaning Simplicity

There are two magic ingredients: vinegar and hydrogen peroxide. Both are safe, natural substances produced by living organisms. (Our own bodies actually create hydrogen peroxide – H2O2 – as a byproduct of our metabolism.)

When hydrogen peroxide encounters organic material (think germs) it releases its extra oxygen atom, becoming mere water (H2O) in the process. That′s what all that foaming and bubbling is when you spray: the extra oxygen is popping off and killing bacteria.

Vinegar kills a lot of bacteria on its own, but hydrogen peroxide kills 100 times as many. When you give a squirt of both, you get another tenfold increase.

Let′s look at some numbers. Say a splash of vinegar from your spray bottle kills 1000 bacteria. A misting of hydrogen peroxide alone would zap 100,000 bacteria. While a spray of both gets 1 million. But all that′s left after spraying is harmless water. No chemical residue. I like it!

photo of safe cleaning solutionsAll you need is a spray bottle of vinegar and an original bottle of hydrogen peroxide with a sprayer cap screwed onto it. Put one pair in your kitchen and another in each bathroom. You′re set to keep those critical places safely clean.

Why the original bottle? Hydrogen peroxide loses its extra oxygen very easily. Just decanting it into another container can make that happen, as can light shining through a translucent spray bottle. You want water as an end product after cleaning, not as a starter!

Once I placed my paired solutions on location, I found myself using them frequently. Not running to fetch them was just as magical as the solutions themselves. (Needing to fetch often leads to not fetching at all, for me.) Just: squirt! squirt! done! (Or add a quick swipe with the microfiber rag kept by the bottles, if adhering toothpaste or avocado needs a scrub.) Cleaner sinks!

Laundry Boost

photo of laundry product named BerryPlusI use Berry+ and soap ″nuts″ to launder clothes and household linens. Soap ″nuts″ (or soapberries) are fruits of the tree sapindus mukorossi. The fruits can be used dried or to create a liquid extract (Berry+).

Why don′t I choose one or the other?

Convenience.

We do a lot of cold water laundry loads. I love being able to pop open a capsule of Berry+, pour it into the washer, close the lid, start the cycle, and go.

photo of soap nuts loose in a dish plus a laundry bag full of themSoap nuts must either be soaked for 5 minutes in warm water (then dumped along with the soak water into the washer) or tossed into a washer destined for a warm or hot water wash. Since my husband and I are both allergic to dust mites, our sheets, pillowcases, blankets, and towels must be laundered in water over 130°F. (The high temp gets rid of the allergens.) Soap nuts are perfect for that job.

The advantage of both soap nuts and Berry+ is that the outflow spilling from my washer to the water treatment plant is non-toxic. Soapberries have been used by the peoples of Asia and by Native Americans for thousands of years. That′s time tested!

I fell in love with soapberries when I found that my berry-laundered clothes developed almost zero static cling in the dryer and emerged from it smelling faintly of freshly ironed cotton. Yum!

(Alas, yes, I do use a dryer. Although our drying rack is usually equally full once I′ve emptied the washer.)

But what to do when the grass stains or the clay stains or whatever need extra cleaning? Sometimes spot treatment with Berry+ will do the trick. Sometimes it won′t.

Ellen Sandbeck′s chapter on laundry educated me about an old-fashioned product that′s never truly left the cleaning lexicon and is now enjoying a resurgence of use: 20 Mule Team Borax, around since 1891.

photo of box of 20 Mule Team BoraxBorax is a naturally occurring mineral salt composed of boron, sodium, oxygen, and water. It functions as a water softener, fabric softener, deodorant, and mild bleach. I add 2 – 4 tablespoons of it to a load when I face especially challenging laundry. (Or apply a paste of it to the stubborn spot.)

Is it perfect?

No.

But it′s helpful to have a stronger benign option in my tool kit.

The Well-Tempered Clavier

Sandbeck compares a happy home to J.S. Bach′s harpsichord after it has been tuned by the method he invented. No one key is perfectly in tune, but all are sufficiently so to sound good. Compromises must be made. (The method before Bach′s invention resulted in one key perfectly in tune and the rest decidedly out of tune.)

Sandbeck says: ″Most people are happiest and at ease in homes that are moderately clean and neat. Both extremes . . . tend to make people unhappy and uncomfortable.″ Also: ″The well-tempered house should be just neat and clean enough to make both the neatest person and the sloppiest person in the household just a tiny bit dissatisfied.″

Sounds fair to me!

* * *

Those are my three favorite snippets from Green Housekeeping, but the book′s packed with tips. Your favorites will likely be different than mine, since homes vary as much as their inhabitants. I invite you to find yours!

Green Housekeeping at Amazon

Green Housekeeping at B&N

Berry+ at reuseit.com

Soap Nuts at NaturOli

For more on green living, see:
Grass Green
Great Soap & Etcetera Quest
Wrapping with Cloth


Share

Grass Green

cover of the book Pasture PerfectJo Robinson’s Pasture Perfect is an accessible, entertaining introduction to the concepts underpinning “grassfarming.” She starts with an amusing anecdote from her first talk given in front of 500 ranchers. At the close of her presentation, before the questions, she announced that she’d put together a little book titled Why Grassfed Is Best! (the precursor to Pasture Perfect). The auditorium emptied rapidly. She carried on, answering questions gamely, and wondering. Did her audience want to be first in line at the buffet dinner? Nope.

There’d been a stampede on the table where her little book was stacked for sale. Literally. Impatient with a line of 50-plus, ranchers began grabbing books, tossing their money down, making their own change. They were that eager for her information. And she’d not brought enough books!

Ms. Robinson takes us on a tour of a pasture-based farm. The air smells of grass and green. A ring of habitat for wildlife encircles the fields. The grass is lush and mixed with clover, alfalfa, and wild plants. The cattle are peaceful, moving slowly within their generous enclosure. Chickens share the paddock. It’s a pleasant spot, nourishing to the animals, welcoming to humans.

Then the author gets down to the nitty gritty: the health benefits of grass-fed meats.

Less fat. Animals eating grain get fat. Grass-fed meat has the same amount of fat as wild game or chicken breast without skin.

Fewer calories. If you eat a 6-ounce beef loin from a grass-fed cow, you’ll consume 92 fewer calories than if you eat one from a feedlot cow. That adds up over time.

More omega-3’s. People low on omega-3’s are more vulnerable to cancer, depression, obesity, diabetes, arthritis, asthma, and dementia. Grass-fed meats have 2 to 10 times more omega-3’s than feedlot meats.

Omega-3’s and omega-6’s in balance. Both these fatty acids are essential, but we need the right blend. Omega-6’s encourage blood to clot. Omega-3’s cause it to flow easily and smoothly. What’s the right ratio of 6’s to 3’s? There’s some debate about it. Probably no more than 4:1, possibly as low as 1:1. Grass-fed beef has ratios between 1:1 and 3:1. Feedlot beef ranges from 5:1 to 14:1. ‘Nuff said!

Conjugated linoleic acid (CLA). The research is preliminary, but CLA may help us resist cancer and heart disease. Grass-fed ruminants have 2 to 5 times as much CLA in their meat as feedlot ruminants.

Vitamin E. It’s an important anti-oxidant, protecting us from free radicals, boosting immunity, preventing heart disease. Grass-fed beef has 3 to 6 times more than feedlot beef.

Carotenoids. Fresh pasture provides hundreds of times more of these anti-oxidants than does feedlot mush, with the result that beta carotene and other carotenoids show up in quantity in grass-fed meat. The benefits of eating carotenoids include lower risk of cataracts and macular degeneration (a leading cause of blindness).

Ms. Robinson also gives us the scoop on milk and eggs.

The milk from grazing cows has 5 times the CLA of conventionally fed dairy cows. The ratio of omega-6’s to omega-3’s is 1:1. The levels of beta carotene, vitamin A, and vitamin E are all much higher.

The eggs from pasture-raised chickens (who eat grass, wild greens, and insects) show similar benefits. A ratio of 6’s to 3’s of 1:1, instead of 20:1. More vitamin A. But you don’t need a chemistry set to analyze the health of an egg. Conventional eggs have lemony pale yolks, while those from pastured hens show a deep, orangey yellow.

Best of all: pastured meat, milk, and eggs just taste better. The New York Times food editors reported free-range poultry as “flavorful and juicy” and that it “had a tender but meaty texture.”

Corby Krummer in The Atlantic Monthly said, “Grass-fed beef tastes better than corn-fed beef; meatier, purer, far less fatty.”

And Sam Guigino in Wine Spectator declares a grass-based strip steak “delicious, rich and full-flavored.”

The last chapter in Pasture Perfect tells us how and where to acquire these healthy and delicious pasture-raised foods. And 60 pages of recipes cap things off.

This was a life-changer for me. The nutritional differences between feedlot meat and grass-fed meat are not trivial. Good health versus poor may well lie in the balance. I had already connected with a local dairy farmer. I wanted nourishing milk for my 2-year-old twins! Now it was time to locate healthy meat and healthy eggs.

I’m lucky, because Virginia has a long tradition of family farms. My region is a focal point for the growing movement toward local food. Once I opened my eyes, there were dozens of neighboring farms that could supply my table. Like some of the people quoted in Pasture Perfect, I’m a bit spoiled now. Conventionally raised just doesn’t taste right!

Pasture Perfect at Amazon

Pasture Perfect at B&N

For more about nutrition, see:
Test first, then conclude!
Yogurt & Kefir & Koumiss, Oh My!

For more on green living, see:
Permaculture Gardening
Running Mushrooms
Going Up in Smoke?


Share

Great Soap & Etcetera Quest

hieroglyph of amcient EgyptQueens of ancient Egypt outlined their eyes with kohl made from sulfide of antimony. Roman matrons rouged their cheeks with cinnabar, red mercury. Elizabethan nobles painted their faces with white lead. Victorian women swallowed arsenic to improve their complexions and drops of belladonna to dilate their eyes.

Learning these facts as a child, I developed considerable scorn for cultures of the past and their use of poisonous substances in the quest for personal beauty and hygiene. “Of course, they didn’t know any better,” I reminded myself.

Who would have dreamed that my attitude would reverse itself? At least the kohl worn by all the Egyptians who were not queens – made with lead sulfide, instead of antimony – actually protected them from eye infections. While modern concoctions . . . are not nearly so safe as we imagine. And we do know better!

Where did my change of attitude start? Strangely, with the flap about bisphenol A. My children were very young at the time, and we had plastics galore in our household. Little ones drop so many things. Surely plastic was safer than risking tender feet cut by broken glass. Well, it wasn’t; not if the plastic contained BPA, or maybe even if it didn’t. I read up on plastic and discovered that the reason it flexes the way it does is because each molecule of plastic physically slides past the others. And in the sliding process, some of the molecules are shed like skin flakes. When we eat foods stored in plastic, we eat a little of the plastic along with the food. Hmm.

I replaced all the plastic juice glasses with glass mugs. (The handles would help small fingers keep a grip.) Our tupperware and rubbermaid received the ax likewise. Canning jars and a few Pyrex containers worked just fine for storing cheese, homemade yogurt, and leftovers. Bed, Bath & Beyond even carried some inexpensive glass pitchers (with covers) for tea and milk. Good. We were set.

Except then I got to wondering . . . what else do I take for granted as safe when it isn’t? What about soap and shampoo and chapstick?

My first forays into research turned up cause for concern, but not much solid information. I decided to try the “organic” products carried by the local health food store. That was a disaster. The soap dried my skin and irritated it. The lotions were no better at moisturizing those dry hands than were conventional ones – that is, no good. And the shampoos resulted in a scalp that actually bled. Hmm again.

cover image of book about the dangers of conventional toiletriesI returned to conventional products, while I did more thinking. Not much in the way of solutions came to me . . . but, eventually, I stumbled upon a little lilac-colored book: Dying to Look Good by Christine Hoza Farlow. It was still thinner on specific solutions than I wanted, but it sure gave me motivation to try again. My conventional soaps, shampoos, and lip balm were chemical cocktails of carcinogens. And the health food store versions were often little better. They just used a different chemical cocktail!

Besides providing motivation, the book also led me to the Environmental Working Group and their Skin Deep cosmetics database. I was skeptical at first. I’d already been burned by the health food stores. Would this be any better?

It was.

The database lists every single ingredient in each product it includes, and it includes a lot of products, some with ingredient lists so simple that the words are all in English, utterly bare of incomprehensible chemical terms. Those were the products I decided to try.

And I got lucky.

photo of Terressentials hair washTerressentials’ hair wash, made with bentonite clay, was a beautiful thing for my hair and scalp. I’ve always had a twitchy scalp, prone to take offense at the slightest slight and throw out a patch of eczema. Apparently, the vast majority of shampoos – conventional and alternative – have ingredients that were causing my eczema. My longtime favorite also had ingredients that relieved it. But that’s crazy! To have irritant and remedy bundled together. My scalp has been calm over the last two years, ever since I slathered it in coconut oil (to soothe the damage done by the earlier experiments) and adopted the clay hair wash. (It’s not soap, and it doesn’t foam, but it does clean.)

photo of Bubble & Bee lip balmsTerressentials’ lip balm was another success, although it gets a little melty in the summer. But Bubble & Bee’s lip balm tends to be too stiffly solid in the winter. So I use both, the stiff one in hot weather, the melty one in cold.

photo of Bubble & Bee's body butterBubble & Bee’s body butter became the first lotion to ever have a lasting effect on dry scaliness of my feet (sorry for the TMI), and it’s pretty nice on hands, elbows, and knees too. Soft, properly moist skin is the result.

photo of African alata soap by SheAyurvedicsPure castile soap from the Blue Ridge Soap Shed doesn’t undo all the good work of that body butter. And, hey, it’s local too! It’s become my husband’s favorite soap, but I prefer something even more moisturizing: African Alata soap by SheAyurvedics. They’re both good. (ETA 2015: SheAyurvedics appears to have gone out of business, alas.)

photo of Bubble & Bee deodorantI’d had adventures with deodorants and anti-perspirants several decades ago and was leery of re-opening that can of worms. But my success with all the other toiletries, and especially with shampoo (the most unpleasant of all my cosmetic adventures) gave me courage to try again. I ordered up Bubble & Bee’s lemongrass deodorant. That proved a little too lemony for my taste, but it certainly did a fine job without irritating my skin. My husband had decided on their super pit putty, and we ended by swapping. He liked mine better, I liked his. Just recently I decided to branch out a little and purchased some lime geranium. Now my only difficulty is that I can’t decide which I like best. Both smell so nice! It’s a good problem to have.

Two toiletries still remain begging solutions.

I hadn’t used soap on my face for years, but the gentle cleanser resting beside the bathroom sink contained questionable ingredients. My problem: nearly all the alternatives have actual soap in them. And even a mild soap is too strong for my face. The one soap-free alternative I could find also has a questionable ingredient in it: grapefruit seed extract. The extract itself is harmless, but unless it is supplied by Nutribiotics, it may be contaminated by triclosan and methyl paraben or benzethonium chloride (all big baddies).

Since the main ingredient of my one alternative was vegetable glycerin, I decided to buy that one ingredient straight up and try it. I’m finding it acceptable, but still not quite right. I’ll probably start the quest again at some point. Just not yet!

Toothpaste is my other wild child. I’m currently using one of the SLS-free Tom’s of Maine formulations, but I’m not keen on its plastic container! I’ve tried homemade: arrowroot powder mixed with a few drops of food grade mint extract. That actually was very satisfactory, but messy. I may go back to it, now that my children are older. They can handle messy these days!

So why am I telling you all these rather personal details? (Too much information, with a vengeance!) Mainly because I really wanted to find a blog post just like this 3 years ago when I embarked on my great toiletries quest. I would have been spared a bleeding scalp and a lot of aggravation. Since I didn’t find this blog post (paradoxical time travel, anyone?), I’m creating it in the hope of sparing you irritation and aggravation! Luck!

UPDATE April 2015: I discovered a mild facial cleanser that works for me – Nourish Organic Moisturizing Cream Hand Wash – and blogged about it here. I’m currently using JASON toothpaste. The tube is made of plastic (alas), but I feel confidant of the ingredients in the paste.

Dying to Look Good at Amazon

Dying to Look Good at B&N

Hair Wash at Terressentials

Lip Balm at Terressentials

Lip Balm at Bubble&Bee

Body Butter at Bubble&Bee

Deodorant at Bubble&Bee

Castile Soap at the Blue Ridge Soap Shed

For more about safe and effective toiletries, see:
Hair Wash with Rhassoul Clay
Why Add a Lemon Rinse
Facial Soap Eureka

For more on green living, see:
Bandanna Gift Wrap
Waste-Free Lunch
Green Housekeeping


Share

Golden Green

I encountered the basic principle young. Clean up after yourself. No fair making your neighbor put your fingerpaints away. Don’t waste things, time, effort. Not right losing Dad’s favorite flashlight after he lent it to keep the bogeyman away. It was the golden rule: do as you would be done by. Connecting this elementary idea to a larger world view took . . . years, took growing up; but there were mile posts along the way.

A photo from an educational magazine – distributed to the entire fifth grade of Montgomery County – remains vivid in my memory. It depicted a family picnicking on a slope. But the hillside of scruffy grass overlooked a six-lane highway, and the sky was brown with smog. Turn the page and the family had been transplanted to a parkland paradise: lush green hills, a clear stream, shy wildlife, and blue sky. Which would you prefer?

Yes, this was 1970, when environmental concern grew apace. I was an impressionable ten-year-old and wanted to do my part, but it wasn’t clear what part was mine. “Don’t litter” was a big campaign at the time. It seemed overly basic.

My next milestone came in college. The desire to recycle gripped me. Newsprint and glass jars were the only candidates, and there was no curbside recycling. Oh, did I ever want to participate! But how? I didn’t own a car, and the recycling center was decidedly beyond walking distance. I never did figure out a way, but I made a vow: once I had wheels, I’d be driving to that center as often as I had a bin full.

I kept that vow, but feel some irony looking back: the exhaust coming out my car’s tailpipe probably did far more harm than would a small collection of glass and newsprint in a landfill. And humans have since devised more dangerous substances with which to strew our earth home. What happens to the nano particles created in the manufacture of computer hard drives? What about the discontinued GMO corn that made volunteer eaters so sick? It’s easy to become discouraged. It’s easy to focus on smaller areas where we have some power – I can recycle, after all – and lose sight of larger problems in need of complex, cooperative solutions.

And, yet, I always come back to: it’s important to me that I do what I can do, mistakes and all. Perhaps I should have stuck with bicycling (and not worried about recycling) after I graduated with my architecture degree. But the recycling was still worthwhile, and I still do it. And don’t litter – be it apple cores and household cleaners or nanoparticles and modified genes – still seems a motto to live by.

Since then I’ve made other changes. I eat local veggies and grass-fed meat. I clean with vinegar, peroxide, castile soap, and micro-fiber rags. I use soap nuts for my laundry and a drying rack. I’ve switched out my incandescent lightbulbs for CFL’s. I group errands so I can take the car out less. My kitchen is stocked with reusable containers, so that bag lunches and food storage need not involve disposables. Our mower is muscle-powered. Is all this trivial? Misguided? Perhaps. But surely profligate driving, reckless chemical use, and relentless disposing of disposables would be worse.

I’ve even set my sights on further changes. No surprise there, given my proclivity for shaking my life up from time to time! I hope my next car will be a hybrid. (And that one in the further future will be wholly electric! How to place a charging station when we have no garage?) My push toward more bicycle riding resulted in a broken foot, but I haven’t renounced that dream wholly. (The peddling and gliding are too much fun!) I want to weatherproof my home, so I can be one of those folk whose winter needs are solved with the equivalent of a space heater. Perhaps I might even manage solar panels on the roof!

I talk about the solutions I’m trying. I ask what others are doing. I read to learn more. Am I naïve? Almost certainly, yes. But cynicism and pessimism seem a waste of the life and breath I’ve been given. I’ve chosen effort and hope. What about you?

Share