Cooking in Trios

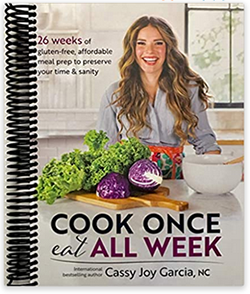
Last fall, while watching The Minimal Mom on YouTube, I discovered the cookbook Cook Once, Eat All Week.

The title’s a bit of a stretch. The “cook once” is the prep cooking, and it results in three easy-to-assemble dinners. If you have four people in your household (as we do when the kids are home from college), you’ll have to do two rounds of prep cooking to cover six nights out of the seven. If you have only two people in the household, then each meal yields enough for two dinners (unless you both happen to be super hungry that night—just sayin’).

However, unlike some of the cook-ahead schemes I’ve heard of, the prep cooking does not take all day. In fact, it’s pretty manageable. The other thing that caught my attention was that almost all of the recipes are (or can be made) grain-free. That alone was enough to make me want to try it. A cookbook filled with recipes avoiding pasta, rice, and polenta would be awesome!

One other factor: I was very tired of our usual round of dinners. I desperately wanted something new.

So I ordered the book!

Wow! When it arrived, I was amazed and pleased.

My biggest problem was choosing which trio of recipes to try first. They all looked so good—which was a surprise for me. I’d never seen a cookbook before in which all the recipes looked good.

I did eventually choose. And I was wowed all over again. The prep cooking was very manageable. The final assembly on the night of eating was truly fast and easy. And every single one of the recipes was delicious.

I’d been somewhat skeptical as to how it would really work, but desperate enough to try it regardless.

Still…how would the second trio go?

Easy. Delicious.

Third trio? Fourth? Fifth?

Same. This cookbook was a total winner for me.

I eventually hit a few recipes that I felt needed some adjustment, but they were in the minority.

I’ve been wanting to tell you all about these adventures in cooking for months now, but I kept forgetting to take photos. And a post about cooking has to have at least a few photos.

Finally, once my kids returned to college for the spring semester, I buckled down with my camera. There’s just one problem: I’m past the boatloads of recipes that required no adjustments and am forging ahead on the ones that I could tell without cooking them that I’d need to switch something up.

For example, I can’t eat cabbage unless it is cooked to death. So I substitute kale. Also, I’ve learned that I hate collard greens. (I’d never eaten them before.) So, again, I substitute.

What I want to do is share the entire process for a trio, from shopping list to prep to on-the-night assembly. Just be aware that the trio that follows is not identical to the one presented in the book.

Let’s get started!

Week 14

Rustic Beef Casserole
Roasted Pepper Casserole
Beef Ragu

Shopping List
FRESH PRODUCE
fresh cilantro, 1 bunch
semi-dried parsley, 0.35 oz
garlic, 3 cloves
kale, 2 bunches
lemon, 1
limes, 3
yellow onions, 3 large
green bell peppers, 5
zucchini, 5

MEAT/DAIRY
butter
ground beef, 6 pounds
Cotija cheese, 1 block
shaved parmesan cheese
plain yogurt, 2 large tubs
FROZEN
frozen cauliflower florets, 4 pkg, 12 oz each
PANTRY
olive oil
balsamic vinegar
canned chipotle pepper in adobo sauce
chicken broth
crushed tomatoes, 28 oz can
red cooking wine
mayonnaise (I make mine homemade, but of course you can buy it)

SEASONINGS
chili powder
bay leaves
dried basil
oregano
thyme
cumin
garlic powder
onion powder

Note on groceries: The recipe for “Meal 2” actually calls for poblano peppers, but our grocery store does not carry them, so I substituted bell peppers, and they worked just as well. But I’ll try poblanos, if I can ever get them.

One other thing: I discovered that I love drained yogurt—it’s creamy and flavorful—so I usually substitute that for sour cream.

Once you’ve got your groceries in, start the prep cooking!

Prep Day

• Cook the ground beef

Ingredients
ground beef, 6 pounds
1-1/2 teaspoons sea salt
butter

Directions
Melt the butter in a large pot on the stovetop at medium heat. Crumble the beef into the melted butter. Sprinkle with the salt. Cook, stirring occasionally, until the meat s fully browned, about 15 to 20 minutes.

Set aside to cool.

Divide the beef once it is cool. Set aside 4 cups to use later in assembling the Rustic Beef Casserole. Divide the rest in half and put each portion (roughly 3 cups each) in a container in the fridge. Label one container “Roasted Pepper Casserole,” and the other “Beef Ragu.”

• Prepare the zucchini noodles

Use a vegetable peeler to create wide ribbons of zucchini. (Discard the seed cores.)

Line two rimmed baking sheets with tea towels. Toss the zucchini ribbons with 1-1/2 teaspoons of sea salt. Spread the ribbons across the towels.

Let sit an hour, then gather each bunch up in its towel and squeeze out as much liquid as possible from the zucchini.

Line an air-tight container with paper towels, place the ribbons in it, and store in the fridge for use in “meal 3.”

• Caramelize the onions

Ingredients
3 large yellow onions
2 tablespoons butter
1 teaspoon sea salt

Directions
Remove the skins and then thinly slice the onions.

Melt the butter in a heavy skillet over medium-low heat. Add the onions and salt. Cook 45 minutes, stirring occasionally, until the onions have reduced and turned a deep caramel color.

Set aside to use later in the prep day when assembling the casserole for “meal 1.”

• Roast the peppers

Pre-heat oven to 400°F.

Remove the cores and seeds from the peppers. Slice them in 1-inch strips. Toss the pepper strips in 2 tablespoons of olive oil.

Cover a rimmed baking sheet with baking parchment. Spread the pepper strips on it.

Roast the peppers for 25 minutes. Set aside to use later in the prep day when assembling the cassrole for “meal 2.”

• Prepare the kale

Ingredients
2 bunches kale
1 tablespoon olive oil
juice of half a lemon
pinch of sea salt

Directions
De-stem the kale and chop medium coarsely.

Heat olive oil in a large pot over medium heat. Add kale, cover pot, and cook 3 to 4 minutes, until the kale is wilted.

Divide kale in half. Store one portion in fridge for us in “meal 3.”

To the other portion, add the lemon juice and salt, stir, and set aside to use later in the prep day when assembling the casserole for “meal 1.”

• Make the red wine reduction

Ingredients
1 cup red wine
2 tablespoons balsamic vinegar
1 teaspoon sea salt
1/2 teaspoon thyme

Directions
Combine all ingredients in a medium saucepan. Bring to a boil over medium-high heat. Reduc heat to medium and simmer 10 minutes. Set aside to use later in the prep day when assembling the casserole for “meal 1.”

• Make the mashed cauliflower

Ingredients
3 packages frozen cauliflower florets, 12 oz each
1/4 cup drained yogurt
2 tablespoons butter
1 teaspoon sea salt
1/2 teaspoon garlic powder
1/4 teaspoon black pepper

Directions
Steam the cauliflower florets for 15 minutes in a covered pan on the stovetop.

Place the steamed cauliflower and the rest of the ingredients in a food processor. Pulse until blended and smooth. Set aside to use later in the prep day when assembling the casseroles for “meal 1” and “meal 2.”
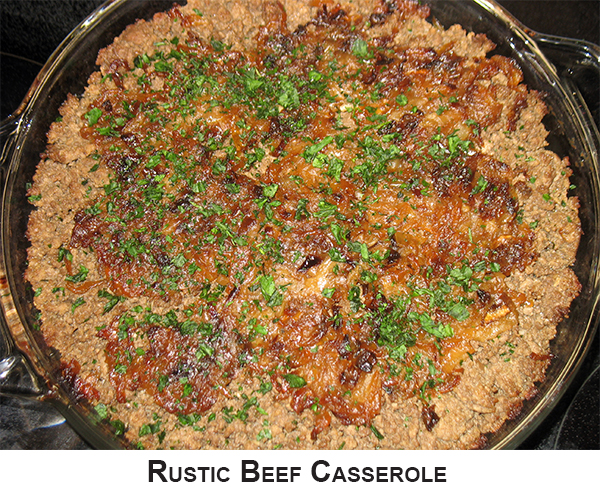
• Assemble the casserole for “meal 1” (Rustic Beef Casserole)

Ingredients
4 cups cooked ground beef
red wine reduction
4 cups mashed cauliflower
wilted kale with lemon juice
caramelized onions

Directions
Place beef and red wine reduction in a large bowl and toss well.

Spread the cauliflower in a 3-quart casserole dish. Layer the kale atop the cauliflower. Spread the beef atop the kale. Top the beef with the caramelized onions.

Cover the casserole with a lid or with aluminum foil.

Store in the fridge until you are ready to cook and serve it. If you are doing prep on the same day you plan to eat “meal 1” (and it is getting close to dinner time), you can pop the casserole in a 350°F oven and cook it for 30 minutes.
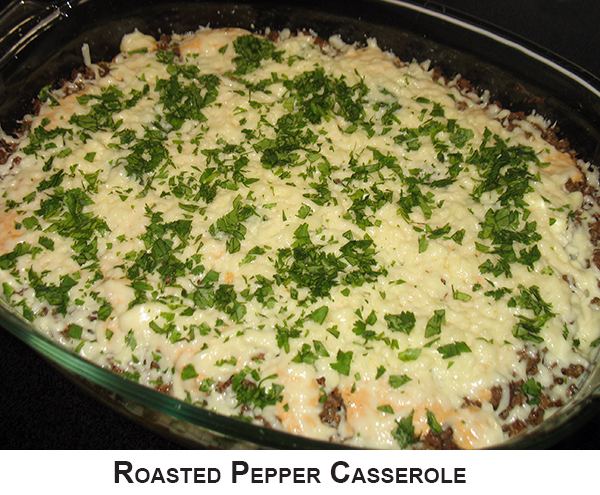
• Assemble the casserole for “meal” 2 (Roasted Pepper Casserole)

Ingredients
roasted peppers
mashed cauliflower
3 cups cooked ground beef
1/2 teaspoon sea salt
1 teaspoon chili powder
1 teaspoon cumin
1 teaspoon oregano
1/2 teaspoon garlic powder
1/2 teaspoon onion powder
1/4 teaspoon black pepper
juice of 1 lime

Directions
Place beef, seasonings, and lime juice in a large bowl and toss thoroughly.

Spread the roasted peppers in a layer across a 3-quart casserole dish. Layer the mashed cauliflower over the peppers. Layer the beef mixture atop the cauliflower.

Cover and store in the fridge.

• Make the tomato sauce

Ingredients
1 tablespoon olive oil
1/2 yellow onion, diced
3 cloves garlic, minced
crushed tomatoes, 28-oz can
2 teaspoons dried basil
1 teaspoon oregano
1 teaspoon thyme
2 bay leaves
1/2 teaspoon sea salt
1/4 teaspoon black pepper
1/2 cup red wine

Directions
In a medium saucepan, sauté onions and olive oil over medium heat for 4 minutes. Add garlic and cook another minute.

Add remaining ingredients and stir. Reduce heat to medium-low and cook 7 minutes, stirring occasionally.

Cool and store in fridge to use in “meal 3.”

• Make chipotle cream sauce

Ingredients
3/4 cup drained yogurt
1/4 cup mayonnaise
2 chipotle peppers
2 tablespoons adobo sauce (from can of chipotle peppers)

Directions
Place all ingredients in a food processor (or blender) and pulse until smooth. Store in fridge to use in “meal 2.”

Meal 1: Rustic Beef Casserole

Ingredients
pre-assembled casserole
1 tablespoon semi-dried parsley

Directions
Pre-heat oven to 350°F.

Bake covered casserole for 30 minutes.

Let cool slightly, garnish with parsley, and serve.

Meal 2: Roasted Pepper Casserole

Ingredients
pre-assembled casserole
chipotle cream sauce
1 oz cotija cheese, crumbled
2 tablespoons chopped fresh cilantro leaves

Directions
Pre-heat oven to 350°F.

Bake covered casserole for 30 minutes.

Remove casserole from oven, remove lid, and let cool slightly. Drizzle chipotle cream sauce over the casserole. Sprinkle with cotija cheese and cilantro, then serve.
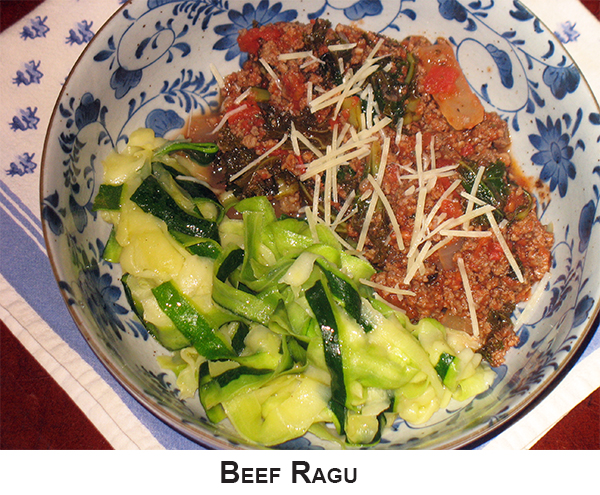
Meal 3: Beef Ragu

Ingredients
tomato sauce
3 cups ground beef
salt to taste
wilted kale (without lemon juice)
olive oil
zucchini ribbons
1/2 cup shaved parmesan
black pepper

Directions
Bring the tomato sauce to a simmer in a large pot over medium heat. Add beef and cook 7 minutes.

While the sauce is simmering, cook the zucchini ribbons by heating the olive oil in a skillet over medium heat. Add the ribbons and sauté for 5 minutes. Drain off excess liquid and set aside the ribbons.

Add kale to the sauce and cook for 2 minutes. Add salt to taste, if needed.

Serve the sauce and the zucchini ribbons side-by-side. Garnish with parmesan.
 

*     *     *

 
Whew! That was a lot of typing! I think it was more work to type it all up than it was to cook it. I found the cooking to be remarkably stress-free. And the meals were so delicious!

Aside from the dairy ingredients, the above recipes are compliant with the Whole30 program of eating.
 

*     *     *

 
Uh, oh! I knew I’d not written all the Whole30 recipe posts that I’d planned, but I thought I’d written a brief intro about the Whole30 itself. Apparently not!

That means I won’t be able to link to it as I’d intended. Instead, I’ll provide links to my other nutrition posts. (And I’ll think about writing that intro post sometime in the future.)

For more about nutrition, see:
Milk Is Highly Insulinogenic
Why Seed Oils Are Dangerous
Thinner and Healthier
Butter and Cream and Coconut, Oh My!

 

Share

Blueberry Crumble (Grain-free)

My daughter and I have been baking a lot lately. I need to avoid wheat and other grains, so our baking is grain-free when possible. Just last week, we found ourselves with too many blueberries in the fridge, so we went looking for a recipe to help us use them up.

Our first batch of blueberry crumble was good, but we saw room for improvement.

We wanted a thinner crust, and we thought adding lemon juice to the filling would add punch to its flavor. Plus we wanted more filling.

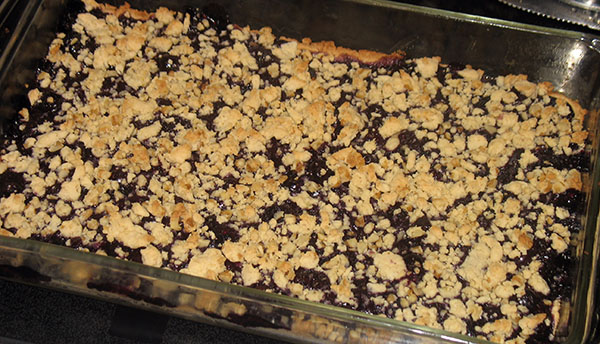
The recipe below includes our adjustments. When the adjusted crumble came out of our oven, we thought it was just about perfect!

INGREDIENTS

Shortbread Crust

1 cup coconut flour
3/4 cup arrowroot powder
1/4 teaspoon salt
1 teaspoon vanilla
1/3 cup maple syrup
1/2 cup butter

Blueberry Filling

2-3/4 cups fresh blueberries
3 tablespoons maple syrup
1 tablespoon arrowroot powder
1/4 teaspoon salt
3/4 teaspoon lemon juice

Crumble Topping

1/3 of the shortbread mixture from the crust above
1/4 cup walnuts, minced

DIRECTIONS

1 • Pre-heat oven to 350°F. (Know your oven! Ours runs cold, so 350°F in a recipe equals 365°F on our dial.)

2 • Grease a 7” x 12” glass baking dish with butter, line with baking parchment, and set aside.

3 • In a medium mixing bowl, combine the ingredients for the crust and cut them together with a pastry cutter until a dough is formed. Reserve 1/3 of the mixture for the crumb topping. Press the other 2/3 of the mixture into the bottom of the prepared baking dish. Bake for 9 minutes, until golden.

4 • While the crust is baking, create the filling. Place all the filling ingredients into a medium saucepan. Cook over medium heat, gently pressing the berries to break them down. Cook for 7 to 9 minutes until the syrup is thick and no large berries remain. Take off the heat and set aside.

5 • Once the crust is baked, let it cool 10 minutes. While it cools, add the minced walnuts to the crumble dough.

6 • Spread the filling over the crust.

7 • Sprinkle the crumble mixture by hand over the filling as evenly as possible. Press it gently in place.

8 • Bake for 20 minutes.

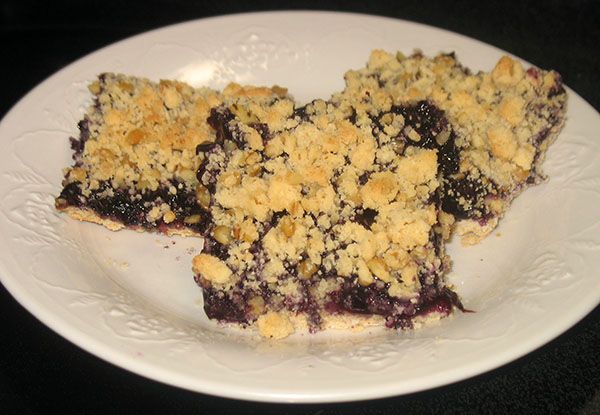
9 • Let cool for 10 minutes. Then cut into bars and serve. The bars will be delicate, but delicious.

For more recipes, see:
Coconut Chocolates
Apples á la Ney-Grimm
Chocolate Chip Cookies


Share

Kombucha in Large Batches

My SCOBY is healthy!

How do I know? Because it keeps making babies. The workhorse SCOBY nestles down in the bosom of the rich brown tea, turning it into kombucha, while a new SCOBY forms on the surface of the batch.

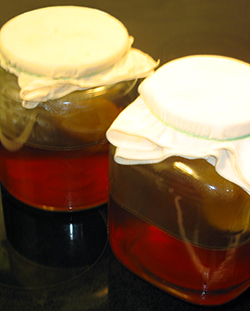
When my first SCOBY made a baby in its brewing jar, I made two jars of kombucha for my second batch. Now I’m increasing my batch size.

From my reading, I learned that one shouldn’t increase the size of the batch too rapidly. The amount of liquid needs to be matched to the strength of the SCOBY.

My first batch was 1 quart. My next batch, because I had two SCOBYs, was two 1-quart jars. Now I’m tackling two 2-quart jars. (I put one workhorse SCOBY and one baby SCOBY in each jar, because four jars with one SCOBY each just seemed too complicated.)

I plan to do another two 2-quart jars next, and then…more!

I’d hoped to try a full gallon, figuring that the jars currently holding 2 quarts each would easily hold double that. But when I poured 2 quarts into each, I saw that I was wrong. Because the jars need to breathe—there’s no lid to prevent spills when I carry the jar from its brewing spot to the kitchen counter for bottling—I can’t fill the vessel to its brim.

So I’ll do two 3-quart batches when I’m ready to increase.

As the volume of liquid increases, the amount of the other ingredients must increase also. I’ll set out the measurements here, in case you are accompanying me with your own kombucha adventure. 😀

Kombucha—1 quart

2 tea bags
1/4 cup evaporated cane juice
3 cups filtered water
1/2 cup kombucha from previous batch

Kombucha—2 quarts

4 tea bags
1/2 cup evaporated cane juice
7 cups filtered water
1 cup kombucha from previous batch

Kombucha—3 quarts

6 tea bags
3/4 cup evaporated cane juice
10-1/2 cups filtered water
1-1/2 cups kombucha from previous batch

Kombucha—1 gallon

8 tea bags
1 cup evaporated cane juice
14 cups filtered water
2 cups kombucha from previous batch

I’m looking forward to the larger batches! The first 1-quart batch disappeared almost instantaneously, especially since I had to reserve 1/2 cup for the next batch. I can see that the second batch isn’t going to last very long either. I may have to see about finding larger vessels, so that I can go for that full gallon!

For the full process of brewing kombucha, see:
Make Your Own SCOBY


Share

Make Your Own SCOBY

With my goal of eating more foods with live cultures and active enzymes came the intention of drinking more kombucha.

But if I was going to drink kombucha, I was going to need to learn how to make it myself, because it was too expensive to keep Casa Ney-Grimm supplied from the grocery store. Especially since my kids like the stuff and will empty the refrigerator of it in no time flat. 😀

The key to making kombucha is the SCOBY.

Symbiotic
Colony
Of
Bacteria and
Yeast

The SCOBY is the living element that turns the other ingredients into kombucha.

There are three ways to obtain a SCOBY.

1 • If you know anyone who makes kombucha, they are likely to have a spare which they will gift you.

2 • You can buy a dehydrated SCOBY through the mail as part of a kombucha starter kit, and then rehydrate the SCOBY.

3 • Or you can make your own SCOBY.

Until just a few weeks ago, I knew about only the first two ways. None of my friends or acquaintances makes kombucha, so I couldn’t get one that way. And Casa Ney-Grimm is currently in the midst of an employment drought, so I didn’t want to spend the money on a starter kit.

Luckily I stumbled across a website that gave instructions on how to make your own SCOBY! Yay!

The site is CulturesForHealth.com, and it’s got a lot of really excellent how-to stuff on it, if you are interested.

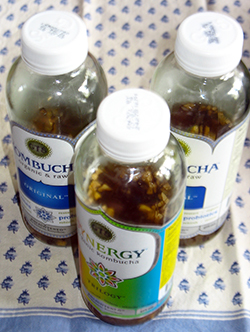
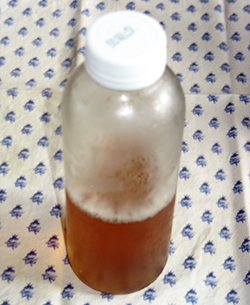
To make your own SCOBY, you do have to buy a bottle of kombucha with live cultures in it. That’s $3 at the grocery store. I could handle that.

So…how do you make your own SCOBY?

I’d going to chronicle my experience right here.

I almost said ‘adventure,’ except that I’ve been known to use that word when I encounter problems, and—so far—my SCOBY-making has been very smooth. Although I did find it exciting, in a good way. But I digress.

The first thing to do is collect all your ingredients, which includes some equipment, so I think I’ll set the process forth like a recipe.

SCOBY

Ingredients

1 wide-mouth canning jar (1 quart size)
1 sturdy paper napkin (or coffee filter or paper towel)
rubber band
filtered water
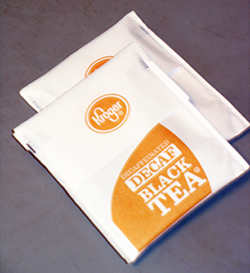
1 tea bag (black tea)
2 tablespoons evaporated cane juice
1 bottle live kombucha (16 oz)
1 spray bottle filled with white vinegar

Directions

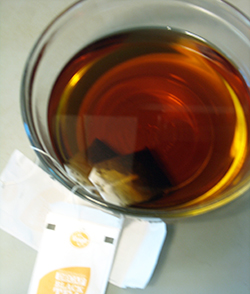
1 • Brew 1 cup of black tea using filtered water. Let the tea bag stay in the hot water for 10 minutes, instead of the usual 4 or 5 minutes.

If the water has chlorine or chloramine in it, it will kill the SCOBY and hinder the fermentation process. If the water has other contaminates in it, they will harm the SCOBY, hinder the fermentation process, and possibly produce unpleasant sidenotes in the taste. Make sure your water is pure.

2 • Stir the evaporated cane juice into the hot tea until it is dissolved.

3 • Let the tea cool to room temperature.

If the tea is too hot, it will kill the living organisms in the kombucha, and no SCOBY will grow.

4 • Pour the tea into the canning jar.

5 • Add the kombucha from the purchased bottle.

Wash that bottle (and lid), and save it! You’ll need it later.

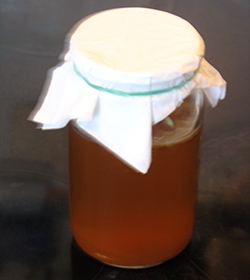
6 • Cover the canning jar with the paper napkin and secure it with the rubber band.

This will keep dust and debris out, but will allow the mixture to breath.

7 • Spray the paper napkin with the white vinegar. It should be damp, but not soaking.

This will prevent any mold from growing.

8 • Put the jar in a sheltered corner, out of direct sunlight.

9 • Spray the paper napkin once per day.

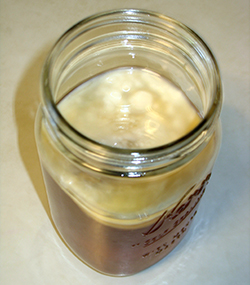
After 2 days, I saw a small fragment on the top of the liquid that I thought might be the beginnings of a new SCOBY. (It was!)

On day 4, that fragment had expanded to cover the entire surface of the liquid! (I found this super exciting.)

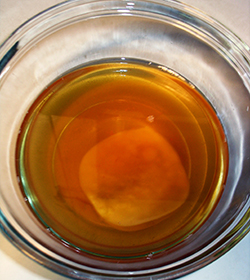
By day 7, the new SCOBY had thickened to become a pancake 1/8-inch thick.

10 • Once your new SCOBY is present, taste a spoonful of the kombucha.

Mine tasted too sweet on day 7, so I carried on letting it ferment and spraying the paper napkin every day until day 10, when it seemed about right. By that time, my SCOBY was a healthy 1/4-inch thick!

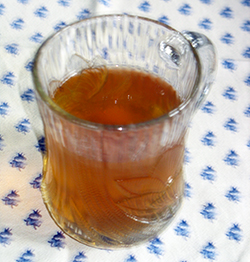
11 • Pour the liquid out into a generous glass bowl, letting the SCOBY flow out with it.

12 • Rinse and dry the canning jar.

Now you have your SCOBY!

Which means you need the recipe for a standard batch of kombucha, because you immediately make a new batch with that SCOBY.

But first, what do you do with the kombucha you made while making your SCOBY?

You bottle all but 1/2 cup of it.

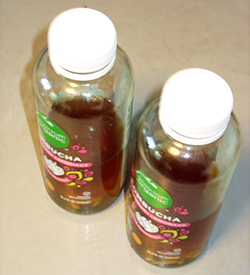
Remember the bottle (and lid) I told you to wash and save? Get it now. Put 1/2 teaspoon of evaporated cane juice in it. Pour your newly made kombucha into the bottle. Leave about a 1/2 inch of head room. Screw the lid on tightly.

Set the bottle in a sheltered corner out of direct sunlight for 2-7 days. It will be getting fizzy.

I’m in the middle of this phase right now with the kombucha I made in the process of making my SCOBY.

I saved several bottles from storebought kombucha, so I used two of them, because I had 24 oz of kombucha. Reserving 4 oz (1/2 cup) for my next batch left 20 oz to bottle, which would not fit in one 16-oz bottle. I added a teaspoon of minced ginger to each bottle, because I like ginger-flavored kombucha.

The instructions on CulturesForHealth.com say to ‘burp’ the bottle(s) every day, so that the fizz does not build up too much and shatter the bottle. The first day I did this, I heard a tiny pop from the escaping fizz. But there was nothing on day 2 or 3, so I think I will ‘burp’ mine less frequently. I want more fizz!

Edited to add: When I drank my first batch of kombucha, it was delicious, but not as fizzy as I like.

Since the SCOBY ‘eats’ the evaporated cane juice in order to ferment the tea and to produce the fizz, I decided to increase the amount in each bottle of my second batch from 1/2 teaspoon to 1 teaspoon. Also, I did not burp the bottles.

The result was perfect! More fizz, yet my bottles did not explode, despite the lack of burping. I suspect each kombucha brewer must fine-tune such things.

Okay. So you’ve bottled your kombucha and now need to start your next batch. Let’s do it!

Kombucha

Ingredients

3 cups filtered water
2 tea bags (black tea)
1/4 cup evaporated cane juice
1/2 cup live kombucha (from previous batch)
1 SCOBY

Directions

1 • Brew 3 cups of black tea using filtered water. Let the tea bag stay in the hot water for 10 minutes, instead of the usual 4 or 5 minutes.

2 • Stir the evaporated cane juice into the hot tea until it is dissolved.

3 • Let the tea cool to room temperature.

4 • Pour the tea into a canning jar.

5 • Add the kombucha from the previous batch.

6 • Add the SCOBY.

7 • Cover the canning jar with a paper napkin and secure it with the rubber band.

8 • Spray the paper napkin with the white vinegar. It should be damp, but not soaking.

9 • Put the jar in a sheltered corner, out of direct sunlight.

10 • Spray the paper napkin once per day.

11 • On day 7, start tasting the kombucha. It will be ready anywhere between day 7 and day 28.

It will taste sweeter in the earlier days (too sweet for me), and more sour in the later days. I’m still experimenting to see what produces the result I like best. 😀

12 • When the kombucha tastes right, bottle all except 1/2 cup. Use that 1/2 cup to start a new batch!

My understanding is that often (but not always) each batch creates a new SCOBY. No wonder kombucha makers are happy to give one away!

I gather that after 3 batches, it is possible to increase the size of your batch from 1 quart to 2 quarts. And after you’ve made 3 batches at the 2-quart size, your SCOBY will be strong, able to handle a gallon.

One other note…my first attempt at making a SCOBY succeeded beautifully, but apparently this is not always the case. Living organisms are unpredictable. If 3 weeks go by with nary a sign of any SCOBY, you’ll need to toss that attempt and try again with fresh ingredients.

For more about foods with live cultures, see:
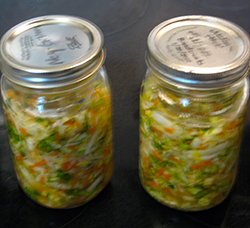
Lacto-fermented Sauerkraut
Lacto-fermented Corn
Pickled Greens
Beet Kvass


Share

Kimchi

Ever since I stumbled on the recipe for lacto-fermented kimchi in Nourishing Traditions, I’ve wanted to make it.

But I figured I should try basic sauerkraut first. And then lacto-fermented carrots seemed like a more accessible taste-treat. Next I went on a beet kvass tear. And then I stayed within that safe, known perimeter until I drifted away from a regular schedule of lacto-fermentation.

But now I’m intent on always having a selection of lacto-fermented foods on hand.

So I tackled a mild version of kimchi!

Here’s the recipe:

Kimchi (Korean Sauerkraut)

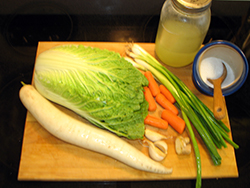
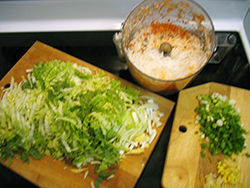
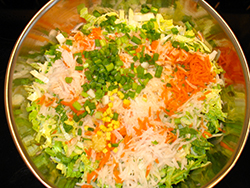
1 head Napa cabbage, cored and shredded
1 bunch green onions, chopped
1 cup carrots, grated
1 daikon radish, grated
1 tablespoon fresh ginger, minced
3 cloves garlic
1/2 teaspoon red pepper flakes (optional)
1 tablespoon sea salt
4 tablespoons whey

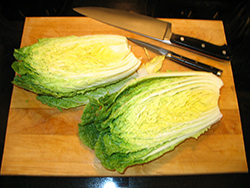
1 • Remove the core of the cabbage and discard. Shred the cabbage leaves.

I discovered I preferred European sauerkraut when shredded by putting it through the grating mechanism of my food processor. But I decided to try slicing the cabbage narrowly for kimchi. I’ll see what I think of that before I try something different.

2Chop the green onions. Peel and mince the ginger. Put the garlic through a garlic press.

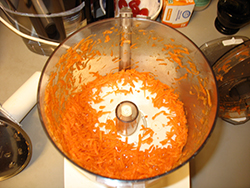
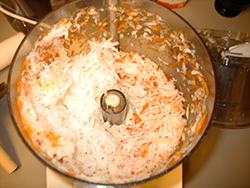
3Grate the carrots and daikon radish by putting them through the grating mechanism of the food processor.

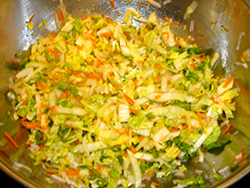
4Put all the ingredients in a bowl and knead them as you might knead bread dough.

All the recipes I’d seen directed me to pound the mixture, and that is how I’d prepared European sauerkraut. I found it took what seemed like forever, and I was always wondering if I’d pounded it enough.

Recently I saw another recipe which recommended the kneading method. I liked that much better. It was easy, much faster, and I could tell when the whole batch was sufficiently kneaded—that there weren’t lingering bits in the middle that remained hard.

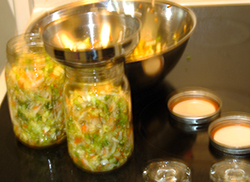
5Place the mixture in two quart-sized, wide-mouth canning jars. Press it down well, until the juices rise enough to cover the vegetables. Place fermentation weights atop to keep the vegetables submerged.

I possessed no fermentation weights when I first tried lacto-fermenting cabbage. I didn’t even know there was such a thing. And all of my batches turned out fine. But now that I do know, I’m using them. Why risk having to throw out a batch?

6Twist the lids on the canning jars to finger tight. Keep at room temperature (but out of sunlight) for 3 days. Then store in the refrigerator (or a root cellar).

When I was making European sauerkraut, the flavors needed about 6 weeks to develop. The sauerkraut just tasted bland before then. But by 6 weeks, it was delish!

I expect the same to be true of my kimchi. I omitted the optional red pepper flakes, because I want flavor, not heat. The nibble I tasted when I put my jars in the fridge did taste bland. But sometime in October, I’ll be in for a treat.

I’ll post a note here to let you know if it’s as good as I think it will be. 😀

For more lacto-fermented recipes, see:
Lacto-fermented Sauerkraut
Lacto-fermented Corn
Pickled Greens
Beet Kvass


Share

Why Calcium Isn’t Enough to Build Strong Bones (and What You Can Do About It)

Several months ago, when I wrote about my experience of gaining weight while drinking milk, and losing weight while eschewing milk, I promised I’d blog about how to keep your bones strong without the dairy products.

This is that post. 😀

Conventional wisdom – and lots of advertising – tells us that milk is the foundation of healthy bones. But like so many other bits of conventional advice about nutrition, it turns out to be wrong.

Here’s why.

1 • Calcium alone cannot give you strong bones.

Sure, calcium is an important building block for strong bones. You do need it. But you also need all the other building blocks: vitamin C, vitamin D, vitamin K, phosphorus, magnesium, and trace amounts of chromium, silica, zinc, manganese, copper, boron, and potassium.

Taking a calcium pill – or drinking extra milk – won’t ensure that you’re getting all the substances that go into strong bones. It might even harm you, since too much calcium can lead to impaired kidney function, kidney stones, high blood pressure, and possibly even an increased risk of heart attack.

Additionally, if you ingest too much calcium, then your body must adjust its stores of other vitamins and minerals in order to process the excess calcium.

2 • Calcium intake is irrelevant, IF your body is not absorbing it and building with it.

People living in the United States ingest far more calcium than those living elsewhere, and yet US residents also suffer more osteoporosis.

What gives?

In addition to having all the building blocks on hand, the environment must also be right for actual building to occur.

Imagine trying to build a house in the midst of a snow storm. You might have all the materials on hand – bricks, mortar, wood framing, nails, etc. – but I doubt you’d get much building done.

Your hormones and your inflammatory status play large roles in determining whether conditions in your body favor the building of strong bones. Or not. High blood sugar and chronic inflammation both speed up the breakdown of bone and slow down the creation of new bone cells.

The foods you eat also influence the building conditions in your body.

Grains possess a lot of phytates (to protect the seed), and legumes possess both phytates and oxalates. Phytates and oxalates chemically bind to the calcium present, both in the grains and legumes themselves, and in other foods present in the digestive tract, carrying the calcium out of the body entirely.

Soaking and sprouting grains and legumes helps to reduce the volume of phytates, but cannot reduce it sufficiently to where its presence ceases to leech calcium (and other minerals) from your body. Additionally, from my previous post on insulin, we know that grains yield high blood sugar for a significant interval after you eat them.

If you don’t eat enough protein, you’ll get the same accelerated bone loss that high blood sugar and inflammation produce.

And if you don’t eat enough healthy fats, you won’t be able to assimilate vitamins D and K, because they are both fat soluble.

Bottom line: in addition to having all the building blocks on hand, conditions within your body must also favor the building and maintenance of strong bones.

3 • There are better sources of calcium than milk.

I remember seeing lists of calcium rich foods several years ago and being skeptical that anything could be better than milk. I was a big milk proponent. Sure, 8 ounces of kale might have 180 milligrams of calcium, but 8 ounces of milk has 300. And I can easily drink 3 glasses of milk every day, but I sure won’t be eating 3 cups of kale every day!

Ah, but!

The key is not how much calcium is present. The key is how much your body assimilates. The reason our RDA for calcium is so inflated is that most of the calcium from milk and pills goes right through. But the calcium from vegetables like kale and mustard greens and others gets absorbed and used. It is more bioavailable.

I went looking for some of the recent studies on calcium from plants versus calcium from milk and landed on the Harvard School of Public Health site with an interesting paragraph that I will quote below, since it occurs in the middle of a hugely long web page.

In particular, these studies suggest that high calcium intake doesn’t actually appear to lower a person’s risk for osteoporosis. For example, in the large Harvard studies of male health professionals and female nurses, individuals who drank one glass of milk (or less) per week were at no greater risk of breaking a hip or forearm than were those who drank two or more glasses per week. When researchers combined the data from the Harvard studies with other large prospective studies, they still found no association between calcium intake and fracture risk. Also, the combined results of randomized trials that compared calcium supplements with a placebo showed that calcium supplements did not protect against fractures of the hip or other bones. Moreover, there was some suggestion that calcium supplements taken without vitamin D might even increase the risk of hip fractures. A 2014 study also showed that higher milk consumption during teenage years was not associated with a lower risk of hip fracture in older adults.

So…if slugging down gallons of milk or dozens of calcium pills is not the answer – and it isn’t – how do we build and maintain strong bones?

I want action points! 😉

First of all, don’t look to bone density drugs such as Fosamax® and Boniva®. These deposit long-lasting compounds (alendronate and ibandronic acid, respectively) within the bone matrix, which give the illusion of greater bone density. But they do not form the normal matrix that actually makes bone strong. In fact, taking biophosphonates leads to bones that are more brittle and more likely to fracture! Talk about irony!

Okay, what does work?

1 • Avoid the foods that result in chronic inflammation, elevated blood sugar, and that remove nutrients from your body.

Highly processed foods and sugar-laden foods are especially bad. Grains and legumes become more and more problematic as we get older.

I hate to start with a “don’t,” but it’s a pretty important don’t. If your bones are currently strong, if your weight is normal, and your health is good, then you might be able to get away with skipping this #1 and leaning hard on #2, #3, and #4.

But I’ve got osteoporosis, I’m still carrying some extra pounds (even after the 23+ that I’ve lost), and I don’t have quite as much pep in my stride as I want. Action point #1 is critically important for me!

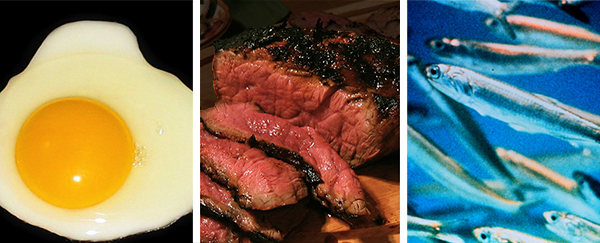
2 • Eat meat, seafood, and eggs, cooked with clarified butter, coconut oil, lard, or tallow to get adequate protein and adequate fats.

These are nutrient-dense foods containing many vitamins and minerals, in addition to the protein and fat. They help keep your blood sugar levels within the optimum range. They do not promote inflammation.

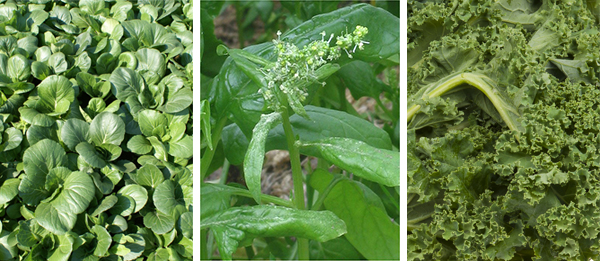
3 • Eat kale, mustard greens, turnip greens, collard greens, broccoli rabe, cooked spinach (many of the nutrients are not bioavailable in raw spinach), sea vegetables, bone broth, sardines, anchovies, shrimp, oysters, and canned salmon.

More nutrient dense foods that are high in calcium and the other building blocks for strong bones. You’ll get what you need without having to worry about balancing calcium with magnesium and potassium and all the others, the way you would if you were trying to get it right using pills. Plus the phytonutrients that may be a part of why calcium in plants is more bioavailable than from other sources are present.

4 • Lift weights.

Or do heavy yard work regularly. Or do yoga poses, many of which build strength as much as they increase flexibility. Engage in physical activity that is weight-bearing.

The compression of working against gravity stresses our bones in a healthy way, triggering them to build more of the structural matrix that can support the load.

I’m a swimmer, which is not weight-bearing. It has all kinds of other benefits, but strengthening my bones is not one of them, alas. So I lift weights in additional to swimming.

And there you have it.

Eat meat, seafood, and eggs.
Eat green, leafy vegetables.
Do weight-bearing physical activity.
And avoid foods that produce high blood sugar and inflammation.

I’ve been trying a lot of new-to-me recipes over the last few months, and I plan on sharing them with you as I continue to blog. I’ve also got a few more health hacks to write about. Stay tuned! 😀

For more about health and nutrition, see:
Test first, then conclude!
Let’s Talk Insulin
Milk Is Highly Insulinogenic
Thinner and Healthier
Butter and Cream and Coconut, Oh My!
Why Seed Oils Are Dangerous


Share

Let’s Talk Insulin

Back in March, I mentioned that I’d been doing some new things on the cooking and nutrition front. I imagined telling you all about it when I finished my revisions on The Tally Master and published the novel.

Well…the digital edition of The Tally Master released April 26, and the paperback roughly a month later in May. In fact, I’m now well started on my next book, with over 10,000 words and counting in the manuscript.

I must plead guilty to dragging my heels on blogging about food.

Why?

Because the biology of nutrition is amazingly complex and, at this point, I’ve read so much about it that when I discover new-to-me information, I’m connecting that information to large matrix of facts forming a landscape detailed and variegated enough that it’s challenging to communicate about it clearly and succinctly.

The overall picture has come into better and better focus for me. I really understand what I’m seeing, and it’s very consistent. But conveying what I see is harder than when I saw less, and the picture seemed simpler.

Yet it’s important stuff. Nutrition is one of the foundational elements determining whether a person merely survives…or thrives. So I’m going to make an effort to share the latest things I’ve been learning.

Today I want to talk about insulin.

Insulin is a hormone.

Hormones are the biochemical messengers of the body. Typically they are secreted by one set of cells, then transported in the bloodstream (or, sometimes, the lymphatic system) to another part of the body, where they bond to specific receptors there.

In the case of insulin, it is secreted by the beta cells of the pancreas, moves through the bloodstream, and affects nearly every cell in the body. Insulin is a master hormone. (Many other hormones possess a narrower window of effect.)

Insulin controls:
• energy storage
• cell growth
• cell repair
• reproduction
• and blood sugar levels

It is the last item on that list – blood sugar levels, technically blood glucose levels – that I’m going to focus on.

Let’s see how it works.

When you eat a carbohydrate – bread, pasta, cookies – your digestion breaks the large molecules down into glucose, which transfers through the lining of your small intestine into your bloodstream.

Your blood sugar rises.

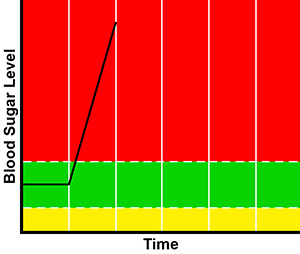
If you ate the cookies – or the cake – which has lots of sucrose and which doesn’t require much digesting to be broken into its component parts of fructose and glucose, your blood sugar spikes. Something like this:

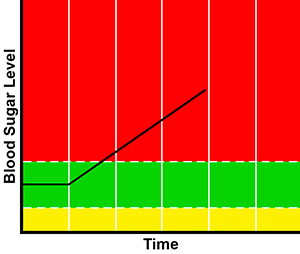
If you ate whole grain rye bread instead, your blood sugar rises more gradually, because all the fiber in the rye bread slows down the rate at which the carbohydrate molecules are broken down into glucose. But – and this is key – your blood sugar does rise. Something like this:

Your body is designed to operate within a very narrow range regarding blood sugar level.

Too little, and some critical operations that depend on glucose for their energy source won’t get enough of it.

This would be very bad.

But there are two important things to keep in mind regarding the potential scenario of low blood sugar.

1 • Foods are rarely pure concentrations of the three macro-nutrients: protein, fat, and carbohydrate.

All foods are made of a combination of these macro-nutrients, each in varying ratios. Butter is mostly fat, but every tablespoon has approximately .1 gram of protein and .01 gram of carbohydrate in it.

Meats are almost entirely protein and fat, but a 6-ounce serving of liver has 8 grams of carbohydrates. Not much, but some. Of course, vegetables and fruits are composed mostly of carbohydrates, all contained in a hefty fiber matrix along with huge packets of vitamins and minerals. But there’s no need to eat bread and pasta to prevent low blood sugar. You’ll get plenty of glucose without them!

2 • Your body can and will make glucose from certain amino acids.

This is why there is no minimum dietary requirement for carbohydrates, unlike – for example – the dietary requirement for protein or that for the essential fatty acids, linoleic and alpha-linolenic.

(Your body can make many, even most, of the amino acids that are the building blocks of protein. But it cannot make them all. There are 9 amino acids that you must get from food. The same is true for the fatty acids: most can be synthesized by your body, but not the two I named above, which must also be obtained from food.)

While I’m on the subject of what the human body can synthesize versus what it must receive from food, I want to touch on an obscure limitation possessed by people with Scandinavian, Innuit, Northern European, or sea coast ancestry. It has personal interest to me, since I’m half Swedish, and the other half comes from Scotland and England.

People with these northern roots often lack the enzymes that convert alpha-linolenic acid into EPA (eicosapentaenoic acid) and DHA (docosahexaenoic acid), two omega-3 fatty acids required for the proper functioning of the immune and nervous systems. The reason behind this lack is that their ancestors ate large amounts of cold-water fish, which supplied all the requisite EPA and DHA. Over time and across generations, the bodies of the northerners simply ceased to manufacture the enzymes that do the conversion.

EPA is found only in animal foods. DHA is present in some algae, but in very low amounts, too low to supply enough.

This explains to me why I became more and more chronically fatigued, and caught colds the instant I was exposed them, when I was in my early thirties and following a vegetarian diet. I was eating whole grains and legumes with a vengeance, but my health got worse and worse, until I added meat back into my repertoire.

However, to get back to my topic here: carbohydrates are not like the nine essential amino acids or the two essential fatty acids. Or even like EPA and DHA for northerners. Your body can make glucose, when it needs it. You don’t need to eat it.

Let’s now consider high blood sugar.

High blood sugar levels are nearly as bad for you as low.

High blood sugar acts essentially as a wrecking crew in your body, damaging your liver, your pancreas, your kidneys, your blood vessels, your brain, and your peripheral nerves. Just like a wrecking ball taking down a rickety tenement.

It’s critically important that your blood sugar level stay in the Goldilocks zone: not too low, not too high, but just right.

(Yes, I know that the Goldilocks zone typically refers to a donut of space around a star in which planets can possess water that is liquid. But the term fits here, too.)

I presented a graph representing your blood sugar level after eating dessert. And I presented another representing your blood sugar level after eating some “healthy” whole grain bread. (For the record, white bread made from refined flour spikes your blood sugar just like cake. Beware those crusty loaves of delicious French bread. Just sayin’.)

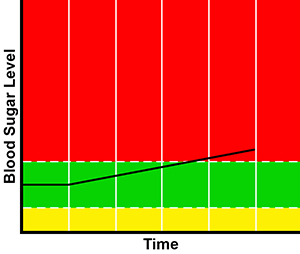
Let’s consider another scenario: your blood sugar after eating baked carrots drizzled with clarified butter or, perhaps, roasted eggplant drizzled with olive oil and sprinkled with some sea salt and freshly grated black pepper. That would look something like this:

Now let’s think about these three eating scenarios.

The first – eating a sugar-laden dessert – yields a sky high level of blood glucose, much like the big kapow of a wrecking ball slamming into a brick building, indeed. Lots of damage. Which your body then repairs. Usually qute well when you are young. Less well, and more slowly, when you are in your forties or older.

The second scenario – eating whole grain bread – also yields blood sugar levels that are quite high, but not quite as high as eating cakes, candy, or soda sweetened with high-fructose con syrup. It’s more like the men in a wrecking crew who are busily dissassembling the framing in a house: unbolting the beams that support the floor, pulling nails in the 2x4s of the thewalls, working hard to take the thing apart.

Again, your body repairs the damage. Almost without a hitch, if you are young. Less easily, when you are older.

In the third scenario – eating a vegetable – your blood sugar barely rises out of the “just right” Goldilocks zone at all. The damage done is minimal, the equivalent of a hinge loosened on a door or a roof tile blown off in the wind. Your body repairs the damage, and need not use much in the way of resources to do so. Your body can support this kind of repair for a long, long time.

So far, I’ve been talking more about blood sugar (which insulin is designed to regulate) than I have about insulin itself.

So let’s move on to insulin.

When you eat a food that causes your blood sugar to rise, those beta cells in your pancreas secrete insulin into your bloodstream. The insulin signals the cells in your body to pull the glucose out of your bloodstream and pack it away into storage.

Where is this storage?

The first storage spots are located in the liver and in the muscles. In both, the glucose is converted into a complex carbohydrate called glycogen.

Glycogen in the liver can easily be converted back into glucose and released back intot the bloodstream to correct low blood sugar when needed.

Glycogen in your muscles stays there to be used by your muscles when they do work. This muscular glygogen cannot be released back into your bloodstream. It stays in storage until your muscles use it up.

But, here’s the thing: your body has limited room for storing glycogen. Between your liver and your muscles, you store enough to allow you to work out hard for about 90 minutes.

What happens if you don’t work out? What if you mostly sit at your desk? And just putter around your house at the end of the day?

Well, some of the glycogen in your liver is probably used up to keep your blood sugar stable between meals. But the glycogen in your muscles simply stays there. Which means that when you eat your next piece of rye toast – or that leftover slice of birthday cake – most of your storage space is already full.

So where does the glucose go, when there’s no room at the inn?

It must not stay in the bloodstream. That would kill you fairly quickly. The muscles are full – they won’t take any more. The liver might have room for a little bit. But what happens to the rest?

Your liver converts the extra glucose into a saturated fat called palmitic acid. Some of the palmitic acid is then bundled together in groups of three to form triglycerides.

The triglycerides and fatty acids are then released into your bloodstream to be taken up by your fat cells. Your fat cells also have a limit to their storage capacity, but they are capable of taking in more than they are designed to hold. Your body doesn’t make more fat cells when you’ve got excess fatty acids and triglycerides to store. (The number of your fat cells is set during childhood and adolescence.) It just packs more into each of the existing fat cells.

Each fat cell stretches to accommodate the overpacking, and it becomes inflamed.

Eventually, the overpacked fat cell simply cannot take anymore. Bloated and inflamed, it puts up a “no vacancy” sign, and the excess triglycerides and fatty acids circulate in your bloodstream. Not good! (High levels of triglycerides in the blood are a known marker for cardiovascular disease.)

I’m going to return to my three scenarios – eating dessert, eating bread, eating vegetables – in a moment, putting insulin in the picture. But before I do that, let me say a few words about inflammation.

Inflammation in our bodies is regulated by the immune system. It is part of the repair cycle that follows an acute injury (a broken bone, a bruising blow, a burn or a cut) or an infection (by bacteria, a virus, or a parasite).

The immune system ramps up to fight and then to repair the damage. When the repair work is complete, the inflammation passes, and the immune system stands down. It’s ready, sure, for the next time. But in between fights, it’s idling. And while it’s idling, it’s doing low-level routine maintenance.

To use analogy: it’s tightening up that loose hinge, driving in an extra nail to that squeaking floorboard, stocking the freezer with chicken soup, painting the shutters and cleaning the windows, washing the dishes.

When your immune system is ramped up and fighting a fire – healing an acute injury or repelling an invader – it does not perform routine maintenance. These small jobs go undone until the next lull.

Chronic inflammation – which is part and parcel of overstretched fat cells – means your immune system is diverting some of its resources to fight a fire. Resources which are needed for routine maintenance. Necessary chores are being left undone as your immune system sends help to the inflamed fat cells.

Chronic inflammation – inflammaton that persists and has no end – is never a good thing. And when we are overweight, we are dealing with chronic inflammation. The more avoirdupois, the higher the level of inflammation.

One more note on inflammation: insulin itself is inflammatory. The longer it hangs out in your bloodstream to clean up glucose, the more it contributes to inflammation.

Okay, now let’s get back my three eating scenarios.

What happens with insulin after you eat cake?

The answer to this question is highly influenced by how insulin resistent your cells are. Typically, when you are young and haven’t been consuming sugar and grains for decades, your cells are not resistant. Which means your pancreas secretes a moderate amount of insulin, your liver and muscles take up glucose in the form of glycogen, and your blood sugar level returns to normal. That would look somoething like this:

That’s a pretty good scenario. Blood sugar isn’t elevated for long, which means the damage done is limited. Insulin didn’t stay in your bloodstream for long, so it didn’t contribute much toward creating inflammation. Your liver and muscles had room for all the glycogen. And then, because were a kid, you went outside and played tag with your friends, emptying much of the glycogen from your muscles and making room for more. Plus, since there was no insulin in your blood, some of the fat in your fat cells was emptied out and converted for energy as well, making room for storage there and ensuring that the cell didn’t become overpacked.

But when you’re 45…or 55…or 65, it doesn’t look like that.

It’s more like this:

Your cells are insulin-resistent from decades of eating sugar and grains, which means it takes more insulin and more time to pack away all that glucose. Your blood sugar is elevated for longer, damaging your body for the entire interval. Your insulin levels are elevated for longer, contributing to inflammation for the entire time. And while your bloodstream is brimming with insulin, your body is unable to withdraw fat from fat cells. (See Test first, then conclude! for more about the one-way door that insulin creates.)

On top of that, you had a stressful day at the office, and when you arrived home you were too exhausted to go to the gym to work out. So there’s not much room in your muscles for any glycogen. Your liver converts it to fatty acids and triglycerides, which are packed away into your fat cells. And these stretched fat cells are, by definition, inflamed fat cells. Which is why the tendonitis in your shoulder (or whatever chronic problem you’re fighting) refuses to heal.

The scenario with whole grain bread or brown rice isn’t much better:

Sure, your blood sugar does not spike as high, but it is still elevated for a long time, doing damage the whole while. Your pancreas must still secrete a lot of insulin, which contributes to inflammation. And while the insulin is present, your cells are forced to run on glucose (glycogen) for energy. No fat can be withdrawn from your fat cells to be processed into ketone bodies, the preferred food of the brain.

Now let’s consider the scenario in which you eat vegetables.

Because your blood sugar barely rises above the optimum level and does not stay there for long, not much damage is done. Furthermore, it does not take much insulin to bring it back down. Which means the insulin has little opportunity to cause inflammation. And, since insulin is not present for long, your body is soon free to withdraw fat from your fat cells and use it for energy.

Withdrawing fat from the fat cells means they get smaller. As they shrink in size, their degree of inflammation reduces. Eventually, if you keep allowing your body to use fat for fuel, the inflammation goes away entirely. Your immune system devotes more and more of its resources to normal repair and maintenance. Your spare tire shrinks. Your knees stop aching.

Let’s consider one more scenario.

Instead of eating just baked carrots drizzled in clarified butter, you also eat seared chicken breasts with a few olives as garnish.

The protein in the chicken and the oil in the olives (plus the fat in the clarified butter and the fiber in the carrots) will cause the carbohydrates in the carrots to be broken down and assimilated even more gradually, so that your blood sugar might never leave the Goldilocks zone at all. Check it out!

I want to visit one more tangent before I conclude: nutrient density.

What does the term mean?

The proportion of nutrients present in a food in comparison to the calories it provides. The nutrients of primary interest are vitamins, minerals, phytonutrients, and the nine essential amino acids. The more nutrient-dense a food is, the more it supports optimal functioning and health.

At one end of the scale are sugar and white flour. They provide no vitamins, no minerals, and no amino acids at all. They are truly empty calories. Sugar is merely glucose plus fructose, and both of these substances rapidly unhook from one another under digestion, the glucose yielding all the damage I’ve been discussing above.

White flour, when digested, also yields glucose, resulting in damage nearly identical to that produced by sugar, and providing no nutrients.

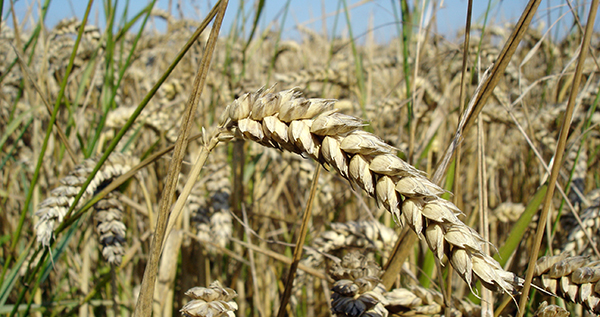
But whole grains are not much better.

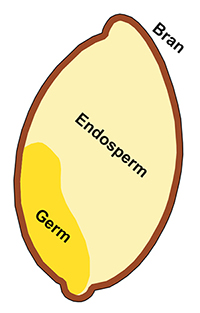
Let’s take a look at the structure of a grain kernel.

The germ and the bran are where you find vitamins, minerals, and fiber. The endosperm provides energy – calories – that allows the seedling plant to grow. (The plant’s nutrients will come from from the soil through its roots or be synthesized by the plant from sunlight, carbon dioxide, and water.)

White flour is made from the endosperm. The bran and the germ are discarded.

Whole grain flour keeps the bran and the germ, but here’s the catch: the bulk of even whole grain flour is provided by the nutrient-free endosperm, and most of the nutrients present in the bran and the germ are not bio-available. That is, they are chemically bound so tightly that digestion cannot unhook them to pass them through the lining of the small intestine and into our bodies where they can be used.

Even worse, the phytates in the bran (present to protect the seed) bind calcium and other minerals from other foods present in the digestive tract and carry these valuable substances out of the body altogether.

Grains are not nutrient-dense.

And every vitamin or mineral that is present in whole grains is present in far larger amounts and with greater bio-availability in vegetables, fruits, eggs, seafood, and meat.

Vegetables, fruits, eggs, seafood, and meat are nutrient dense.

I’ll be posting more of my latest revelations about food and nutrition over the coming weeks and months. In the meantime, if you’d like to delve deeper on your own, I can recommend two books.

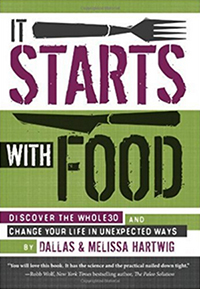
It Starts with Food by Dallas and Melissa Hartwig is an excellent resource with solid information presented in a lighthearted, friendly way.

It’s an easy introduction to some key principles, including much of the information I’ve discussed in this post, plus a lot more.

 
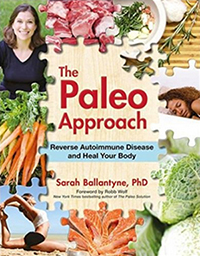
The Paleo Approach by Sarah Ballantyne is a dense tome written by a scientist, chronicling in exquisite detail the complex workings of the human gut and how it interfaces with food and nearly every other system in the body.

The information is rock solid, and if you are dealing with any complex and recalcitrant health issues, you may well need the specifics that Ballantyne provides.

The book is written for the layperson, but it is not an easy read. Explanations are comprehensive and extensive and detailed. The author covers every last tiny interaction that takes place in the intricate chain that permits molecules from food to pass through the intestinal membrane, and exactly how certain foods muck up the works for many people, especially the immune system.

I tend to use the index to research specific topics. I read paragraphs, even whole segments within chapters. But I rarely read an entire chapter at once, and I haven’t yet read the entire book from cover to cover.

It’s a great resource, but… 😉

For more from my blog on this topic, see:
Thinner and Healthier
Milk Is Highly Insulinogenic
Butter and Cream and Coconut, Oh My!
Why Seed Oils Are Dangerous
Why Calcium Isn’t Enough


Share

Milk Is Highly Insulinogenic

When I first encountered that word, insulinogenic, I completely garbled its pronunciation. In-su-lino-whadya-hooya? What the Hades?

In-su-lino-gen-ic. Right.

So what does it mean? It means something that stimulates the production of insulin. In the context of milk, it means that milk produces a much bigger insulin response in the human body than it has any right to, given the amount of carbohydrates present in milk, mostly in the form of the milk sugar lactose. Milk punches so high above its carb content that it produces an insulin response like that of white bread!

Why is this of concern to me?

Well…when I was diagnosed with osteoporosis, I really stepped up my milk intake. I didn’t know that milk was insulinogenic, and I did know that my bones could use all the help they could get.

I found it difficult to drink 4 cups a day, so I began adding a pinch of stevia along with cocoa powder to my evening milk. Yum! It tasted like dessert!

Meanwhile, my weight had been creeping up. There seemed to be several obvious reasons for that. I had two health problems in sequence that kept me away from the gym for nearly 2 years. I’d allowed pasta back into my menu, perhaps once every 10 days. And I was getting into my middle fifties. I didn’t like the upward creep, naturally.

I was relieved when I resolved my health problems enough to return to the gym in May 2016. And I rededicated myself to kicking the pasta back out of my menu. Remembering when I tried Phil Maffetone’s 2-week test with such stellar results, I expected to see the start of a drop in weight. Imagine my surprise when I continued to gain!

“How can this be?” I asked myself. “I’m swimming three times a week. Lifting weights two or three times a week. I’m eating fewer than 50 grams of carbs per day. My calorie intake is modest; I’ve never been a big overeater. What the Hades gives?”

This unfortunate upward trend continued. “I wonder if it is the milk?” I asked myself.

You would think I might have done some more reading about milk, but I didn’t. I was attached to my milk. Besides, it was healthy milk from grass-fed cows lovingly tended by my local farmer, who had managed the apprentices at the famous Polyface Farm. It couldn’t be the milk!

But I suspected it was.

I tried to cut down and found that I couldn’t. Oh, oh! Was I addicted to milk?

Finally, in November 2016, after months of “quitting milk” and then “I’ll just have one last big glass tonight,” I decided I needed support. I’d visited a website devoted to the Whole30 way of eating some while back and noted that the Whole30 was the way I wanted to eat and that the site had forums. A forum sounded like exactly what I needed.

And it was!

Hanging out with a bunch of others who were eating the same way I wanted to eat – and posting on my progress – enabled me to give up the milk and ditch the last remnants of pasta. I saw almost immediate results. I had an annual exam scheduled with my doctor 3 weeks after I started my Whole30, and I found I’d lost 7 pounds. Without counting calories. Just by waving goodbye to milk. (Since I doubt my previous once or twice a month indulgence in pasta was the key to my previous weight gain.)

I also found my energy levels increasing and my mood improving. I felt good!

After 30 days of no milk (and no grains, no legumes, and no sugar – none), I’d lost 9 pounds. I decided to carry on as I was. I liked how I felt, I liked all the new meals I’d learned how to cook, I liked everything about my new routine. So far, I’m still losing weight, 20 pounds and counting at about one-and-a-half pounds per week. My yoga pants are beginning to get too loose!

It was only after these stellar results that I did a little researching on milk and learned that it is highly insulinogenic. Even my healthy milk from a local dairy farm run by a super careful and informed grass farmer.

When I was younger, I could get away with eating insulinogenic foods. At least, they didn’t pack the pounds on me, although – looking back – they did have other more subtle negative effects. But as I’ve gotten older, insulin in my bloodstream started to have the effect that it does in many, acting as a one-way gatekeeper that packs fat into the fat cells and doesn’t allow any withdrawals of that fat for energy. No more milk for this lady!

But what will I do for my osteoporosis?

That’s another blog post. Which I will write. I also plan to share more about my adventures with the Whole30 in future posts. But this is enough for now. 😀

For more about the effects of insulin, see:
Test first, then conclude!

For more on nutrition, see:
Why Seed Oils Are Dangerous
Thinner and Healthier
Butter and Cream and Coconut, Oh My!
Can’t wait for my future posts to learn more about the Whole30? See:
Whole30.com


Share

Quiche sans Crust

Swedish apronI’ve always loved quiche, but it’s been decades since I’ve made any in my kitchen. I’m not sure why I dropped it from my repertoire. Honestly, I’m not sure it was ever in my repertoire. A shame.

But last week, my daughter who hates eggs announced that she’d been served quiche at a friend’s house and really liked it. I leapt on my opportunity to get some luscious, farm-fresh eggs into my beloved child. 😉

Since it has been many months since I’ve posted a recipe, I’m leaping on the chance to do that as well.

It’s been years since the food researchers conceded that they were wrong about the cholesterol in eggs. It’s not harmful, never has been harmful, and you can eat as many eggs as you want. Actually, they conceded that the cholesterol in eggs is not harmful and has never been harmful, but they wussed out of reversing their recommendation to limit eggs. It just looks so bad. Heaven help their reputations!

So what’s good about the nutrition in eggs?

Just about everything. They are rich in vitamins, especially the important fat-soluble A and D.

(Vitamin A is necessary for healthy skin, healthy mucous membranes, proper immune system function, healthy eyes, and good vision. Vitamin D is essential for healthy bones and teeth, the proper functioning of the immune system and the brain and nervous system, regulating insulin levels, support of the lungs and cardiovascular system, and preventing cancer.)

Eggs contain ample high-quality protein. They are an excellent source of EPA and DHA – long-chain fatty acids that are vital to the development of the nervous system in young children and to the preservation of mental acuity in adults. Eggs are truly a complete nutritional package, provided they come from chickens raised on pasture, where they scratch for bugs and worms.

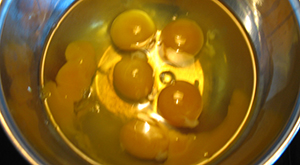
quiche eggsChickens sitting in vast warehouses produce eggs that lack some of the superlative benefits of pasture-raised birds. Their omega-6 to omega-3 ratio is 20:1 instead of the optimum 1:1. And you can see from simply looking at the egg yolks – pale lemon yellow versus rich orange – that warehoused chickens produce eggs with less beta-carotene. They also have 28% less vitamin A.

But enough of weighing the pros and cons of eggs. What about my quiche?

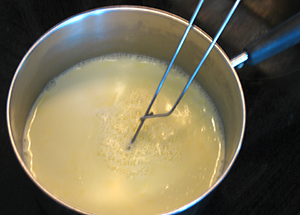
quiche milkWhen I made it for my family, I made two, one crustless and one with a crust. That way I can eat low-carb, while my kids and husband get the kind of taste sensation they prefer. The recipe below is for one crustless quiche. You can double it, if you want to make a pair like I did. Or you can pour it into a crust, if you prefer your quiche with wheat. 😀

Ingredients

quiche cheesedab of butter
2 cups milk
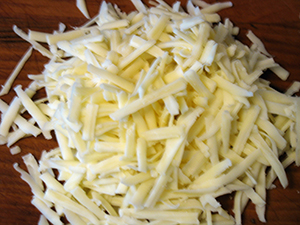
1/2 cup grated cheddar cheese
4 slices of deli ham
3 eggs
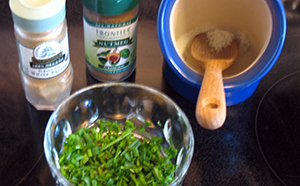
1/2 teaspoon Celtic sea salt
dash of white pepper
dash of nutmeg
1 teaspoon minced fresh chives

Directions

1Make sure you have a rack in the middle of the oven, and either remove the second one or place it below the middle one. Pre-heat the oven to 375F.

quiche spices2Smear the butter all over the interior of a 9-inch glass pie dish.

3Heat the milk in a saucepan, stirring constantly, until a few tendrils of steam start to rise from its surface. Then set it aside, off the heat.

4Grate the cheddar cheese, if you have not already done so. (I do my grating after heating the milk, to give the milk a chance to cool a little.)

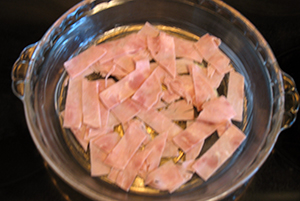
quiche ham5Cut the deli ham in strips, roughly half an inch wide and 2 inches long.

6Crack the eggs into a bowl and whisk them thoroughly.

7Add the salt, white pepper, nutmeg, and chives to the eggs and mix well.

8Lay the ham strips all over the bottom of the pie dish.

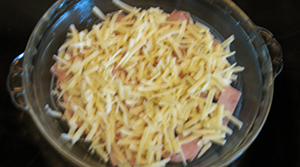
quiche ham and cheese9Cover the ham with the grated cheese.

10Pour the egg mixture into the milk and mix thoroughly.

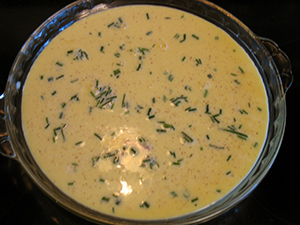
11Gently pour the egg-milk mixture over the cheese and ham.

quiche uncooked12Getting that full pie dish into the oven without spilling it is tricky! Take it slow and use pot lifters, so that all your attention can be on the liquid level and not on your vulnerable fingers.
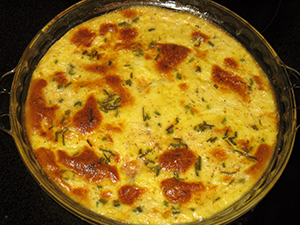
13Let the quiche bake for 45 – 50 minutes.

quiche cooked14Test for doneness by inserting a butter knife into the edge of the quiche custard. The rubric says that if it comes out clean, the quiche is done. I say: know your oven! The knife came out clean from last week’s quiche at 40 minutes, but it could have used another 5 minutes. This week’s quiche generated a knife that never came out clean. After 55 minutes, I took it out of the oven anyway. I should have taken it out 5 minutes earlier. Both week’s quiches were good, but not at the ultimate sweet spot.

quiche slice15Let the quiche cool to lukewarm – about 15 minutes – and serve. Cut the quiche to create 6 pieces.

More recipes:
Butternut Soup
Baked Apples
Coconut Chocolates


Share

Chocolate Chip Cookies

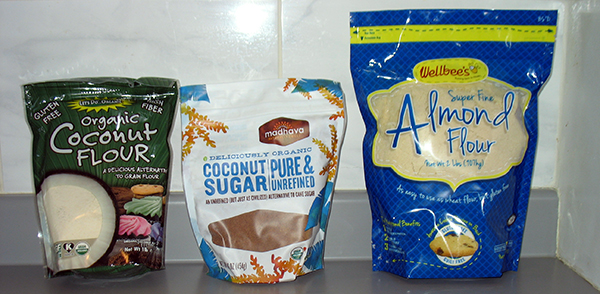
Cookies - alternative floursI’ve wanted to try baking cookies using alternative flours for a while now. My body seems to tolerate wheat less and less well as the years go by. I was hoping that coconut flour and almond flour would be friendlier choices for me.

Lately I’ve been inspired by the dinner recipes of Danielle Walker. I’m sure her recipes work perfectly without any tinkering – she seems to test them thoroughly. But somehow I have not yet managed to follow any of them exactly. My inner cook comes out, and I make a few changes. 😉

I decided to see what Danielle had to offer for cookies. You can find her recipe here. I stuck pretty closely to it, but not exactly. However, I was delighted by my results. These cookies are super delicious – delicate and yet slightly chewy, and they don’t upset my tummy!

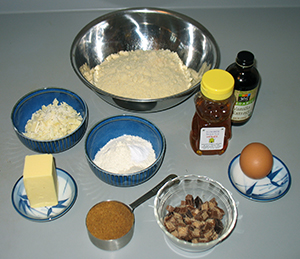
Ingredients

Cookies - ingredients1/4 cup butter
1/4 cup coconut palm sugar
1 teaspoon cane sugar
2 tablespoons honey
1 large egg
2 teaspoons vanilla
1-1/2 cups almond flour
2 tablespoons + 1 teaspoon coconut flour
1/2 teaspoon baking soda
1/2 teaspoon Celtic sea salt
1/2 chocolate chips

Directions

In a food processor, cream together the butter, coconut sugar, cane sugar, honey, egg, and vanilla until well mixed, about 15 seconds.

(Creaming the butter and sugar the old-fashioned way – with a fork – would likely work equally well. I used the food processor for my first attempt. I may not bother rousting it out on my second.)

Add the almond flour, coconut flour, baking soda, and salt to the processor and process again until well mixed, about 30 seconds. Scrape down the sides of the processor, if needed, to get all the dry ingredients mixed in.

(I tasted my batch at this point and decided that it was not quite sweet enough. That’s where the “extra” teaspoon of cane sugar – listed above in the ingredients – came from. I also assessed the dough and felt that it was a little too liquid. So I added the “extra” teaspoon of coconut flour – also listed above in ingredients.)

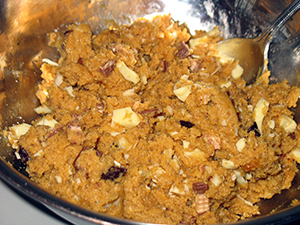
Cookies - the doughTurn the dough out into a mixing bowl, add the chocolate chips, and stir by hand until they are well mixed in.

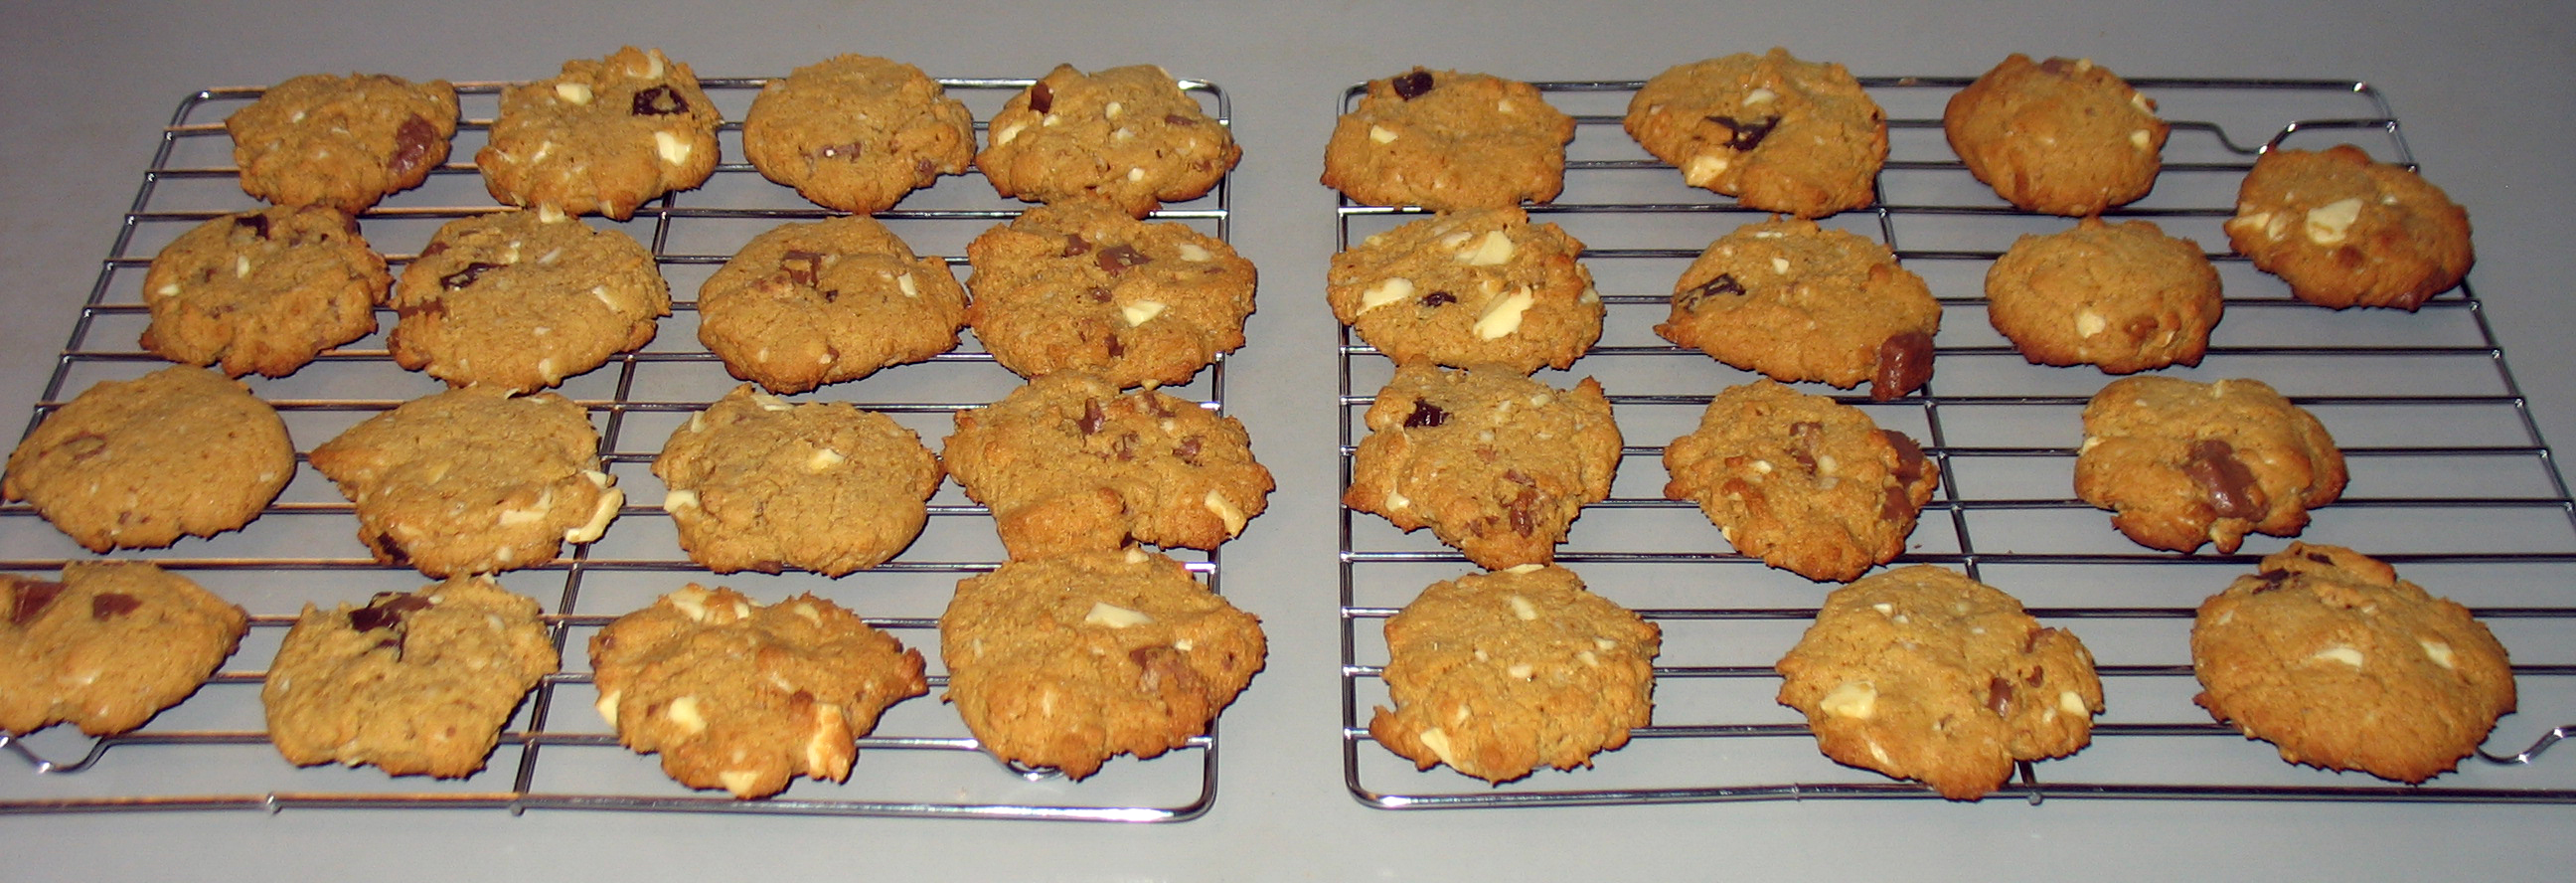
(My batch in the photos likely looks a little strange to you. That’s because we had no chocolate chips in the house, and my husband and my daughter were out with car, shopping. So I improvised. I dug through the Halloween candy in the freezer and pulled out a mini chocolate bar, two kitkat bars, and a bar of white chocolate. I chopped them up and used them in place of the chocolate chips.)

Preheat the oven to 350°F.

Line two baking sheets with baking parchment.

Cookies - on baking sheet

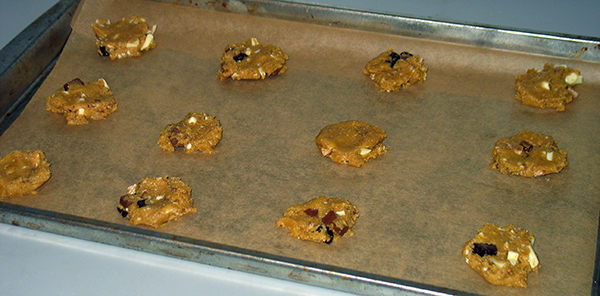
Drop the cookie dough by spoonfuls on the baking sheets. Flatten the cookies, because they will not change shape much while baking.

Bake 9 minutes and then cool on a rack. Makes 29 cookies.

More recipes:
Arugula Beef
Butternut Soup
Baked Apples
Coconut Chocolates

Cookies - baked


Share