Blueberry Crumble (Grain-free)

My daughter and I have been baking a lot lately. I need to avoid wheat and other grains, so our baking is grain-free when possible. Just last week, we found ourselves with too many blueberries in the fridge, so we went looking for a recipe to help us use them up.

Our first batch of blueberry crumble was good, but we saw room for improvement.

We wanted a thinner crust, and we thought adding lemon juice to the filling would add punch to its flavor. Plus we wanted more filling.

The recipe below includes our adjustments. When the adjusted crumble came out of our oven, we thought it was just about perfect!

INGREDIENTS

Shortbread Crust

1 cup coconut flour
3/4 cup arrowroot powder
1/4 teaspoon salt
1 teaspoon vanilla
1/3 cup maple syrup
1/2 cup butter

Blueberry Filling

2-3/4 cups fresh blueberries
3 tablespoons maple syrup
1 tablespoon arrowroot powder
1/4 teaspoon salt
3/4 teaspoon lemon juice

Crumble Topping

1/3 of the shortbread mixture from the crust above
1/4 cup walnuts, minced

DIRECTIONS

1 • Pre-heat oven to 350°F. (Know your oven! Ours runs cold, so 350°F in a recipe equals 365°F on our dial.)

2 • Grease a 7” x 12” glass baking dish with butter, line with baking parchment, and set aside.

3 • In a medium mixing bowl, combine the ingredients for the crust and cut them together with a pastry cutter until a dough is formed. Reserve 1/3 of the mixture for the crumb topping. Press the other 2/3 of the mixture into the bottom of the prepared baking dish. Bake for 9 minutes, until golden.

4 • While the crust is baking, create the filling. Place all the filling ingredients into a medium saucepan. Cook over medium heat, gently pressing the berries to break them down. Cook for 7 to 9 minutes until the syrup is thick and no large berries remain. Take off the heat and set aside.

5 • Once the crust is baked, let it cool 10 minutes. While it cools, add the minced walnuts to the crumble dough.

6 • Spread the filling over the crust.

7 • Sprinkle the crumble mixture by hand over the filling as evenly as possible. Press it gently in place.

8 • Bake for 20 minutes.

9 • Let cool for 10 minutes. Then cut into bars and serve. The bars will be delicate, but delicious.

For more recipes, see:
Coconut Chocolates
Apples á la Ney-Grimm
Chocolate Chip Cookies


Share

Kimchi

Ever since I stumbled on the recipe for lacto-fermented kimchi in Nourishing Traditions, I’ve wanted to make it.

But I figured I should try basic sauerkraut first. And then lacto-fermented carrots seemed like a more accessible taste-treat. Next I went on a beet kvass tear. And then I stayed within that safe, known perimeter until I drifted away from a regular schedule of lacto-fermentation.

But now I’m intent on always having a selection of lacto-fermented foods on hand.

So I tackled a mild version of kimchi!

Here’s the recipe:

Kimchi (Korean Sauerkraut)

1 head Napa cabbage, cored and shredded
1 bunch green onions, chopped
1 cup carrots, grated
1 daikon radish, grated
1 tablespoon fresh ginger, minced
3 cloves garlic
1/2 teaspoon red pepper flakes (optional)
1 tablespoon sea salt
4 tablespoons whey

1 • Remove the core of the cabbage and discard. Shred the cabbage leaves.

I discovered I preferred European sauerkraut when shredded by putting it through the grating mechanism of my food processor. But I decided to try slicing the cabbage narrowly for kimchi. I’ll see what I think of that before I try something different.

2Chop the green onions. Peel and mince the ginger. Put the garlic through a garlic press.

3Grate the carrots and daikon radish by putting them through the grating mechanism of the food processor.

4Put all the ingredients in a bowl and knead them as you might knead bread dough.

All the recipes I’d seen directed me to pound the mixture, and that is how I’d prepared European sauerkraut. I found it took what seemed like forever, and I was always wondering if I’d pounded it enough.

Recently I saw another recipe which recommended the kneading method. I liked that much better. It was easy, much faster, and I could tell when the whole batch was sufficiently kneaded—that there weren’t lingering bits in the middle that remained hard.

5Place the mixture in two quart-sized, wide-mouth canning jars. Press it down well, until the juices rise enough to cover the vegetables. Place fermentation weights atop to keep the vegetables submerged.

I possessed no fermentation weights when I first tried lacto-fermenting cabbage. I didn’t even know there was such a thing. And all of my batches turned out fine. But now that I do know, I’m using them. Why risk having to throw out a batch?

6Twist the lids on the canning jars to finger tight. Keep at room temperature (but out of sunlight) for 3 days. Then store in the refrigerator (or a root cellar).

When I was making European sauerkraut, the flavors needed about 6 weeks to develop. The sauerkraut just tasted bland before then. But by 6 weeks, it was delish!

I expect the same to be true of my kimchi. I omitted the optional red pepper flakes, because I want flavor, not heat. The nibble I tasted when I put my jars in the fridge did taste bland. But sometime in October, I’ll be in for a treat.

I’ll post a note here to let you know if it’s as good as I think it will be. 😀

For more lacto-fermented recipes, see:
Lacto-fermented Sauerkraut
Lacto-fermented Corn
Pickled Greens
Beet Kvass


Share

Quiche sans Crust

Swedish apronI’ve always loved quiche, but it’s been decades since I’ve made any in my kitchen. I’m not sure why I dropped it from my repertoire. Honestly, I’m not sure it was ever in my repertoire. A shame.

But last week, my daughter who hates eggs announced that she’d been served quiche at a friend’s house and really liked it. I leapt on my opportunity to get some luscious, farm-fresh eggs into my beloved child. 😉

Since it has been many months since I’ve posted a recipe, I’m leaping on the chance to do that as well.

It’s been years since the food researchers conceded that they were wrong about the cholesterol in eggs. It’s not harmful, never has been harmful, and you can eat as many eggs as you want. Actually, they conceded that the cholesterol in eggs is not harmful and has never been harmful, but they wussed out of reversing their recommendation to limit eggs. It just looks so bad. Heaven help their reputations!

So what’s good about the nutrition in eggs?

Just about everything. They are rich in vitamins, especially the important fat-soluble A and D.

(Vitamin A is necessary for healthy skin, healthy mucous membranes, proper immune system function, healthy eyes, and good vision. Vitamin D is essential for healthy bones and teeth, the proper functioning of the immune system and the brain and nervous system, regulating insulin levels, support of the lungs and cardiovascular system, and preventing cancer.)

Eggs contain ample high-quality protein. They are an excellent source of EPA and DHA – long-chain fatty acids that are vital to the development of the nervous system in young children and to the preservation of mental acuity in adults. Eggs are truly a complete nutritional package, provided they come from chickens raised on pasture, where they scratch for bugs and worms.

quiche eggsChickens sitting in vast warehouses produce eggs that lack some of the superlative benefits of pasture-raised birds. Their omega-6 to omega-3 ratio is 20:1 instead of the optimum 1:1. And you can see from simply looking at the egg yolks – pale lemon yellow versus rich orange – that warehoused chickens produce eggs with less beta-carotene. They also have 28% less vitamin A.

But enough of weighing the pros and cons of eggs. What about my quiche?

quiche milkWhen I made it for my family, I made two, one crustless and one with a crust. That way I can eat low-carb, while my kids and husband get the kind of taste sensation they prefer. The recipe below is for one crustless quiche. You can double it, if you want to make a pair like I did. Or you can pour it into a crust, if you prefer your quiche with wheat. 😀

Ingredients

quiche cheesedab of butter
2 cups milk
1/2 cup grated cheddar cheese
4 slices of deli ham
3 eggs
1/2 teaspoon Celtic sea salt
dash of white pepper
dash of nutmeg
1 teaspoon minced fresh chives

Directions

1Make sure you have a rack in the middle of the oven, and either remove the second one or place it below the middle one. Pre-heat the oven to 375F.

quiche spices2Smear the butter all over the interior of a 9-inch glass pie dish.

3Heat the milk in a saucepan, stirring constantly, until a few tendrils of steam start to rise from its surface. Then set it aside, off the heat.

4Grate the cheddar cheese, if you have not already done so. (I do my grating after heating the milk, to give the milk a chance to cool a little.)

quiche ham5Cut the deli ham in strips, roughly half an inch wide and 2 inches long.

6Crack the eggs into a bowl and whisk them thoroughly.

7Add the salt, white pepper, nutmeg, and chives to the eggs and mix well.

8Lay the ham strips all over the bottom of the pie dish.

quiche ham and cheese9Cover the ham with the grated cheese.

10Pour the egg mixture into the milk and mix thoroughly.

11Gently pour the egg-milk mixture over the cheese and ham.

quiche uncooked12Getting that full pie dish into the oven without spilling it is tricky! Take it slow and use pot lifters, so that all your attention can be on the liquid level and not on your vulnerable fingers.

13Let the quiche bake for 45 – 50 minutes.

quiche cooked14Test for doneness by inserting a butter knife into the edge of the quiche custard. The rubric says that if it comes out clean, the quiche is done. I say: know your oven! The knife came out clean from last week’s quiche at 40 minutes, but it could have used another 5 minutes. This week’s quiche generated a knife that never came out clean. After 55 minutes, I took it out of the oven anyway. I should have taken it out 5 minutes earlier. Both week’s quiches were good, but not at the ultimate sweet spot.

quiche slice15Let the quiche cool to lukewarm – about 15 minutes – and serve. Cut the quiche to create 6 pieces.

More recipes:
Butternut Soup
Baked Apples
Coconut Chocolates


Share

Chocolate Chip Cookies

Cookies - alternative floursI’ve wanted to try baking cookies using alternative flours for a while now. My body seems to tolerate wheat less and less well as the years go by. I was hoping that coconut flour and almond flour would be friendlier choices for me.

Lately I’ve been inspired by the dinner recipes of Danielle Walker. I’m sure her recipes work perfectly without any tinkering – she seems to test them thoroughly. But somehow I have not yet managed to follow any of them exactly. My inner cook comes out, and I make a few changes. 😉

I decided to see what Danielle had to offer for cookies. You can find her recipe here. I stuck pretty closely to it, but not exactly. However, I was delighted by my results. These cookies are super delicious – delicate and yet slightly chewy, and they don’t upset my tummy!

Ingredients

Cookies - ingredients1/4 cup butter
1/4 cup coconut palm sugar
1 teaspoon cane sugar
2 tablespoons honey
1 large egg
2 teaspoons vanilla
1-1/2 cups almond flour
2 tablespoons + 1 teaspoon coconut flour
1/2 teaspoon baking soda
1/2 teaspoon Celtic sea salt
1/2 chocolate chips

Directions

In a food processor, cream together the butter, coconut sugar, cane sugar, honey, egg, and vanilla until well mixed, about 15 seconds.

(Creaming the butter and sugar the old-fashioned way – with a fork – would likely work equally well. I used the food processor for my first attempt. I may not bother rousting it out on my second.)

Add the almond flour, coconut flour, baking soda, and salt to the processor and process again until well mixed, about 30 seconds. Scrape down the sides of the processor, if needed, to get all the dry ingredients mixed in.

(I tasted my batch at this point and decided that it was not quite sweet enough. That’s where the “extra” teaspoon of cane sugar – listed above in the ingredients – came from. I also assessed the dough and felt that it was a little too liquid. So I added the “extra” teaspoon of coconut flour – also listed above in ingredients.)

Cookies - the doughTurn the dough out into a mixing bowl, add the chocolate chips, and stir by hand until they are well mixed in.

(My batch in the photos likely looks a little strange to you. That’s because we had no chocolate chips in the house, and my husband and my daughter were out with car, shopping. So I improvised. I dug through the Halloween candy in the freezer and pulled out a mini chocolate bar, two kitkat bars, and a bar of white chocolate. I chopped them up and used them in place of the chocolate chips.)

Preheat the oven to 350°F.

Line two baking sheets with baking parchment.

Cookies - on baking sheet

Drop the cookie dough by spoonfuls on the baking sheets. Flatten the cookies, because they will not change shape much while baking.

Bake 9 minutes and then cool on a rack. Makes 29 cookies.

More recipes:
Arugula Beef
Butternut Soup
Baked Apples
Coconut Chocolates

Cookies - baked


Share

London Broil at Casa Ney-Grimm

londo 600 pxI adore the savor of London broil, but for decades I didn’t realize how easy it is to make at home. Now that I prefer to serve grassfed meat to my family, I’ve discovered that London broil is one of the easiest to find and most reasonably priced cuts of grassfed beef available. Here’s how I make it.

Ingredients
london marinade2 to 2-1/2 pounds London broil beef

Marinade
4 garlic cloves, minced or put through a garlic press
4 tablespoons balsamic vinegar
3 tablespoons brown mustard
1-1/2 tablespoons Worcestershire sauce
1 tablespoon soy sauce
1 teaspoon dried oregano
1 teaspoon dried basil
1 teaspoon dried thyme
1/2 teaspoon dried red pepper flakes
2/3 cup olive oil

london broilerDirections
Whisk the marinade ingredients together in a bowl.

Put the meat in a resealable plastic bag. Pour the marinade into the bag. Seal the bag, pressing out the air.

Put the bag in a shallow dish in the refrigerator. Marinate for 8 hours or over night. Turn the bag twice.

When ready to cook, remove the meat from the marinade and let the liquid drip off it. Discard the marinade.

Place the meat on a broiling pan and set it under the broiler. I use the second rack slot from the broiler coils, about 4 inches away. Broil the first side for 10 minutes. (The meat in my photo was broiled for 11 minutes, which was a bit too long. It was still scrumptious; I just prefer mine more rare.) Flip the meat and broil the second side for 9 minutes.

london cookedTransfer the meat to a cutting board. Let it rest for 10 minutes. Cut it diagonally across the grain in thin slices. Serve.

More recipes:
Butternut Soup
Apples á la Ney-Grimm
Pie Crust Cookies


Share

Parsnip Turnip Purée

rutabagas and parsnips

I’ve tried cooking this combination – parsnips and turnips – two ways. They’re both good, but distinctly different as an eating experience. The broth-cooked method yields a smoother, almost sweeter result. The roasted method delivers a denser, starchier one. I’m going to share them both.

Ingredients

root puree with broth3 large turnips or rutabagas
8 – 10 parsnips
1/4 to 1/2 cup butter
3/4 teaspoon Celtic sea salt
3 cups chicken broth (for broth version; omit for roasted version)

Broth Directions

Pour the chicken broth into a large pot and warm over medium heat.

Scrub the vegetables in clear water. Then peel them and cut into bite-sized chunks. Add the vegetables to the chicken broth. Cover and simmer for 20 to 30 minutes, until the veggies are fork tender. Take the pot off the heat and let it cool 10 minutes.

Pour the whole mixture into a food processor. Add the butter and salt and process until smooth and creamy. Serve.

cubed rutabagas and parsnips

Roast Directions

Scrub the vegetables in clear water. Then peel them and cut into bite-sized chunks.

Put the chopped parsnips in one baking dish, the turnips in another.

Melt the butter and drizzle it over both portions of vegetables. Cover both baking dishes and place them in a 350ºF oven.

Bake the turnips for 45 minutes, check them for tenderness, and pull them out of the oven when they are fork tender.

roots pureeBake the parsnips for 90 minutes, check them for tenderness, and pull them out of the oven when they are fork tender.

Place both vegetables, the salt, and more butter into a food processor. Process until smooth. Re-heat the purée and serve.

More recipes:
Chicken Stock
Coconut Salmon
Sauerkraut
Arugula Beef


Share

I Love Soup!

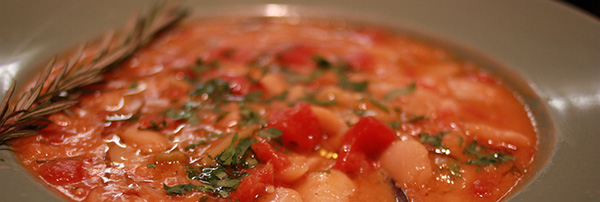
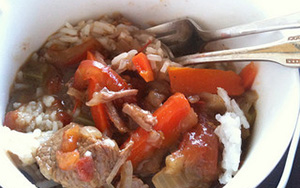
Meat and fish stocks have been a staple of traditional cuisines for a long time. Consider the Japanese breakfast of fish broth with rice. French onion soup. Korean sol long tang (beef broth and thinly shaved beef brisket). Russsian chlodnik (shrimp soup).

Lima Bean Soup

Yum! I want some right now! 😀

No question that a homemade soup based on homemade stock is delicious. Makes me wish for a do-over of my winter cooking this year. I didn’t make nearly as much soup as I’d intended.

a book of foods from traditional peoples from around the world
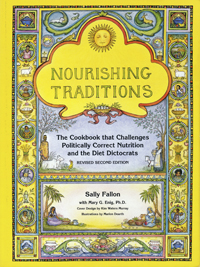
But homemade soup stock is great for a bunch other reasons too. Most of which I didn’t know before I read the book Nourishing Traditions.

Broth Is Super Nutritious

Okay, I “knew” soup was nutritious. You hear it all the time. But I didn’t know why. And, honestly, most commercial soups aren’t, because they’re made with cheap hydrolyzed vegetable protein as a base instead of actual beef stock or chicken stock.

So why is meat and fish broth so good for us? Two reasons.

All the minerals present in bone, cartilage, and marrow are present in the broth, especially the biggies of calcium, magnesium, and potassium.

These minerals, plus those of any vegetables you’ve included in your stock-making, are present as electrolytes, a form that is particularly easy for the body to assimilate – that is, your body will take in more of them, more easily.

Broth Is Hydrophilic

“What?” I hear you say. I said it too!

Hydrophilic means it attracts liquids. Most raw foods are hydrophilic. When we eat them, the particles attract the digestive juices present in the gut, causing the food particles to be rapidly and thoroughly digested.

But most cooked foods are hydrophobic. That is, they repel liquids. And repel the digestive juices. Which means your body has to use (and make) more enzymes to accomplish digestion, and it takes longer.

The gelatin in stock possesses the unusual property that even after heating it is hydrophilic. It attracts liquid. So all those lovely vegetable chunks and meat pieces in your soup? They’re coated in broth and thus become far easier to digest.

When I was a young thing, the emphasis placed by my elders on digestibility seemed incomprehensible. You swallow your food; it’s digested; end of story. After I’d experienced indigestion – ouch! – their concern made more sense. And after I’d experienced years of a painful gut from eating soy products such as tofu, digestibility seemed paramount! (All better, BTW, now that I’ve been avoiding soy for nearly a decade.)

Broth Is Protein Sparing

I said “what?” to that one as well.

Here’s the thing: all living cells are composed of protein. Or, put another way, protein is essential to life.

Proteins are assembled from amino acids. And our bodies can build many of the amino acids we need. But not all. There are eight of them that must be supplied by our diet. All essential eight are present in their most assimilable form in meat.

Roast Beefbeef stewBut meat is expensive. Plus, we now know that cooked meat is hydrophobic, which reduces the bio-availability of those amino acids.

So how does this protein sparing thing work?

It has to do with the protein in broth gelatin. The protein in broth gelatin is not complete. That is, it does not contain all eight essential amino acids. In fact, it’s mostly composed of two: arginine and glycine.

But meat broth (and fish broth) gelatin has another special property. It allows the body to more fully utilize the complete proteins that are eaten with it.

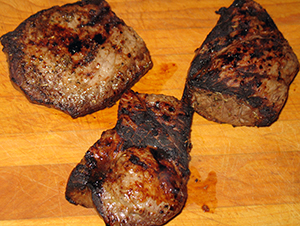
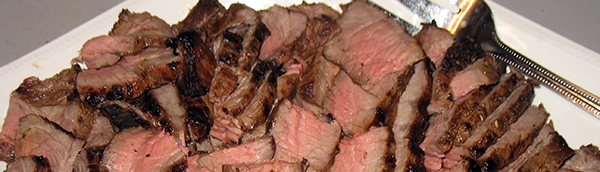
In other words, the chunks of beef in a beef stew (with its broth) will give you much more protein than the same amount of beef sliced from a roast. For those of us on a budget, soup with homemade stock is our friend. 😀

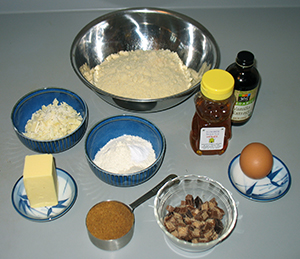
So how do you make soup stock?

I’ll confess that I make more chicken stock than any other, because it’s the easiest. Here’s how I do it.

Chicken StockChicken Stock Recipe

bones & necks from 2 free-range chickens
4 quarts cold, filtered water
2 tablespoons vinegar or whey
1 large onion
6 whole cloves
1 bay leaf
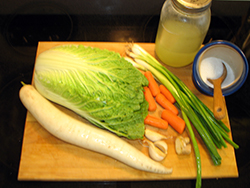
2 large carrots, peeled
3 celery sticks

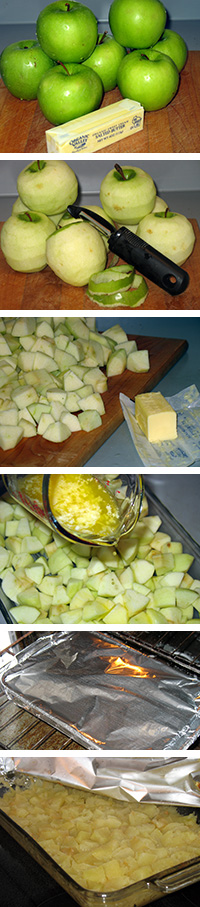
Put the chicken bones into a large pot, fill it with the water, and add the vinegar (or the whey – the liquid that runs off yogurt). Let it sit for an hour. This allows the acidic water to draw the minerals, especially calcium, out of the bones and into the liquid.

Stick the cloves into the onion.

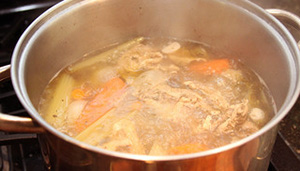
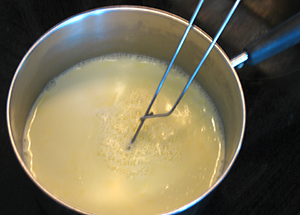
Bring the soaking bones to a boil. Skim the foam that rises to the top. Reduce the heat, put the onion and the bay leaf in, cover, and simmer for 4 hours. Add the vegetables and simmer for another 2 to 6 hours.

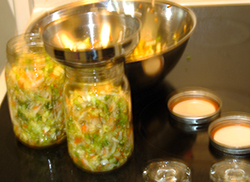
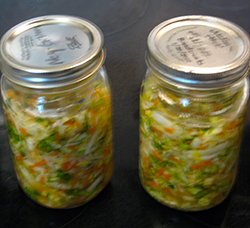
Remove the chicken bones and wilted vegetables with a slotted spoon. Let the stock cool. Strain it through a seive and pour it into jars to store. It will stay good for 5 days in the fridge, several months in the freezer.

Use as a base for soups and sauces. Plain broth with some salt added makes a great breakfast addition.

For more about nutrition, see:
Grass Green
Handle with Care

For more about food chemistry, see:
Electrolytes iin Solution
Essential Amino Acids


Share

Lacto-fermented Corn

corn earsThe first corn of summer arrived in my kitchen last week.

Half of it I simply cooked and served, slathered in butter, to my family. The other half I made into corn relish.

I promised last August that I’d share the corn relish recipe with you when corn was in season again. Time to make good on my promise!

Corn relish is a lacto-fermented food. The same lacto-bacilli that turn milk into yogurt also turn corn and a few other vegetables into corn relish.

photo of corn, tomato, onion melange in canning jarThere are several benefits to this.

For me personally, it means I can eat corn! Cooked in any ordinary way, corn makes me really ill. Lacto-fermented corn bothers my system not in the least.

Of course, most people can eat corn without my difficulty, but lacto-fermented corn offers everyone the great benefits of any lacto-fermented food.

The process of lacto-fermentation creates valuable enzymes which add to the health of the entire gastro-intestinal tract. We digest our food more thoroughly and easily, and receive more of its nutrition, when we eat enzymes.

Lacto-fermentation also creates pro-biotics. You know how your doctor recommends eating yogurt after a course of anti-biotics? Well, eating lacto-fermented vegetables does the same thing, repopulating the intestine with the beneficial bacteria that must be present in order for humans to be healthy!

And lacto-fermentation makes the vitamins and minerals in our foods more bio-available, so that our bodies absorb more of these vital substances, instead of letting them merely pass through and out.

a book of foods from traditional peoples from around the worldI learned about lacto-fermantation in Sally Fallon’s book, Nourishing Traditions. It’s an incredible treasury of the old food ways, and I encourage you to check it out for yourself! One caution: whenever you eat foods new to you, it’s wise to go slow. Your body isn’t used to the new substance. Eat just a spoonful or two and wait. Everyone’s body is a little different. Check to make sure yours is okay with something new before you eat a large serving!

For more information about lacto-fermented foods, check here and here.

And now, without more ado, here’s the recipe. (P.S. It’s delicious!)

Corn Relish

3 large ears of fresh organic corn
1 small onion (or a quarter of a large one)
3 tomatoes or 3 peaches
2 tablespoons fresh cilantro leaves (optional)
1 tablespoon Celtic sea salt
4 tablespoons whey

It’s important to use organic vegetables, because pesticide residues on conventional produce can halt the process of lacto-fermentation.

Also, do not use ordinary table salt. The anti-caking chemicals in it can likewise interfere with lacto-fermentation.

I obtain whey by allowing raw milk (from my herd share in a local dairy farm) to become old-fashioned curds and whey! But you can get it from draining the liquid – whey – from any yogurt with active cultures.

Last summer I made corn relish with tomatoes. It tasted marvelous. Last week, I had no tomatoes on hand, and I substituted peaches for them. This corn relish tastes very similar. The lacto-fermented corn and onions are somewhat spicy and dominant. If you have neither tomatoes nor peaches on hand, I encourage you to experiment. I suspect other substitutions might work equally well.

The first step is shucking the corn of its husks and rinsing the threads that cling to the corn away under running water. You may notice that the very tip of the corn is slightly brown. This is a good thing! It’s a bonafide that the corn really is organic. The browning is from a type of pest that loves corn, but is kept away by pesticides. Just cut the brown tip off and discard it.

Next, cut the corn kernels from the cob into a large bowl.

Wash the peaches, remove their pits, and dice the flesh. Add to the mix. (Or peel the tomatoes, dice them, and add them to the mix. The best way to peel tomatoes: immerse them in boiling water for 60 seconds, then in cold water. The skins will slip right off.)

Dice the onion very fine. Add to mixture.

corn relish in the makingPluck the cilantro leaves from their stems, if you are using cilantro, and add.

Add sea salt and whey. Stir the mixture with a spoon. Then pound it lightly with a wooden mallet or a meat pounder.

Spoon the mixture into a 1-quart canning jar. (Be sure you have put the jar and its lid through the hottest cycle of your dishwasher, or else fill the jar with boiling water and let it sit for 5 minutes before pouring it out. And immerse the lid in boiling water as well. You want the lacto-bacilli to grow, not any pathogenic bacteria!)

Leave at least 1 inch of headroom between the top of the corn mixture and the lip of the jar. Pres the mixture down firmly, so that the whey and the vegetable juices cover the corn mixture. If there is not enough liquid for this, add a little filtered water or more whey. Screw the lid on to finger tight.

serving of corn relishLet the jar sit on your counter at room temperature for 3 days. This is when it lacto-ferments. After 3 days, refrigerate the corn relish. It is ready to eat now and will keep in the refrigerator for many months.

More recipes:
Sauerkraut
Coconut Salmon
Baked Carrots
Baked Apples

More on nutrition:
Test first, then conclude!
Why Seed Oils Are Dangerous
Butter and Cream and Coconut, Oh My!


Share

Apples á la Ney-Grimm

Basket of ApplesI love fine cuisine, but the daily grind of cooking is truly not my thing. My husband does more of it than I, but I do cook. We both emphasize simple recipes with excellent ingredients. Complicated food is fun to eat, not so much fun to prepare for a Wednesday dinner!

I’m going to share another of my “un-recipes.” I call them that, because they’re so simple they barely deserve the epithet of recipe. Gourmets will laugh at me, but if it’s yummy and healthful, I’m satisfied.

Baked apples always featured as a dessert in my mind. And, certainly, if you add a sprinkling of cinnamon, nutmeg, and sugar to this dish, it makes an excellent dessert. Avoid the sweeteners, however (but keep plenty of butter from grass-fed cows), and you’ve got a good accompaniment to roast pork or roast fowl.

Here’s my simple procedure.

Baking ApplesBaked Apples

8 organic apples
1/4 cup butter


Grease the baking dish with butter.
 

Wash and peel the apples.


Core and cut the apples into bite-sized chunks. Arrange them in the baking dish.


Melt the butter. Drizzle it over the apples.
 

Cover the baking dish and place it in the oven. Bake for 1 hour at 350°F.
 

Serves 4 generously.


For more simple recipes, see:
Sautéed Eggplant
Sauerkraut
Baked Carrots
Coconut Salmon
Oatmeal, Brown Rice, Granola, and Crisp Nuts
Coconut Chocolates

For more about butter, see:
Butter and Cream and Coconut, Oh My!


Share

Coconut Salmon

photos of making coconut salmonI love how crispy the coconut crust becomes and how beautifully it keeps the salmon moist. I have trouble hitting the sweet spot with salmon – not undercooked, but not over dry – and this recipe makes it easy!


1/4 cup butter
1 teaspoon Celtic sea salt
1/8 teaspoon paprika
1/2 cup dried, shredded coconut
12 – 18 oz salmon filets


Preheat your oven to 375F.


Arrange the salmon in a buttered baking dish.


Mix the coconut, salt, and paprika in a small bowl.


Melt the butter.


Add the melted butter to the coconut mixture and stir until the butter is well diffused through the dry ingredients.


Spread the coconut-butter mixture on top of the salmon.


Place the salmon in the oven.


Bake 12 minutes, if salmon is thawed (or fresh). Bake 25 minutes if the salmon is frozen.


More Recipes
Baked Carrots
Sauerkraut
Sautéed Eggplant

Share