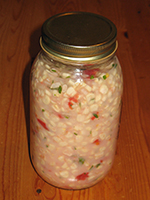
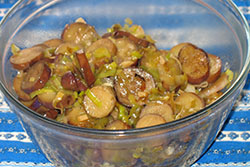
 Six weeks ago I made a quart of lacto-fermented corn relish. It was an experiment, because corn in its ordinary state – boiled, slathered with butter, and gnawed from the cob – makes me very ill. Sad, since I love the taste. I hoped lacto-fermented corn might not irritate my system When our CSA delivered yet another eight ears of corn, I decided to risk it. And it went well! I can eat lacto-fermented corn with nary a murmur from my digestion. Plus it tastes like seconds, thirds, and fourths!
(I know. I said that before about the eggplant dish below, but it’s true!)
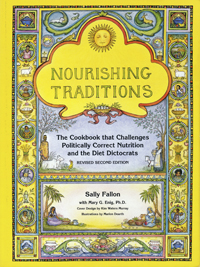
 So let me tell you about lacto-fermentation. The corn relish recipe was my own creation, but I learned the principles from Sally Fallon’s Nourishing Traditions.
Lactobacilli – lactic acid producing bacteria – are everywhere. They thrive on the surface of all living things and are particularly numerous on the roots and leaves of low-growing plants.
Lactic acid is a natural preservative. It inhibits the action of bacteria that produce decay. Before the invention of freezers or canning machines, cooks preserved vegetables and fruits by lacto-fermentation.
The benefits of lacto-fermentation go far beyond mere preservation, however.
Lacto-fermented foods:
• are more digestible
• make their nutrients more bio-available to our bodies
• possess higher vitamin levels
• acquire many helpful enzymes during lacto-fermentation
• include substances that kill harmful bacteria and prevent cancer
• promote the growth of healthy flora along the entire length of the intestine.
Lacto-fermented or “pickled” cabbage was (and is) popular worldwide. Europe developed sauerkraut; Latin America, cortido; Korea, kimchi; and Japan, tsukemono. But many other vegetables (and fruits) respond delisciously to lacto-fermentation: cucumber, corn, and watermelon rind, to name a few.
Lacto-fermentated foods are easy and fun to prepare at home. There’s something magical to the process – a little like baking, in which dough transforms into bread or cake or cookies, but requiring less hands-on prep and little precision.
The basic recipe goes as follows. Wash your fruits or vegetables thoroughly. Chop or shred or grate them and mix with sea salt and homemade whey. Pound the mix briefly with a wooden mallet. Then press the mass into a canning jar, leaving an inch of headroom at the top, and seal firmly. Leave the jar at room temperature for two to four days, then refrigerate. Fruits will keep for two months. Vegetables stay good indefinitely. (Experts consider sauerkraut to be best after six months!)
Speaking of sauerkraut, here’s a bit of trivia about it and a famous navigator of the past. Captain Cook loaded sixty barrels of the stuff onto his ship before embarking on his second trip around the world. None of the crew developed scurvy. (Sauerkraut has a lot of vitamin C.) And twenty-seven months later, when Cook was nearing home again, the last barrel was opened. It remained perfectly preserved – despite its long journey through every kind of weather and warmth – and delicious. When served to Portuguese nobles visiting aboard, the partial barrel was carried away to share with friends!
One more jot of trivia: ketchup was once a lacto-fermented food. The word derives from ke-tsiap, a Chinese Amoy term for a pickled fish sauce. (Fish sauce was the universal condiment of the ancient world.) The English added mushroom, walnut, cucumber, and oyster to fish sauce to create their own version. Then Americans added tomatoes for another unique take on the flavor enhancer. American ketchup is now largely high fructose corn syrup, but it is possible for the home cook to return to the old artisanal method of concocting it. (But that’s another blog post!)
What about my corn relish? Are you clamoring for the recipe? It’s worth trying, but I’m going to recommend that you start with sauerkraut instead. Corn relish is a simple recipe, but sauerkraut is the most basic of all. And I think you’ll be delighted with its taste – much fresher than the vinegar-laden and pasteurized stuff from the grocery store. I promise I’ll post the corn relish recipe when fresh corn is back in season!
Update: Corn did eventually come back in season, and I made more corn relish! The recipe is posted here.
 Sauerkraut
1 large cabbage
2 tablespoons sea salt
(not ordinary shaker salt, which has additives that damage lacto-fermentation)
1/2 cup homemade whey
(draining and using the excess liquid from any yogurt with live cultures works fine)
The cabbage should be of high quality and preferably organic. Pesticide residues can kill lactobacilli and interfere with lacto-fermentation.
Wash the cabbage, peel off the outermost leaves and discard, and remove and discard the stem stalk and the densest part of the core. Then shred the cabbage. The grating attachment in a food processor works nicely, but you can also simply slice the cabbage with a chef knife.
Put the shredded cabbage in a large, sturdy bowl. Add the salt and the whey. Lightly pound the mixture with a wooden mallet for 10 minutes to release the cabbage juices.
(I know. My mallet is metal, and it shouldn’t be. A wooden one is on my shopping list. Why? The whey can damage metal utensils over time. As you can see, my meat pounder is undamaged after 2 years of use. But I still intend to get something wooden. Just not in any rush!)
Transfer the mixture into a pair of quart-sized canning jars. Press the cabbage down firmly in the jars until the juices come up to cover the cabbage. Be sure there is an inch of headroom between the cabbage and the lids. The cabbage will expand slightly while lacto-fermenting. Tighten the lids securely. Lacto-fermentation is an anaerobic process.
Let the jars rest on your counter at room temperature for 2 – 4 days (2 if it’s summer or you’re using the oven a lot, 4 if it’s winter and you keep your house cool).
Then move the jars to the fridge. Let the kraut mature for 3 weeks to develop the best flavor. Serve!
Some people add caraway seed to the ferment. I tried it, but find cabbage straight up to be tastiest!
Once you’ve eaten a serving of your batch, visit here again and tell me what you think! Good?
For more Nourishing Traditions posts, see:
Yogurt & Kefir & Koumiss, Oh My!
Handle with Care
Beet Kvass
More Recipes
Sautéed Eggplant
Coconut Salmon
Baked Carrots
 I love how crispy the coconut crust becomes and how beautifully it keeps the salmon moist. I have trouble hitting the sweet spot with salmon – not undercooked, but not over dry – and this recipe makes it easy!


 Sauerkraut
