 I’ve learned to be cautious with grains.
They’re high in carbohydrates and, as I’ve gotten older, my body has grown more sensitive to carbs. Philip Maffetone’s In Fitness and in Health taught me that carbs were likely behind the chronic fatigue of my 30’s and the weight gain of my 40’s.
Gary Taubes, in his Good Calories, Bad Calories, explained some of why. When eaten, carbohydrates can provoke an inflammatory response (fatigue) and do cause the body to release insulin into the bloodstream. Insulin then causes the body to cease burning fat for energy and switch to burning glucose. Which means the fatty acids stay in the fat cells, and more fatty acids are packed in (weight gain).
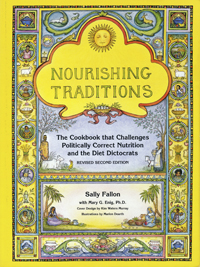
But there’s another reason to be cautious with grains. Sally Fallon’s Nourishing Traditions explains that we modern westerners aren’t preparing whole grains safely any more. Our ancestors did. And a few of us still possess the old knowledge. (I did not.)
 In India, rice and lentils are fermented for two days before being made into idli and dosas. In Africa, coarsely ground corn was soaked overnight before being added to soups and stews. Ethiopian injera bread is made by fermenting the grain teff for several days. American pioneers were famous for sourdough breads and biscuits. In old-fashioned European porridges, the oats or barley berries were soaked overnight or even for several days before cooking. Flours were never simply scooped from a canister, mixed into whatever, cooked, and eaten two hours later. There’s a reason for that!
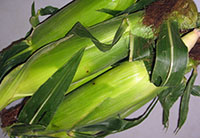
All grains contain phytic acid in the outer layer, the bran.
Of course, you can eat refined grains which lack the bran and the germ, but that leads to its own set of health problems. (White flour acts on the body a lot like sugar.) But if you eat whole grains, improperly prepared, phytic acid will harm you.
So what’s the problem with phytic acid?
It combines with minerals in the digestive tract and blocks their absorption. All that lovely calcium or iron or zinc or whatever binds to the phytic acid and rides away, right out of the body. On top of that, phytic acid can be very irritating. Hello, irritable bowel syndrome! Hello, mineral deficiencies! Hello, osteoporosis!
And that’s not all.
The protein in grains, especially the gluten, is hard to digest. Soaking and fermenting breaks down these proteins into their simpler building blocks, which are much easier on digestion.
Consider animals nourished primarily by plants. They have multiple stomachs (sometimes four!) and long intestines. Plants take a lot of digesting! Humans have only one stomach and shorter intestines. We need the help of friendly lactobacilli (the bacteria in yogurt and other live foods) when we eat plants such as grains (and legumes).
Another possibility to consider: add a dollop of cream or butter to cooked grains. The fat acts as a catalyst for mineral absorption. You’ll get more of that critical calcium (for example), if you pair those oats with cream.
And a final consideration: most processed breakfast cereals – even granola, alas! – are downright dangerous. Not only are they rife with phytic acid, but they are processed at high heat and under high pressure. This destroys many of the valuable nutrients in grains, turns the fragile plant oils rancid, and changes the proteins enough to render them toxic.
The take-away lesson is that grains (and legumes) need to be soaked or sprouted to confer their benefits.
If you’re a baker, bake true sourdough breads or loaves made with sprouted grains. If you purchase your bread (raising my hand here), buy true sourdoughs (not just flavored with sourdough) and sprouted grain breads.
I go very light on the grains myself. But for all the grain lovers among us, I’ll share three basic recipes with the grains properly prepared. (Plus crisp nuts.)
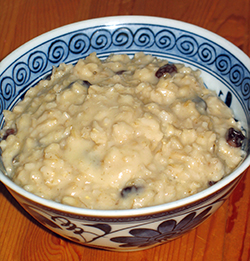
The oatmeal in this photo has raisons in it, cooked on the stovetop with the oats, but not soaked overnight with the oats!
 Oatmeal
1 cup oats, rolled (not instant or quick-cooking)
1 cup filtered water, warmed (but not hot)
2 tablespoons whey or yogurt or lemon juice
1 more cup filtered water
1/2 teaspoon Celtic sea salt
Add the whey to the warm water and soak the oats in it overnight (at least 7 hours). Find a warm spot. A covered bowl on the kitchen counter is fine, if your house isn’t too chilly.
(Chlorine can interfere with lacto-fermentation, so don’t use straight water-plant tap water.)
In the morning, bring the additional cup of water to a boil. Add the salt. Add the soaked oats (along with any remaining liquid). Reduce the heat, cover, and simmer for 4 minutes. Remove from the heat and let sit (still covered) for 5 minutes.
Serve with cream or butter.
Other optional toppings include maple syrup, raw honey, apricot butter, or crisp nuts.
Rice
2 cups brown rice
4 cups filtered water, warmed
4 tablespoons whey or yogurt or lemon juice or vinegar
1 teaspoon Celtic sea salt
3 tablespoons butter
Rinse and drain the rice.
Add whey to the warm water and soak the rice in it overnight (at least 7 hours).
When soaking is complete, transfer mixture to a cooking pot and bring it to a boil on the stove top.
Skim off the foam that rises to the top.
Lower the heat, add the salt and butter, stir, and then cover tightly. Cook (without removing the lid) for 45 minutes over very low heat.
Serve.
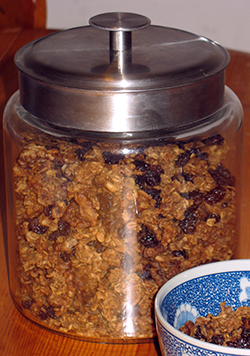
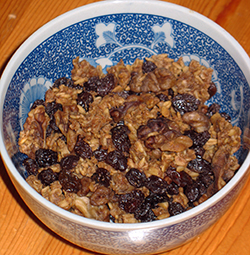 Granola (a safe version)
This recipe is a bit involved. My kids adore it, but I don’t make it very often! In fact, it’s been more than a year for me. Which leads me to a note of warning. I’ve made lots of adjustments to the recipe since the first time, with lots of scribbly notes in the margins of my recipe binder. I hope I’ve deciphered them accurately! But if your rendition of this granola isn’t working, it’s probably me, not you. I hope to make granola this spring. (And if I discover I’ve erred, I’ll come back and correct myself.) So you might wait to try this until after my essay. Or – if you’re the adventurous sort – dive in and post any adjustments you make in the comments!
Update:I did make granola this spring (as promised to my kids). Twice! And the recipe as I posted it was pretty close to correct. But it needed a touch more spice. I increased the amount of cinnamon, nutmeg, and ground cloves in my second batch. Plus I made more. The first batch was devoured in 5 days flat. If you were waiting (as recommended above) for me to tweak my recipe, I’ve done so. The recipe below is the recipe. Go for it!
6 cups oats, rolled
6 cups filtered water, warmed
4 tablespoons whey or yogurt or lemon juice
3/8 cup butter (add 1 tablespoon butter, if you’re soaking the nuts with the oats)
3 tablespoons honey
3 tablespoons maple syrup (add 1 tablespoon syrup, if soaking nuts with oats)
3 teaspoons cinnamon
1-1/2 teaspoons nutmeg
1-1/2 teaspoons ground cloves
2 cups crisp nuts (no crisp nuts on hand? throw some in to soak with the oats)
2 cups raisins
 Add whey to warm water and soak oats in it overnight (at least 7 hours). If you are out of crisp nuts, add raw nuts to the oats to soak along with them.
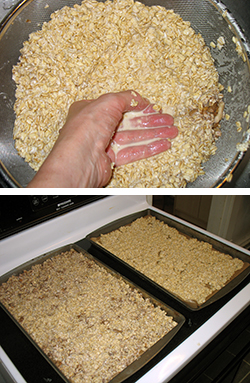
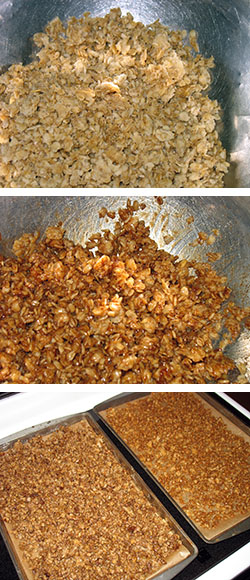
Next day, drain the liquid off the oats. Press the mass a little (if it’s really soggy) to wring extra moisture out of it.
Spread baking parchment on 2 baking sheets. Spoon the oats onto the sheets and spread them out evenly. Place baking sheets in the oven and turn it on to 200ºF (no need to preheat). Bake for 3 hours. Check the oats for moisture. If you added nuts to soak with the oats, the mixture will be dry at the edges of the baking sheet, but still moist at the center. If you soaked the oats solo, they’ll be dry all the way through, but not crisp.
Near the end of this first baking, melt the butter, honey, and maple syrup. Stir in cinnamon, nutmeg, and cloves. Set aside, off the heat.
 Remove the oats from the oven. Put the oats in a large bowl and break up the large clumps using 2 butter knives. Then get a handful between your palms and rub your hands together. This works really well to break the clumps even further. Keep going until the texture of the oats is fairly fine. Then pour the butter mixture over the oats, and blend thoroughly.
Put fresh sheets of baking parchment on the baking sheets. (The used parchment will be soggy.) Spoon the oat mixture onto the baking sheets and spread evenly. Place back in the 200ºF oven. Stir the oats and re-spread them every hour. Bake for 4 hours.
Remove oats from oven and allow to cool. Break up any clumps with your hands. Mix the now-crisp oats with raisons and crisp nuts (if you didn’t add raw nuts at the soaking step). Store in an air-tight canister.
Serve however you prefer granola: with milk, with cream, with yogurt, with fruit, etc. It will be a little more crisp than conventional store-bought granola.
Crisp Walnuts
Use these as a topping on oatmeal, in the granola recipe above, or as a snack. Just like grains and legumes, nuts should be soaked to neutralize the many enzyme inhibitors in them.
4 cups walnut pieces, raw
2 teaspoons Celtic sea salt
filtered water to cover nuts
Mix the salt with the filtered water and soak the nuts in it overnight (at least 7 hours).
Next day, drain the nuts in a colander.
Put baking parchment on a baking sheet. Spread the nuts evenly on it. Place in oven, turn on to 150ºF and “bake” for 12-24 hours, until completely dry and crisp. Stir the nuts with a spoon and re-spread them occasionally. (If you have a food dehydrator, use that!)
Store the nuts in an air-tight container.
Walnuts, alone of all the nuts, must be stored in the refrigerator. Their unique composition of oils will go rancid at room temperature. The other nuts may be safely stored at room temperature.
This recipe may be used for pecans, almonds, or macadamias. Do not use it for cashews. Cashews are not raw when they come to us. They contain a toxic oil that must be released and removed by two separate heatings before humans can eat them safely. This means that they’ll get slimy and nasty if soaked too long or dried too slowly. Soak them at most 6 hours. Dry them in a 200ºF oven.
Nourishing Traditions at Amazon
Nourishing Traditions at B&N
For more Nourishing Traditions posts, see:
Yogurt & Kefir & Koumiss, Oh My!
Amazing Lactobacilli
Beet Kvass
Some posts challenging politically correct nutrition:
Butter and Cream and Coconut, Oh My!
Test first, then conclude!
Thinner and Healthier
And some more recipes:
Coconut Chocolates
Coconut Salmon
Baked Carrots
Do you have any old-time grain recipes that include the soaking or sprouting of grains?
Do please share!

 I recently purchased a new cookbook that’s had a unique effect on me.
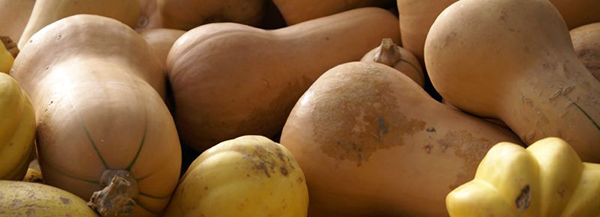
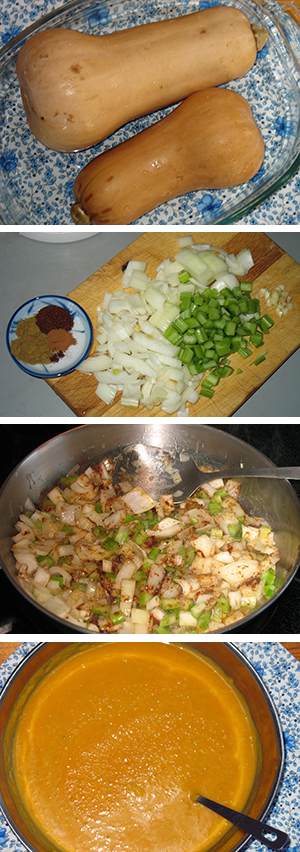
 1 butternut squash


 Ingredients
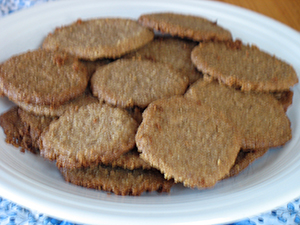
 Ingredients

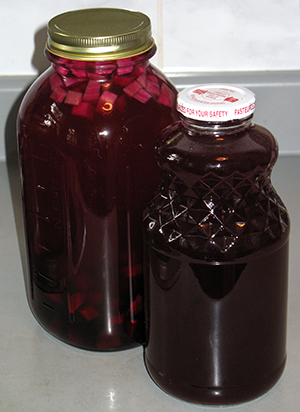 Serve by pouring the liquid – the kvass – into a glass. Keep the beet chunks in the jar. (I use a small strainer placed against the jar mouth while I pour to corral the beets.) If kvass is new to you, start with small servings, perhaps just a tablespoon or two, to give your body a chance to adjust.