Kimchi

Ever since I stumbled on the recipe for lacto-fermented kimchi in Nourishing Traditions, I’ve wanted to make it.

But I figured I should try basic sauerkraut first. And then lacto-fermented carrots seemed like a more accessible taste-treat. Next I went on a beet kvass tear. And then I stayed within that safe, known perimeter until I drifted away from a regular schedule of lacto-fermentation.

But now I’m intent on always having a selection of lacto-fermented foods on hand.

So I tackled a mild version of kimchi!

Here’s the recipe:

Kimchi (Korean Sauerkraut)

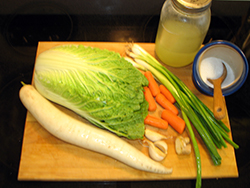
1 head Napa cabbage, cored and shredded
1 bunch green onions, chopped
1 cup carrots, grated
1 daikon radish, grated
1 tablespoon fresh ginger, minced
3 cloves garlic
1/2 teaspoon red pepper flakes (optional)
1 tablespoon sea salt
4 tablespoons whey

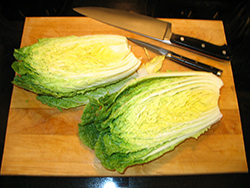
1 • Remove the core of the cabbage and discard. Shred the cabbage leaves.

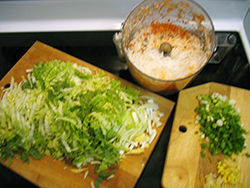
I discovered I preferred European sauerkraut when shredded by putting it through the grating mechanism of my food processor. But I decided to try slicing the cabbage narrowly for kimchi. I’ll see what I think of that before I try something different.

2Chop the green onions. Peel and mince the ginger. Put the garlic through a garlic press.

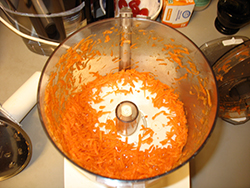
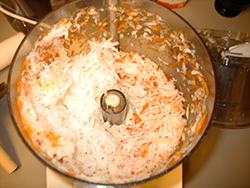
3Grate the carrots and daikon radish by putting them through the grating mechanism of the food processor.

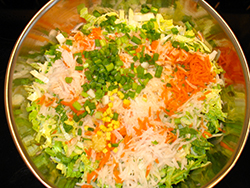
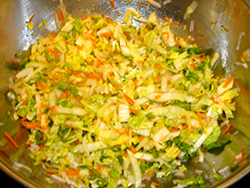
4Put all the ingredients in a bowl and knead them as you might knead bread dough.

All the recipes I’d seen directed me to pound the mixture, and that is how I’d prepared European sauerkraut. I found it took what seemed like forever, and I was always wondering if I’d pounded it enough.

Recently I saw another recipe which recommended the kneading method. I liked that much better. It was easy, much faster, and I could tell when the whole batch was sufficiently kneaded—that there weren’t lingering bits in the middle that remained hard.

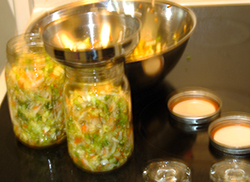
5Place the mixture in two quart-sized, wide-mouth canning jars. Press it down well, until the juices rise enough to cover the vegetables. Place fermentation weights atop to keep the vegetables submerged.

I possessed no fermentation weights when I first tried lacto-fermenting cabbage. I didn’t even know there was such a thing. And all of my batches turned out fine. But now that I do know, I’m using them. Why risk having to throw out a batch?

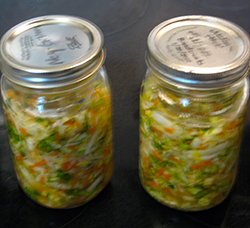
6Twist the lids on the canning jars to finger tight. Keep at room temperature (but out of sunlight) for 3 days. Then store in the refrigerator (or a root cellar).

When I was making European sauerkraut, the flavors needed about 6 weeks to develop. The sauerkraut just tasted bland before then. But by 6 weeks, it was delish!

I expect the same to be true of my kimchi. I omitted the optional red pepper flakes, because I want flavor, not heat. The nibble I tasted when I put my jars in the fridge did taste bland. But sometime in October, I’ll be in for a treat.

I’ll post a note here to let you know if it’s as good as I think it will be. 😀

For more lacto-fermented recipes, see:
Lacto-fermented Sauerkraut
Lacto-fermented Corn
Pickled Greens
Beet Kvass


Share

I Love Soup!

Meat and fish stocks have been a staple of traditional cuisines for a long time. Consider the Japanese breakfast of fish broth with rice. French onion soup. Korean sol long tang (beef broth and thinly shaved beef brisket). Russsian chlodnik (shrimp soup).

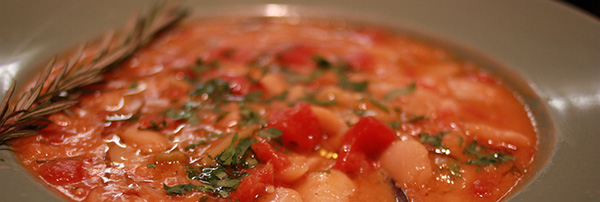
Lima Bean Soup

Yum! I want some right now! 😀

No question that a homemade soup based on homemade stock is delicious. Makes me wish for a do-over of my winter cooking this year. I didn’t make nearly as much soup as I’d intended.

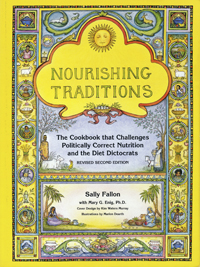
a book of foods from traditional peoples from around the worldBut homemade soup stock is great for a bunch other reasons too. Most of which I didn’t know before I read the book Nourishing Traditions.

Broth Is Super Nutritious

Okay, I “knew” soup was nutritious. You hear it all the time. But I didn’t know why. And, honestly, most commercial soups aren’t, because they’re made with cheap hydrolyzed vegetable protein as a base instead of actual beef stock or chicken stock.

So why is meat and fish broth so good for us? Two reasons.

All the minerals present in bone, cartilage, and marrow are present in the broth, especially the biggies of calcium, magnesium, and potassium.

These minerals, plus those of any vegetables you’ve included in your stock-making, are present as electrolytes, a form that is particularly easy for the body to assimilate – that is, your body will take in more of them, more easily.

Broth Is Hydrophilic

“What?” I hear you say. I said it too!

Hydrophilic means it attracts liquids. Most raw foods are hydrophilic. When we eat them, the particles attract the digestive juices present in the gut, causing the food particles to be rapidly and thoroughly digested.

But most cooked foods are hydrophobic. That is, they repel liquids. And repel the digestive juices. Which means your body has to use (and make) more enzymes to accomplish digestion, and it takes longer.

The gelatin in stock possesses the unusual property that even after heating it is hydrophilic. It attracts liquid. So all those lovely vegetable chunks and meat pieces in your soup? They’re coated in broth and thus become far easier to digest.

When I was a young thing, the emphasis placed by my elders on digestibility seemed incomprehensible. You swallow your food; it’s digested; end of story. After I’d experienced indigestion – ouch! – their concern made more sense. And after I’d experienced years of a painful gut from eating soy products such as tofu, digestibility seemed paramount! (All better, BTW, now that I’ve been avoiding soy for nearly a decade.)

Broth Is Protein Sparing

I said “what?” to that one as well.

Here’s the thing: all living cells are composed of protein. Or, put another way, protein is essential to life.

Proteins are assembled from amino acids. And our bodies can build many of the amino acids we need. But not all. There are eight of them that must be supplied by our diet. All essential eight are present in their most assimilable form in meat.

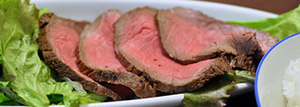
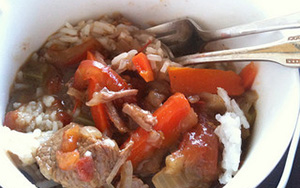
Roast Beefbeef stewBut meat is expensive. Plus, we now know that cooked meat is hydrophobic, which reduces the bio-availability of those amino acids.

So how does this protein sparing thing work?

It has to do with the protein in broth gelatin. The protein in broth gelatin is not complete. That is, it does not contain all eight essential amino acids. In fact, it’s mostly composed of two: arginine and glycine.

But meat broth (and fish broth) gelatin has another special property. It allows the body to more fully utilize the complete proteins that are eaten with it.

In other words, the chunks of beef in a beef stew (with its broth) will give you much more protein than the same amount of beef sliced from a roast. For those of us on a budget, soup with homemade stock is our friend. 😀

So how do you make soup stock?

I’ll confess that I make more chicken stock than any other, because it’s the easiest. Here’s how I do it.

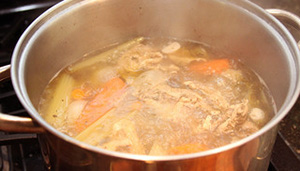
Chicken StockChicken Stock Recipe

bones & necks from 2 free-range chickens
4 quarts cold, filtered water
2 tablespoons vinegar or whey
1 large onion
6 whole cloves
1 bay leaf
2 large carrots, peeled
3 celery sticks

Put the chicken bones into a large pot, fill it with the water, and add the vinegar (or the whey – the liquid that runs off yogurt). Let it sit for an hour. This allows the acidic water to draw the minerals, especially calcium, out of the bones and into the liquid.

Stick the cloves into the onion.

Bring the soaking bones to a boil. Skim the foam that rises to the top. Reduce the heat, put the onion and the bay leaf in, cover, and simmer for 4 hours. Add the vegetables and simmer for another 2 to 6 hours.

Remove the chicken bones and wilted vegetables with a slotted spoon. Let the stock cool. Strain it through a seive and pour it into jars to store. It will stay good for 5 days in the fridge, several months in the freezer.

Use as a base for soups and sauces. Plain broth with some salt added makes a great breakfast addition.

For more about nutrition, see:
Grass Green
Handle with Care

For more about food chemistry, see:
Electrolytes iin Solution
Essential Amino Acids


Share

Pie Crust Cookies

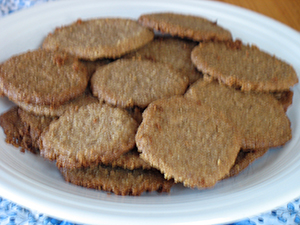
plate of pie crust cookiesThe first pie crust cookies were frugality run amok.

I was baking an apple pie with my son and enjoying it. We tried a new recipe for the crust, based on pecans. The recipe was intended for a custard pie that didn’t require a top crust. But apple pies need them, and ours was mounded super high with apples. We made more than a double recipe to be sure to have enough dough. Which yielded too much, of course.

Not wanting to waste it, we made the extra into cookies. And they were melt-in-your-mouth delicious. Yum!

The next time we baked together, we made pie crust cookies on purpose!

Here’s how we did it.

A Note on Ingredients

This recipe will work with ordinary whole wheat flour, instead of sprouted whole wheat flour. You may also use raw pecans, rather than crisp pecans. But I urge you to use the sprouted flour and the crisp nuts.

Grains, nuts, and seeds contain phytic acid. Phytic acid prevents the seed or nut from sprouting until it is in contact with the moist earth that will permit the plant to flourish. Which means it prevents enzymes from working. But you want the enzymes in your body to work! You’ll digest your food more completely and receive more of its nourishment. Plus phytic acid is an irritant. Properly preparing seeds, nuts, and grains neutralizes phytic acid. You can read more about this important principle of nutrition here.

Many health food stores carry sprouted whole wheat flour. I buy mine at Whole Foods. Some health food stores carry sprouted nuts. Sprouted nuts can safely be used instead of crisp nuts. The recipe for crisp pecans follows the one for the cookies below.

baking pie crust cookiesIngredients

2 cups crisp pecans
1-1/2 cups sprouted whole wheat flour
1/2 cup evaporated cane juice
1/2 teaspoon Celtic sea salt
3/8 cup butter
3/8 cup unrefined coconut oil
1 teaspoon vanilla


Directions

Put pecans, flour, sugar, and salt in food processor and process until nuts are ground and all ingredients well mixed.


Add butter, coconut oil, and vanilla.


Process until the mixture forms a ball.


Place half of the dough on a sheet of wax paper.


Use a rolling pin to roll out dough between 2 sheets of wax paper. Be careful when you pull the top sheet up, since the dough is both delicate and sticky.


Use a cookie cutter or a small glass to make small round cookies. You may form the leftover dough into small cookies. The dough is delicate, but will not suffer from this extra handling.


Place cookie rounds on cookie sheets covered with baking parchment.


Bake in pre-heated 375º F oven for 10 minutes. Cool cookies on cookie sheets for about 2 minutes.


Remove cookies to cooling racks and cool completely. The cookies are fragile, but they truly do melt in your mouth.


Crisp Pecans

Use these as a topping on oatmeal, in the cookie recipe above, or as a snack.


Ingredients

4 cups raw pecans
2 teaspoons Celtic sea salt
filtered water to cover nuts


Directions

Mix the salt with the filtered water and soak the nuts in it overnight (at least 7 hours).

Next day, drain the nuts in a colander.

Put baking parchment on a baking sheet. Spread the nuts evenly on it. Place in oven, turn on to 150ºF and “bake” for 12-24 hours, until completely dry and crisp. Stir the nuts with a spoon and re-spread them occasionally. (If you have a food dehydrator, use that!)

Store the nuts in an air-tight container.

This crisp nut recipe may be used for walnuts, almonds, or macadamias. Do not use it for cashews. Cashews are not raw when they come to us. They contain a toxic oil that must be released and removed by two separate heatings before humans can eat them safely. This means that they’ll get slimy and nasty if soaked too long or dried too slowly. Soak them at most 6 hours. Dry them in a 200ºF oven.

Note: Walnuts, alone of all the nuts, must be stored in the refrigerator. Their unique composition of oils will go rancid at room temperature. The other nuts may be safely stored at room temperature.

For another dessert recipe, see:
Coconut Chocolates

For more on nutrition, see:
Butter and Cream and Coconut, Oh My!
Test first, then conclude


Share

Lacto-fermented Corn

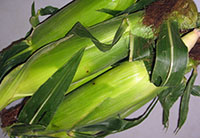
corn earsThe first corn of summer arrived in my kitchen last week.

Half of it I simply cooked and served, slathered in butter, to my family. The other half I made into corn relish.

I promised last August that I’d share the corn relish recipe with you when corn was in season again. Time to make good on my promise!

Corn relish is a lacto-fermented food. The same lacto-bacilli that turn milk into yogurt also turn corn and a few other vegetables into corn relish.

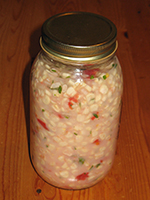
photo of corn, tomato, onion melange in canning jarThere are several benefits to this.

For me personally, it means I can eat corn! Cooked in any ordinary way, corn makes me really ill. Lacto-fermented corn bothers my system not in the least.

Of course, most people can eat corn without my difficulty, but lacto-fermented corn offers everyone the great benefits of any lacto-fermented food.

The process of lacto-fermentation creates valuable enzymes which add to the health of the entire gastro-intestinal tract. We digest our food more thoroughly and easily, and receive more of its nutrition, when we eat enzymes.

Lacto-fermentation also creates pro-biotics. You know how your doctor recommends eating yogurt after a course of anti-biotics? Well, eating lacto-fermented vegetables does the same thing, repopulating the intestine with the beneficial bacteria that must be present in order for humans to be healthy!

And lacto-fermentation makes the vitamins and minerals in our foods more bio-available, so that our bodies absorb more of these vital substances, instead of letting them merely pass through and out.

a book of foods from traditional peoples from around the worldI learned about lacto-fermantation in Sally Fallon’s book, Nourishing Traditions. It’s an incredible treasury of the old food ways, and I encourage you to check it out for yourself! One caution: whenever you eat foods new to you, it’s wise to go slow. Your body isn’t used to the new substance. Eat just a spoonful or two and wait. Everyone’s body is a little different. Check to make sure yours is okay with something new before you eat a large serving!

For more information about lacto-fermented foods, check here and here.

And now, without more ado, here’s the recipe. (P.S. It’s delicious!)

Corn Relish

3 large ears of fresh organic corn
1 small onion (or a quarter of a large one)
3 tomatoes or 3 peaches
2 tablespoons fresh cilantro leaves (optional)
1 tablespoon Celtic sea salt
4 tablespoons whey

It’s important to use organic vegetables, because pesticide residues on conventional produce can halt the process of lacto-fermentation.

Also, do not use ordinary table salt. The anti-caking chemicals in it can likewise interfere with lacto-fermentation.

I obtain whey by allowing raw milk (from my herd share in a local dairy farm) to become old-fashioned curds and whey! But you can get it from draining the liquid – whey – from any yogurt with active cultures.

Last summer I made corn relish with tomatoes. It tasted marvelous. Last week, I had no tomatoes on hand, and I substituted peaches for them. This corn relish tastes very similar. The lacto-fermented corn and onions are somewhat spicy and dominant. If you have neither tomatoes nor peaches on hand, I encourage you to experiment. I suspect other substitutions might work equally well.

The first step is shucking the corn of its husks and rinsing the threads that cling to the corn away under running water. You may notice that the very tip of the corn is slightly brown. This is a good thing! It’s a bonafide that the corn really is organic. The browning is from a type of pest that loves corn, but is kept away by pesticides. Just cut the brown tip off and discard it.

Next, cut the corn kernels from the cob into a large bowl.

Wash the peaches, remove their pits, and dice the flesh. Add to the mix. (Or peel the tomatoes, dice them, and add them to the mix. The best way to peel tomatoes: immerse them in boiling water for 60 seconds, then in cold water. The skins will slip right off.)

Dice the onion very fine. Add to mixture.

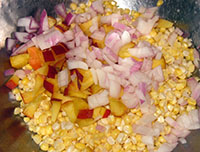
corn relish in the makingPluck the cilantro leaves from their stems, if you are using cilantro, and add.

Add sea salt and whey. Stir the mixture with a spoon. Then pound it lightly with a wooden mallet or a meat pounder.

Spoon the mixture into a 1-quart canning jar. (Be sure you have put the jar and its lid through the hottest cycle of your dishwasher, or else fill the jar with boiling water and let it sit for 5 minutes before pouring it out. And immerse the lid in boiling water as well. You want the lacto-bacilli to grow, not any pathogenic bacteria!)

Leave at least 1 inch of headroom between the top of the corn mixture and the lip of the jar. Pres the mixture down firmly, so that the whey and the vegetable juices cover the corn mixture. If there is not enough liquid for this, add a little filtered water or more whey. Screw the lid on to finger tight.

serving of corn relishLet the jar sit on your counter at room temperature for 3 days. This is when it lacto-ferments. After 3 days, refrigerate the corn relish. It is ready to eat now and will keep in the refrigerator for many months.

More recipes:
Sauerkraut
Coconut Salmon
Baked Carrots
Baked Apples

More on nutrition:
Test first, then conclude!
Why Seed Oils Are Dangerous
Butter and Cream and Coconut, Oh My!


Share

Handle with Care

glass cannister of granolaI’ve learned to be cautious with grains.

They’re high in carbohydrates and, as I’ve gotten older, my body has grown more sensitive to carbs. Philip Maffetone’s In Fitness and in Health taught me that carbs were likely behind the chronic fatigue of my 30’s and the weight gain of my 40’s.

Gary Taubes, in his Good Calories, Bad Calories, explained some of why. When eaten, carbohydrates can provoke an inflammatory response (fatigue) and do cause the body to release insulin into the bloodstream. Insulin then causes the body to cease burning fat for energy and switch to burning glucose. Which means the fatty acids stay in the fat cells, and more fatty acids are packed in (weight gain).

But there’s another reason to be cautious with grains. Sally Fallon’s Nourishing Traditions explains that we modern westerners aren’t preparing whole grains safely any more. Our ancestors did. And a few of us still possess the old knowledge. (I did not.)
images depicting traditional peoples from around the worldIn India, rice and lentils are fermented for two days before being made into idli and dosas. In Africa, coarsely ground corn was soaked overnight before being added to soups and stews. Ethiopian injera bread is made by fermenting the grain teff for several days. American pioneers were famous for sourdough breads and biscuits. In old-fashioned European porridges, the oats or barley berries were soaked overnight or even for several days before cooking. Flours were never simply scooped from a canister, mixed into whatever, cooked, and eaten two hours later. There’s a reason for that!

All grains contain phytic acid in the outer layer, the bran.

Of course, you can eat refined grains which lack the bran and the germ, but that leads to its own set of health problems. (White flour acts on the body a lot like sugar.) But if you eat whole grains, improperly prepared, phytic acid will harm you.

So what’s the problem with phytic acid?

It combines with minerals in the digestive tract and blocks their absorption. All that lovely calcium or iron or zinc or whatever binds to the phytic acid and rides away, right out of the body. On top of that, phytic acid can be very irritating. Hello, irritable bowel syndrome! Hello, mineral deficiencies! Hello, osteoporosis!

And that’s not all.

The protein in grains, especially the gluten, is hard to digest. Soaking and fermenting breaks down these proteins into their simpler building blocks, which are much easier on digestion.

Consider animals nourished primarily by plants. They have multiple stomachs (sometimes four!) and long intestines. Plants take a lot of digesting! Humans have only one stomach and shorter intestines. We need the help of friendly lactobacilli (the bacteria in yogurt and other live foods) when we eat plants such as grains (and legumes).

Another possibility to consider: add a dollop of cream or butter to cooked grains. The fat acts as a catalyst for mineral absorption. You’ll get more of that critical calcium (for example), if you pair those oats with cream.

And a final consideration: most processed breakfast cereals – even granola, alas! – are downright dangerous. Not only are they rife with phytic acid, but they are processed at high heat and under high pressure. This destroys many of the valuable nutrients in grains, turns the fragile plant oils rancid, and changes the proteins enough to render them toxic.

The take-away lesson is that grains (and legumes) need to be soaked or sprouted to confer their benefits.

If you’re a baker, bake true sourdough breads or loaves made with sprouted grains. If you purchase your bread (raising my hand here), buy true sourdoughs (not just flavored with sourdough) and sprouted grain breads.

I go very light on the grains myself. But for all the grain lovers among us, I’ll share three basic recipes with the grains properly prepared. (Plus crisp nuts.)

The oatmeal in this photo has raisons in it, cooked on the stovetop with the oats, but not soaked overnight with the oats!
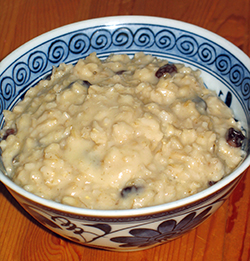
oatmealOatmeal

1 cup oats, rolled (not instant or quick-cooking)
1 cup filtered water, warmed (but not hot)
2 tablespoons whey or yogurt or lemon juice
1 more cup filtered water
1/2 teaspoon Celtic sea salt

Add the whey to the warm water and soak the oats in it overnight (at least 7 hours). Find a warm spot. A covered bowl on the kitchen counter is fine, if your house isn’t too chilly.

(Chlorine can interfere with lacto-fermentation, so don’t use straight water-plant tap water.)

In the morning, bring the additional cup of water to a boil. Add the salt. Add the soaked oats (along with any remaining liquid). Reduce the heat, cover, and simmer for 4 minutes. Remove from the heat and let sit (still covered) for 5 minutes.

Serve with cream or butter.

Other optional toppings include maple syrup, raw honey, apricot butter, or crisp nuts.

Rice

2 cups brown rice
4 cups filtered water, warmed
4 tablespoons whey or yogurt or lemon juice or vinegar
1 teaspoon Celtic sea salt
3 tablespoons butter

Rinse and drain the rice.

Add whey to the warm water and soak the rice in it overnight (at least 7 hours).

When soaking is complete, transfer mixture to a cooking pot and bring it to a boil on the stove top.

Skim off the foam that rises to the top.

Lower the heat, add the salt and butter, stir, and then cover tightly. Cook (without removing the lid) for 45 minutes over very low heat.

Serve.
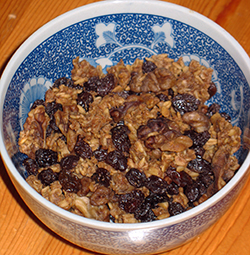
granolaGranola (a safe version)

This recipe is a bit involved. My kids adore it, but I don’t make it very often! In fact, it’s been more than a year for me. Which leads me to a note of warning. I’ve made lots of adjustments to the recipe since the first time, with lots of scribbly notes in the margins of my recipe binder. I hope I’ve deciphered them accurately! But if your rendition of this granola isn’t working, it’s probably me, not you. I hope to make granola this spring. (And if I discover I’ve erred, I’ll come back and correct myself.) So you might wait to try this until after my essay. Or – if you’re the adventurous sort – dive in and post any adjustments you make in the comments!

Update:I did make granola this spring (as promised to my kids). Twice! And the recipe as I posted it was pretty close to correct. But it needed a touch more spice. I increased the amount of cinnamon, nutmeg, and ground cloves in my second batch. Plus I made more. The first batch was devoured in 5 days flat. If you were waiting (as recommended above) for me to tweak my recipe, I’ve done so. The recipe below is the recipe. Go for it!

6 cups oats, rolled
6 cups filtered water, warmed
4 tablespoons whey or yogurt or lemon juice
3/8 cup butter (add 1 tablespoon butter, if you’re soaking the nuts with the oats)
3 tablespoons honey
3 tablespoons maple syrup (add 1 tablespoon syrup, if soaking nuts with oats)
3 teaspoons cinnamon
1-1/2 teaspoons nutmeg
1-1/2 teaspoons ground cloves
2 cups crisp nuts (no crisp nuts on hand? throw some in to soak with the oats)
2 cups raisins
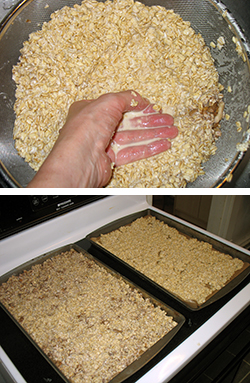
draining and spreading the granolaAdd whey to warm water and soak oats in it overnight (at least 7 hours). If you are out of crisp nuts, add raw nuts to the oats to soak along with them.

Next day, drain the liquid off the oats. Press the mass a little (if it’s really soggy) to wring extra moisture out of it.

Spread baking parchment on 2 baking sheets. Spoon the oats onto the sheets and spread them out evenly. Place baking sheets in the oven and turn it on to 200ºF (no need to preheat). Bake for 3 hours. Check the oats for moisture. If you added nuts to soak with the oats, the mixture will be dry at the edges of the baking sheet, but still moist at the center. If you soaked the oats solo, they’ll be dry all the way through, but not crisp.

Near the end of this first baking, melt the butter, honey, and maple syrup. Stir in cinnamon, nutmeg, and cloves. Set aside, off the heat.
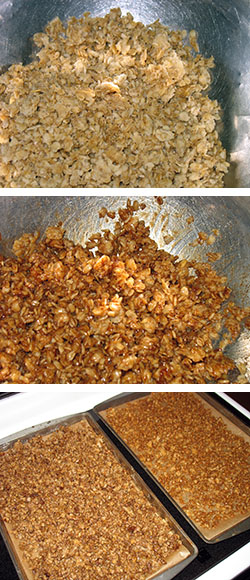
granola in the makingRemove the oats from the oven. Put the oats in a large bowl and break up the large clumps using 2 butter knives. Then get a handful between your palms and rub your hands together. This works really well to break the clumps even further. Keep going until the texture of the oats is fairly fine. Then pour the butter mixture over the oats, and blend thoroughly.

Put fresh sheets of baking parchment on the baking sheets. (The used parchment will be soggy.) Spoon the oat mixture onto the baking sheets and spread evenly. Place back in the 200ºF oven. Stir the oats and re-spread them every hour. Bake for 4 hours.

Remove oats from oven and allow to cool. Break up any clumps with your hands. Mix the now-crisp oats with raisons and crisp nuts (if you didn’t add raw nuts at the soaking step). Store in an air-tight canister.

Serve however you prefer granola: with milk, with cream, with yogurt, with fruit, etc. It will be a little more crisp than conventional store-bought granola.

Crisp Walnuts

Use these as a topping on oatmeal, in the granola recipe above, or as a snack. Just like grains and legumes, nuts should be soaked to neutralize the many enzyme inhibitors in them.

4 cups walnut pieces, raw
2 teaspoons Celtic sea salt
filtered water to cover nuts

Mix the salt with the filtered water and soak the nuts in it overnight (at least 7 hours).

Next day, drain the nuts in a colander.

Put baking parchment on a baking sheet. Spread the nuts evenly on it. Place in oven, turn on to 150ºF and “bake” for 12-24 hours, until completely dry and crisp. Stir the nuts with a spoon and re-spread them occasionally. (If you have a food dehydrator, use that!)

Store the nuts in an air-tight container.

Walnuts, alone of all the nuts, must be stored in the refrigerator. Their unique composition of oils will go rancid at room temperature. The other nuts may be safely stored at room temperature.

This recipe may be used for pecans, almonds, or macadamias. Do not use it for cashews. Cashews are not raw when they come to us. They contain a toxic oil that must be released and removed by two separate heatings before humans can eat them safely. This means that they’ll get slimy and nasty if soaked too long or dried too slowly. Soak them at most 6 hours. Dry them in a 200ºF oven.

Nourishing Traditions at Amazon

Nourishing Traditions at B&N

For more Nourishing Traditions posts, see:
Yogurt & Kefir & Koumiss, Oh My!
Amazing Lactobacilli
Beet Kvass

Some posts challenging politically correct nutrition:
Butter and Cream and Coconut, Oh My!
Test first, then conclude!
Thinner and Healthier

And some more recipes:
Coconut Chocolates
Coconut Salmon
Baked Carrots

Do you have any old-time grain recipes that include the soaking or sprouting of grains?
Do please share!
 

Share

Yogurt & Kefir & Koumiss, Oh My!

My nutritional education began under the aegis of my mother. Judged against the backdrop of the sixties, she was a pioneer, actively pursuing the benefits of serving whole grain breads, breastfeeding her babies, eating multiple servings of raw vegetables, and curtailing sugar intake. Compared to Wonder® bread, bottle feeding, miniscule portions of frozen corn-carrots-peas mix, and dessert every night after dinner, her choices represented a miracle of enlightenment. (Yay, Mom! Thank you!)

But she was also influenced by her time. Who isn′t? She gave up butter for margarine. (Transfats, anyone?) She remained unaware of the dangers of improperly prepared grains (those unfermented or unsprouted). She drifted toward a high-carb, low-fat diet. (As an adult, I did, too.)

So my own nutritional knowledge had a better foundation than that of my contemporaries, but it also featured serious deficits.

My first inkling that I′d gone astray arrived gradually and confusingly as health issues. It seemed there were more and more foods I could not eat without feeling really ill in the hours after my meal. Doctors had no real answers, other than telling me to keep a food diary. I did this, and the list of DO-NOT-EAT grew and grew. It was discouraging and inconvenient. I felt ill too often. And when my friends invited me over for dinner, they faced a Herculean task, if they wanted me to actually eat the foods they′d prepared.

Then I met a local dairywoman with a small family farm. She clued me into the fact that conventional dairy cows receive a soy-based feed. The soy proteins come through in their milk. Maybe it wasn′t cow milk that made me sick after all! Maybe it was the soy proteins.

Kathryn also knew that soy is added as filler to many foods, and not only the obvious candidates such as canned soup. It′s in canned tunafish. It′s in pizza (the tomato sauce and the cheese). It′s in conventional roast chicken, injected under the skin to add moisture to the breast meat. If you have trouble digesting soy . . . watch out! It′s a soy world out there.

I grew vigilant in detecting (and avoiding) soy. My health problems cleared up. Wow! I was thrilled.

But Kathryn had more to teach me. She recommended the book Pasture Perfect (which I shared with you a few weeks ago, here). That was the start of the real revolution in my thinking. Obviously there were a lot of things my mother never told me. And, like most of us, I′d been listening to the media and the mainstream medical establishment about what was healthy to eat and what was not. (Doctors are not taught nutrition, by the way. They′re reading the same newspapers and magazines as their patients!)

images depicting traditional peoples from around the worldThe next book featured in my continuing education was a doozie: Nourishing Traditions by Sally Fallon and Mary G. Enig. Kathryn followed its precepts, but never recommended it to me. I suspect she thought it would be too challenging for my PC thinking! She didn′t know me well enough to realize that the sheer novelty of the concepts (novel to me, millenia-old to humankind) would ignite my curiosity.

The tale of how I discovered that Nourishing Traditions held an honored place on Kathryn′s shelves is convoluted enough (and rather beside the point) that I won′t spend the paragraphs to recount it. Suffice it to say, I did discover the book, checked it out from the library, and was blown away by its contents. It′s a cookbook with hundreds of recipes, but it′s also a nutritional manual, packed with the wisdom accumulated by traditional peoples over the ages. Their food ways kept them healthy and strong, generation after generation, before doctors and medical science achieved modern power.

Nourishing Traditions is so dense with amazing information, my customary sharing of ″3 cool things″ not only can′t do it justice, but risks serious misrepresentation. I′ll be sharing 3 cool things from the first chapter today. (With more chapters following at intervals across the next half year.)

The Ancient Art of Culturing Milk

photo of fresh milk, homemade whey, homemade yogurtDrinking unfermented milk from dairy animals is a new and modern development. Without pasteurization and refrigeration, milk sours and separates quickly. Before the age of industry, traditional people harnessed this property for their advantage. During the process of lacto-fermentation, friendly bacteria that produce lactic acid (think yogurt) break down both milk sugar (lactose) and milk protein (casein). Over time, they produce enough lactic acid to inactivate all putrefying bacteria. The milk reaches a state in which it is safely preserved for days or even weeks. (Longer for cheeses.)

Different cultures had different methods and produced different end products. Europeans once consumed clabber and curds and whey, as well as the more familiar yogurt and cheese. In Russia, one found kefir and koumiss. In Scandinavia, there were longfil and kjaeldermelk. In the Middle East: laban. India: dahi. France: crème fraîche (still popular). Germany: cultured butter. All over the globe, shaped by their unique climate, terrain, and history, traditional people cultured milk. It′s a practice worth reviving more fully today.

Fight Osteoporosis and Lactose Intolerance

The fermenting of milk creates many benefits. Casein, the milk protein, is one of the most difficult to digest. Breaking it down via fermentation renders it digestible. Culturing also restores or multiplies the helpful enzymes in milk. One of them, lactase, aids the digestion of lactose (milk sugar). Other enzymes help the body absorb calcium and other minerals. Plus vitamins B and C both increase during fermentation. A ″witch′s brew″ of fermented milk is significantly more nutritious than the basic, conventional white stuff!

Viruses & Germs, Take That!

Most of us know that eating yogurt after a round of antibiotics restores the proper functioning of the gut. What I didn′t understand was that the benefits of healthy gut fauna are both more essential and more comprehensive than bouncing back from a sinus infection.

Friendly lacto-bacilli and the lactic acid they produce are just as much a part of moving nutrients from our food into our bodies′ cells as the actual structures and organs of digestion: mouth, stomach, pancreas, etc. Could we assimilate our food well without our intestines? Well, the friendly bacteria are just as necessary. In addition, these friendly bacteria keep unfriendly intruders at bay. There′s a reason traditional peoples fed fermented milk to the sick, the aged, and to nursing mothers. These vulnerable individuals needed all the bolstering they could get.

Strong bones, fewer stomach aches, more complete transfer of nutrients, less illness. What′s not to like?!

* * *

The chapter on cultured dairy products continues with recipes for piima, buttermilk, crème fraîche, kefir, and other tasty comestibles along with the foundational whey needed by the cook to make many of the dishes featured in later chapters. Margin notes provide vignettes into the kitchens of traditional peoples and the wonders they worked there. It′s an intriguing read, but it also turned many of my own mistaken notions upside down.

Education, entertainment, and health-saving practice all in one package. I couldn′t resist, and I′m glad I didn′t.

Nourishing Traditions at Amazon

Nourishing Traditions at B&N

For more Nourishing Traditions posts, see:
Amazing Lactobacilli
Handle with Care
Beet Kvass

For more on books important to continuing nutritional education, see:
Thinner and Healthier
Test first, then conclude!
Butter and Cream and Coconut, Oh My!
Why Seed Oils Are Dangerous


Share