Osteoporosis, Be Gone!

Osteoporosis_LocationsFive years ago, I was diagnosed with osteopenia. The literal translation is “bone deficiency,” and the diagnosis meant that my bones had lost mineral density, making them weaker and more prone to breakage than optimally mineralized bones.

This was not a good development, but few doctors prescribe medicines to prevent further bone loss at this stage of things. Instead, they instruct the patient to get plenty of weight-bearing exercise and to be tested again in 2 to 5 years. The hope is that the osteopenia will not worsen to become osteoporosis.

When my bone density was assessed a year ago, that hope was not realized. My bones had lost more density, arriving at the threshold (just barely) that marks true osteoporosis, literally “porous bones.” My doctor prescribed Fosamax, instructing me that I would need to remain vertical for 2 hours after I ingested the medicine in order to prevent heartburn.

I filled the prescription and only then realized I had a problem. I was dealing with a chronic pain issue that kept me lying down the majority of the time. I was going to find it tough to find 2 hours when I would be upright continuously.

In fact, I never did find them. I beat my chronic pain last December, only temporarily, alas. It crept back during my battle with my retinal tear. Not nearly as severely as before. I am able to be active now. I swim 400 meters three times a week. I could take the Fosmax. But the thing is that I want to build bone density, not merely slow further bone loss. The Fosamax won’t do that. But there is one thing that will:

Weight-bearing exercise.

But not mild weight-bearing exercise. I needed strenuous weight-bearing exercise. And preferably exercise that utilizes the whole body, rather than working muscles in isolation. Which meant I needed bodyweight training.

Bodyweight training would improve my coordination and balance by engaging groups of large muscles all at once, together with small stabilizing muscles. Plus it would work my heart muscle, because engaging many muscles requires much more aerobic support than engaging just a few.

I liked the idea that if I were to trip and fall, not only would my bones be stronger and less likely to break, but also that my muscles would be stronger and more capabale of catching me before I hit the ground, and my coordination would be better, giving me a chance to prevent the fall altogether.
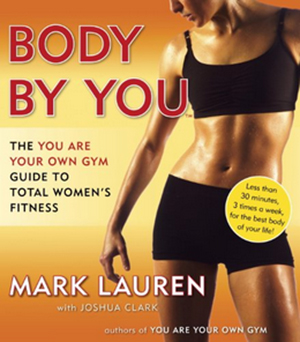
Body by YouSo I went looking for guidance in books. Quite a few praise bodyweight training, but give only the most cursory descriptions of how to do specific exercises. I wanted detailed instructions. I found what I was looking for – and more – in Body by You by Mark Lauren. Lauren is an expert, who has trained thousands to good effect. His book provides the detailed instructions I sought, as well as step-by-step progressions for moving from the beginner versions to more challenging exercises and on to the most challenging of all.

I’ve just started, a mere 19 days ago, and I’m very de-conditioned from all the medical issues that have derailed me over the past few years. So I’m starting with the absolute easiest beginner exercises. But I can already feel a difference, so I’m hopeful that I will improve steadily, if slowly.

Lauren categorizes his exercises into five different types: pulling, in-line pushing (parallel to your spine), perpendicular pushing (perpendicular to your spine), squatting, and bending.

The easiest pulling exercise in the book is called a “let me in.” It works the muscles of the back (lats, spinal erectors, rhomboids), arms and shoulders (biceps, forearms, rear deltoids), and the core. Laren demonstrates the “let me in” in the video below using a door, but I would recommend against a door as your prop. Most doors are not made for this kind of abuse. Over time, you’ll destroy your door and be hurt when it fails altogether.

I use one of the metal support pillars in my basement, sunk into concrete at its base and bolted into a major floor joist at its top.

My husband cautions that not all such support pillars are fastened at their tops, and he has seen them slip. If you try this, check your support pillar to be sure it is secured, not just held in place by the weight of the house.

The easiest in-line pushing exercise is the military press with hands elevated to hip height. It targets your shoulders, triceps, and core. I use the chest freezer in my basement. It’s currently full of frozen meat and really heavy. It’s not going anywhere, even when I lean hard on it. 😀

The easiest perpendicular pushing exercise is the classic wall push-up. It works the chest, triceps, shoulders, and the core, especially the abdominals. The key for me is to find a stretch of wall clear of bookshelves and wide enough that my elbows don’t bump into anything. 😀

Lauren structures his workout so that you alternate between in-line pushing and perpendicular pushing. So, today being a Friday, I’ll shortly be doing “pull me ins,” wall push-ups, “good morning” bends, and squats. But on Monday, I’ll do “pull me ins,” military presses, “good morning” bends, and squats.

Bending exercises work the legs, glutes, back, core, and – depending on the specific exercise – the shoulder and triceps too. The easiest bending exercise is called the “good morning.” It is almost too easy for me, so I suspect I’ll be moving up to the version with the hands held straight overhead soon.

Squats exercise the glutes, quads, hamstrings, lower back, core, and calves. The very easiest squat is the “therapy sumo squat,” done with the toes and knees turned outward at a 45º angle. That doesn’t work for me, because it trashes my hip joints. So I am doing a basic squat with my toes and knees facing forward. I’ve not yet advanced to the hands overhead version shown below!

I’m pleased with how the bodyweight training feels so far. I’m making progress, and I haven’t yet injured myself! Always a concern. 😀

As I advance – crossing my fingers that I will – I’ll look for videos of the modified exercises to share with you.

Time to go exercise now! (I spent most of today writing the current scene of Tally and composing this blog post!)


Share

The Secret Behind Midnight Snacks

It’s a classic, isn’t it?

You’re reading a fantastic book, and you keep saying to yourself, “Just one more page!” Or your best friend forever is visiting from out of town, and you talk late into the night, heart to heart.

Big Ben Clock FaceSuddenly you realize that it’s midnight and you’re starving.

I never gave the classic midnight snack much thought. I’d heard health experts recommend against it for various reasons: it didn’t give your gut a chance to rest; calories ingested at night got converted to body fat more readily; etc.

I’d also read that the food-to-body-fat superhighway was nonsense: it didn’t matter when you ate, rather that how much you ate overall was the key.

But I never paid more than cursory attention to all the discussion.

When I was younger, I happened to be one of those lucky people who maintain an ideal weight without much attention or effort.

Now that I’m older, my metabolism has slowed – as most people’s do – and I pack on extra pounds much more easily. So the pros and cons of midnight snacking hold more interest for me than heretofore.

But I’ve also learned that the simplistic calories-in-calories-out model (calories expended must match or exceed calories ingested) still touted by much of the medical establishment grossly ignores the action of the hormone insulin on the body.

My blog posts Thinner and Healthier and Test first, then conclude! go into this more extensively, if you’re interested. But the bottom line is that most people become much more sensitive to the effects of insulin in the bloodstream as they get older. The hormone packs fat into the fat cells and, once we’re over 50, makes it more and more difficult for any of that fat to be removed and used for fuel. While starving yourself on super-low-calorie diets merely deprives your body of needed nutrients and lowers your metabolism further. Catch-22!

But I digress! 😀

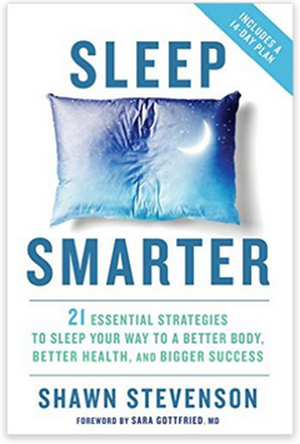
Sleep SmarterThe reason I bring this up is because of something I learned in Sleep Smarter by Shawn Stevenson.

When you are sleep deprived, the amount of glucose reaching your brain dips.

Brains run on glucose. They must have it. However, there’s no need to eat sugar to fuel your brain. In fact, don’t do it! Your liver can make all the glucose your brain requires, without you ever ingesting any sugar at all.

In a sleep researcher’s lab, where the amount of sleep deprivation induced for the purpose of study is extreme (24 hours), glucose reaching the brain dips by 6%. But suppose you regularly get by on only 6 or 7 hours of sleep. No doubt your glucose dips much less, but it still dips.

Even worse, the reduction of glucose to the brain is not distributed equally. When the reduction is 6% overall, the parietal lobe and the prefrontal cortex lose from 12% to 14% of the glucose they should receive.

Why is that important?

The parietal lobe and the prefrontal cortex are the areas of the brain we use for thinking, for discerning the differences between potential actions, for social interactions, and for knowing right from wrong.

When the parietal lobe and prefrontal are short of their necessary fuel, our decision making suffers.

That’s why you might do something really unwise late at night and then wonder in the morning: “What was I thinking?” In fact, you weren’t thinking, or not very well.

On top of this, your brain late at night – desperately seeking glucose, due to the growing dearth of this necessary fuel as the hour latens – knows perfectly well that a shot of glucose is conveniently at hand in a bag of potato chips or a bowl of Cheerios® or a few scoops of ice cream.

That’s why those foods prove so irresistible at midnight!

I took away several things from all of this.

1 • If I’m asleep before the glucose dip arrives, it will never even happen. Asleep, my body will be in the repair mode that occurs most intensely between 10 PM and 2 AM. (That’s another fact I learned from Sleep Smarter.)

My brain chemistry will be exactly as it is supposed to be, initiating repairs, instead of losing glucose and frantically seeking a resupply by prompting cravings.

(Unless I am chronically sleep deprived; in which case, the glucose dip occurs even in sleep and can actually wake me up!)

2 • It’s not that eating late at night is a problem in itself. It’s that such snacks are usually extra and often composed of sugar or simple carbohydrates. I’ve already ingested all the food I truly need at breakfast, lunch, and dinner.

Whereas, if I fall asleep somewhere between 10 PM and 11 PM, I’ll never even get hungry at midnight, let alone go seeking extra food.

3 • If I do happen to stay up too late – which will happen at times, because I’m a night owl – I have the perfect hack. I’ve tested it, and it usually works, although not infallibly. The brain in search of fuel is pretty fierce!

Curse of Chalion 300 pxHere’s the scenario: I get to re-reading The Curse of Chalion by Lois McMaster Bujold, one of my absolute favorites, and – whups! it’s midnight!

I realize I’m feeling really hungry, hungry enough that it will keep me awake, even though my eyelids are falling closed with my fatigue.

In the past, I’ve poured a big glass of local, farm-fresh milk and stirred a little stevia and cocoa powder into it.

The problem with that is that I’m getting an awful lot of carbs in the lactose (milk sugar) contained in that milk. On top of that, the sweetness of the stevia will trigger a larger insulin release into my bloodstream than would the lactose alone. And, on top of that, the big glass holds twice the amount of milk that I would normally drink in one go. So I’m getting a huge lactose hit with little else to cushion it.

While I was fighting my sleep schedule in the aftermath of my retinal detachment – before I read Sleep Smarter – I drank that huge glass of milk nearly nightly. And I gained 10 pounds. Not good!

(Chronic sleep deprivation all by itself causes weight gain, without any big glasses of milk, so some of my gain of ten pounds was no doubt due to several months of sleep loss.)

These days I’m usually asleep by 11 PM. Plus I’m finally visiting the gym swimming pool again after a long layoff. So I’m hoping to take those 10 pounds off! (Fingers crossed.)

But on those nights like last night, when I was absorbed in The Curse of Chalion and got hungry, this is what I do:

FIRST, I remind myself that my sensation of hunger, while powerful, is due to the dip in glucose to my brain. This actually does help, although it is not enough without my next step.

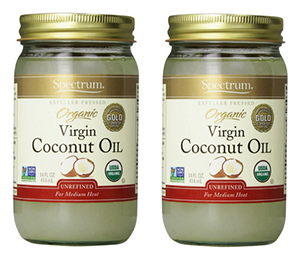
SECOND, I eat 2 tablespoons of coconut oil.

coconut oilCoconut oil is made up of largely medium-chain fatty acids that are not normally stored in the body’s fat cells at all. Instead they are quickly converted to energy. Additionally, coconut oil acts as a slight appetite suppressant for many people. It certainly does for me.

Anyway, it’s a much better option than the huge glass of milk. That 2 tablespoons of coconut oil diminishes my craving for food at midnight just enough that I can get to sleep. And it gives me a slight energy boost – not a frenetic boost like caffeine, but a calm can-do feeling – just enough oomph for me to go brush my teeth, spray some magnesium oil on my legs, and turn out the light.

CAUTION: If you decide to try my coconut oil hack and see if it works for you, be a little careful. The short- and medium-chain fatty acids in coconut oil don’t require bile for digestion. But coconut oil also contains some long-chain fatty acida, and those do require bile for digestion.

If you’ve been eating a low-fat diet for a while, which many people do these days, your body hasn’t needed much bile for a while and has adjusted by not making much. It won’t suddenly produce more when you abruptly dump 2 tablespoons of coconut oil in! Which means you’ll feel nauseated and maybe even experience diarrhea.

So start with a quarter of a teaspoon and work up slowly to give your pancreas and gallbladder a chance to ramp up.

(I’ve blogged about the benefits of coconut oil in Butter and Coconut and Cream, Oh My!, if you’d like to know more.)

The bottom line? It’s really best to be asleep long before midnight!

But I found the why of the midnight munchies to be fascinating, so – of course! – I had to share it with you. 😀

To read the blog posts I mentioned in passing, see:
How I Rehabilitated My Sleep
Thinner and Healthier
Test first, then conclude!
Butter and Coconut and Cream, Oh My!


Share

Drawing for Fun and Relaxation

When my kids were little, I introduced them first to fingerpainting and then to watercolors. The fingerpainting stage was messy. I would cover their toddler table with a large plastic leaf bag and robe them in smocks and stand vigilant to steady the water bowl they used to rinse their hands when they wanted to switch colors.

Watercolor by J.M. Ney-Grimm

But when they were old enough for watercolors, the level of supervision could be considerably less. So I joined them in the fun. I’d cover the entire dining room table with leaf bags, set out three sets of paints and three cups of water for rinsing brushes, and sit down with them. We had some lovely times painting together. And I found that I enjoyed the painting almost as much as I enjoyed the time with my children.

I remembered that I’d loved drawing since I was a kid myself, and wondered if it might be good to reactivate this interest. I read a few chapters of Drawing on the Right Side of the Brain, but it seemed overly ambitious for me at that moment. So I poked around online and stumbled upon the Zentangle® website.

I loved what I saw there, but the starter kit was $50, a little steep for something I just wanted to experiment with. So I bookmarked it for later and went on with my life, breaking out the watercolors every now and then, even after my kids were no longer interested.

To be honest, I forgot all about Zentangles until this June, when I decided I needed a quiet activity for the evenings that didn’t involve a computer screen or a TV screen. I tried an adult coloring book, but that didn’t quite work for me. And then I remembered…something.

“Wasn’t there some kind of pen-and-ink drawing?” I said to myself. “It looked really cool. I remember I wanted to try it, but it was awfully expensive. What was the name of it?”

As you can see, my memory was very sketchy. All I had was the picture in my mind of that cool black-and-white drawing.

Luckily, I had bookmarked the site with the info. Even more luckily, I found the bookmark when I went scrolling through the hundreds of bookmarks that I’ve created. (I bookmark a lot of pages when I’m researching for my novels.)

I clicked the bookmark, it directed me to the correct site, and I said, “Oh, yeah! That’s it!” when I saw it. But I still couldn’t go for the $50 price tag.

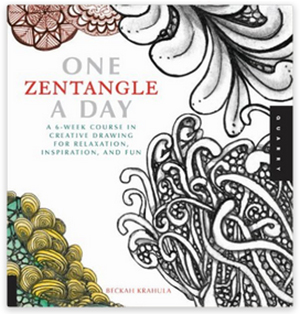
One Zentangle a Day“I wonder if there’s a book about this on Amazon?”

You can guess the answer. There was. It was reasonably priced. And it looked like it would have just the how-to information I wanted. I purchased One Zentangle a Day and leaped on it when it arrived.

The book is not perfect. The author includes a fair bit of verbiage on shading and use of color which is not a part of the Zentangle method, although it can be used with Zentangle-inspired art. Unfortunately, this extraneous material is not particularly well explained. However, I didn’t get the book for instruction in shading or using color.

Zentangling is essentially an exploration of pattern and how different patterns can be fitted together. It’s a new name for a very old pastime.

The book presents three new patterns at a time, showing how to draw each one step by step. With each set of patterns is an example of a drawing that features them (usually mixed with a few more). You, the reader, are instructed to practice the patterns first and then to draw your own Zentangle using the new patterns, together with a few of the other patterns you’ve already learned.

So I’ve been doing just that, and it’s been a lot of fun. It has proven an excellent evening activity when I’m not in the mood to read or when I’m too tired to do anything else.

Here are some of my practice squares of patterns I learned during the first 4 days I used the book.

Zentangle patterns, day 4, 600 px

The first couple of weeks, when I drew my own Zentangle, I always used the new patterns plus a few of the older ones when the design seemed to call for them. Lately, my designs seem to demand that I use only two of the new patterns instead of all three. Since I’m doing this for fun, I go with my inspiration. It means that I’m getting “behind,” in that I’m collecting patterns I have yet to use, but who cares! I’m not in any hurry to reach the end of the book.

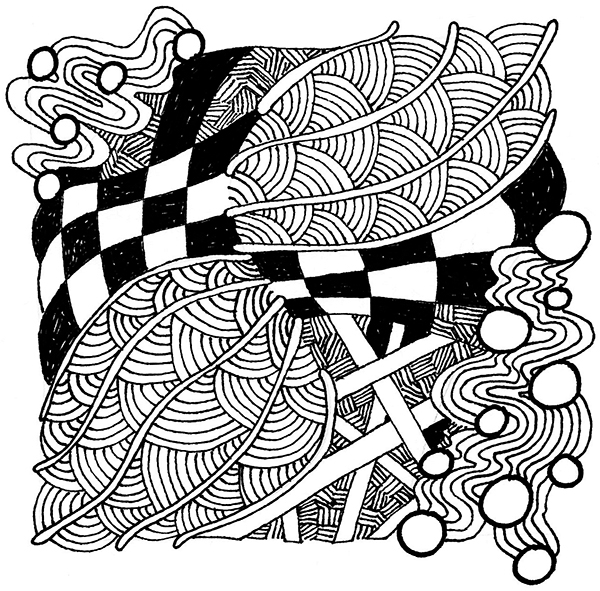
Here’s the Zentangle I drew using the patterns shown above.

Zentangle, day 4, 600 px

What do you think? Does it look like fun to you? What do you do when you need something quiet, but engrossing?


Share

How I Rehabilitated My Sleep

My torn retina in January devastated my sleep. When the ophthalmologist completed his repair of the tear, he injected a gas bubble into my eye and informed me that I would need keep my head upright, but with a slight tilt (which tilt he demonstrated by moving my head into the correct position), 24/7 for the next 10 days.

digital clock

As it turned out, that first 10-day interval was just for starters. I had several check-ups during the 10 days – with favorable reports on my eye’s progress – and then was told I must keep that head angle for another 2 or 3 weeks. All told, I think I kept that head angle for nearly 2 months.

Which meant I had to sleep sitting up!

Which meant I mostly dozed, and only for about 5 hours per night, when I was exhausted enough to do so.

By the time I was cleared to lie down again, both of my hip joints ached, most of the rest of my body was sore, I was seriously sleep deprived, and I was accustomed to starting my doze somewhere between 2 AM and 4 AM.

With permission to lie down, I thought, “Now I can sleep!”

I could not have been more mistaken. I hadn’t realized how much I tended to lie on my back while I slept, and I didn’t have permission for that position until the gas bubble was entirely dissipated. Lying on my back would cause the bubble to float up to my cornea and abrade it. Not good! So no lying on my back!

Lying on my side at night, the ache in my hip joints grew worse. I’d stay on the right side until I could not bear it. Then I’d flip to my left side. The relief to my right hip was wonderful…until roughly 40 minutes passed, and then the ache in my left hip was equally bad.

I did sleep. Some.

But when I was finally clear to sleep however I wanted, including on my back, normal sleep was so far in my past that I couldn’t remember how to do it.

I made efforts to return to a reasonable sleeping schedule with little success.

Sleep SmarterWhich meant that when I spotted an advertisement on June 2 for a book titled Sleep Smarter, I was ripe for checking it out. It sounded good, with information based solidly on sleep research and pleased readers who had tried its methods.

I purchased the book and read it. I liked what I was learning. I’d thought I knew a lot about sleep, but in fact there was more I didn’t know than I did. The author’s tone is clearly geared toward a pop audience, and I’m not convinced that every last one of his recommendations is backed by solid research. But he referred to many studies that I do have some familiarity with and that are valid. In any case, I figured that the proof would be in the pudding. All of his action-steps were easily implemented and inexpensive. I’d try them and see how they worked.

Here’s a list of many (but not all) of his suggestions:

• exercise for 10 minutes first thing in the morning
• get 10 minutes of sunlight first thing in the morning
• turn off all screens 60 – 90 minutes before you want to be asleep
   (to limit blue light, which depresses melatonin production)
• during that hour, do something pleasurable and low key
   (read, listen to relaxing music or an audiobook, converse, meditate,    journal, take a bath)
• rub topical magnesium onto your legs
   (many westerners are magnesium deficient, and the mineral is
   necessary in many processes, including relaxing tense muscles,    reducing pain, and calming the nervous systems)
• drink no caffeine after noon
• get 30 minutes of sunlight during the day
• remove electronics from the bedroom
• keep the thermostat between 62°F and 68°F at bedtime
• use blackout curtains in the bedroom
• place a spider plant or a snakeroot plant in the bedroom
   (to clean the air)
• meditate for 5 – 10 minutes first thing in the morning
• move bedtime and wake time by only 15 minutes at a time,
   when you need to move them
• use low-blue light bulbs in the bedroom
• get glasses that block blue light for use when you choose to look at
   your computer, your phone, or the television late at night
• download apps that block blue light for your phone and computer
• wear loose clothes to sleep in
• do self-massage as part of your bedtime ritual

Not all of these recs appealed to me. Some were irrelevant: I don’t drink either coffee or tea or soda. My husband’s allergies meant that having a plant indoors was unwise. I didn’t feel ready to invest in blackout curtains right off the bat. But getting some sunlight immediately upon waking sounded excellent, as did turning off my computer by 9 pm.

Sleep Smarter included a plan for implementing the various strategies over the course of 2 weeks, but some of the easiest tips weren’t added until the second week. And some were those that weren’t going to work for me.

I decided to take what I’d learned and put it together with what I know of myself (I’m a night owl, not a lark, for example) and create a customized morning routine. One thing that was clear to me was that I’d always approached changing my sleep schedule with a focus on my evening routine. That’s important, of course, but it was never going to do what I wanted, if it was unsupported by an effective morning routine. In fact, for me, the morning routine needed to be the main focus. The evening would fall into place, if I got the morning right.

This is the morning routine that I developed:

• immediately upon waking, do 20 minutes of core exercises
   that prevent pain in my back
• the instant I am done with those exercises, go sit outside
   for 30 minutes on either my front porch or my back deck
   (bring my journal, if desired – which it generally is)
• walk barefoot on the lawn for 5 – 10 minutes
• come in and cook breakfast

maple trees from the back deckEven though my sleep schedule was a mess when I decided to try this, I’d been waking at 7:30 am. But I’d been so tired that I always went back to sleep. So my first morning, I went outside, instead of diving under my pillow.

And it was glorious! The air was cool and fresh. The sun through the tree leaves was beautiful, as were the fluting calls of the birds. When I walked on the grass, the earth under my bare feet just felt good. And I didn’t feel sleepy at all by the time 30 minutes had passed.

That was already a success, as far as I was concerned.

This is the evening routine I developed:

• turn off all screens at 9 pm
• spend the time reading or journaling or drawing
   or chatting with my husband
• at 10 PM, wash my face, smooth a coconut-based lotion on my face,
   and spray a magnesium oil on my legs
• turn out the light the instant I feel sleepy

It was a little hard finding quiet things to do after I turned off my computer. I tried coloring an adult coloring book that featured butterflies, but that didn’t hold my interest sufficiently. So I purchased a book that explained a pattern-drawing method called Zentangle® and discovered that drawing designs in this way is a perfect evening activity. Between reading, journaling, drawing, and conversing, I have enough possibilities.

So how did it work?

It worked wonderfully well for me! The first night I was sleepy by 1 AM, so that’s when I turned off the light and fell easily and swiftly asleep. An incredible improvement over my then-typical 4 AM! By the end of my first week, I was sleepy by 11 PM. I occasionally have nights when I’m sleepy soon after 10 PM, but I am a night owl. I suspect 10 PM would be my ideal bedtime, but I am happy with 11 PM. And I am thoroughly delighted with how pleasant I find the morning routine and how quickly it returned my sleep schedule to something that meshes well with the rest of the world around me.

Total success, as far as I am concerned! 😀

ETA: Keep in mind that none of the above is intended to address an actual sleeping disorder. If you’ve just gotten off track – as night owls like me do from time to time – then ordinary sleep hygiene, applied intelligently, can make a huge difference quite rapidly. But for certain types of sleeping disorders, some of the listed strategies could actually make things worse. So get help from an expert in sleep medicine, if you think you may have a sleeping disorder.


Share